The Apex Data Relationship in Docs Made Easy allows users to programmatically collect, process, and structure data before it is injected into a DocsMadeEasy Template. This enables advanced data handling scenarios that go beyond standard SOQL-based relationships, ensuring that dynamic, computed, or conditional datasets can be used seamlessly during document generation.
How to Use Apex Data Relationships?
Creating an Apex Data Class
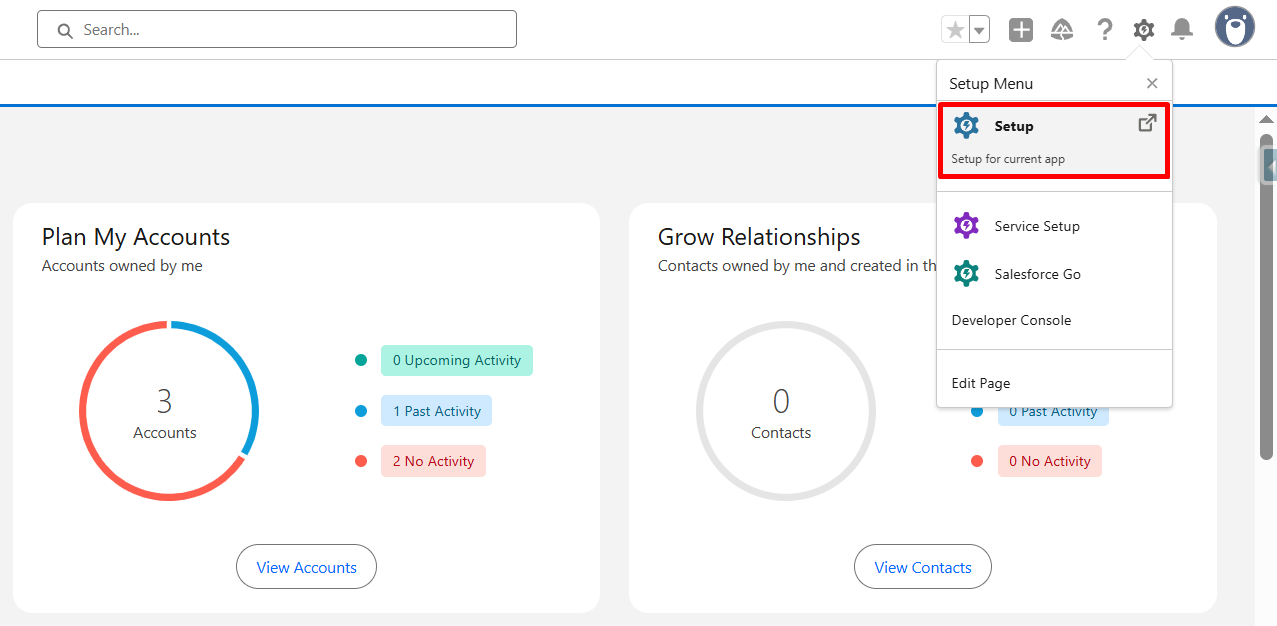
Step 1. Navigate to Setup.
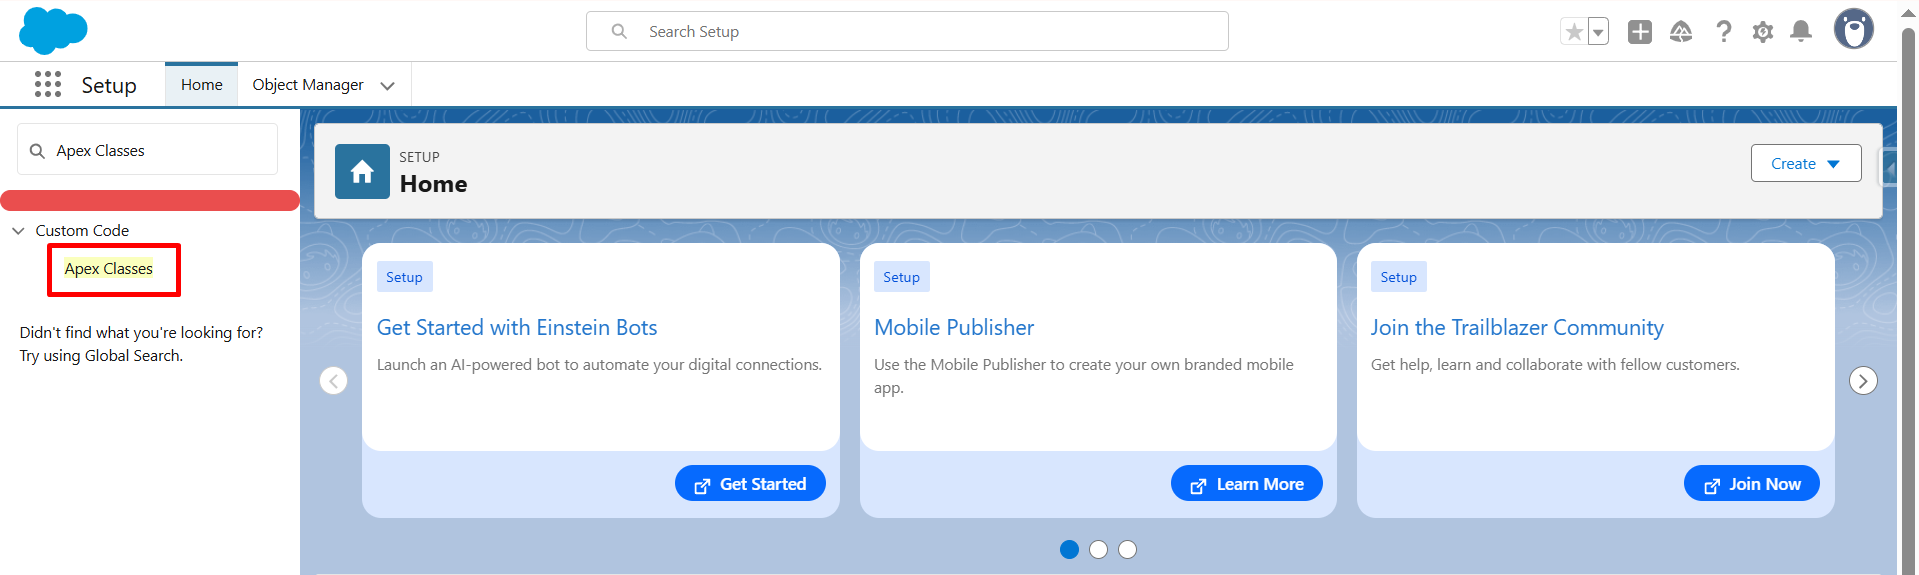
Step 2. Search for Apex Classes in the Search Box and Click.
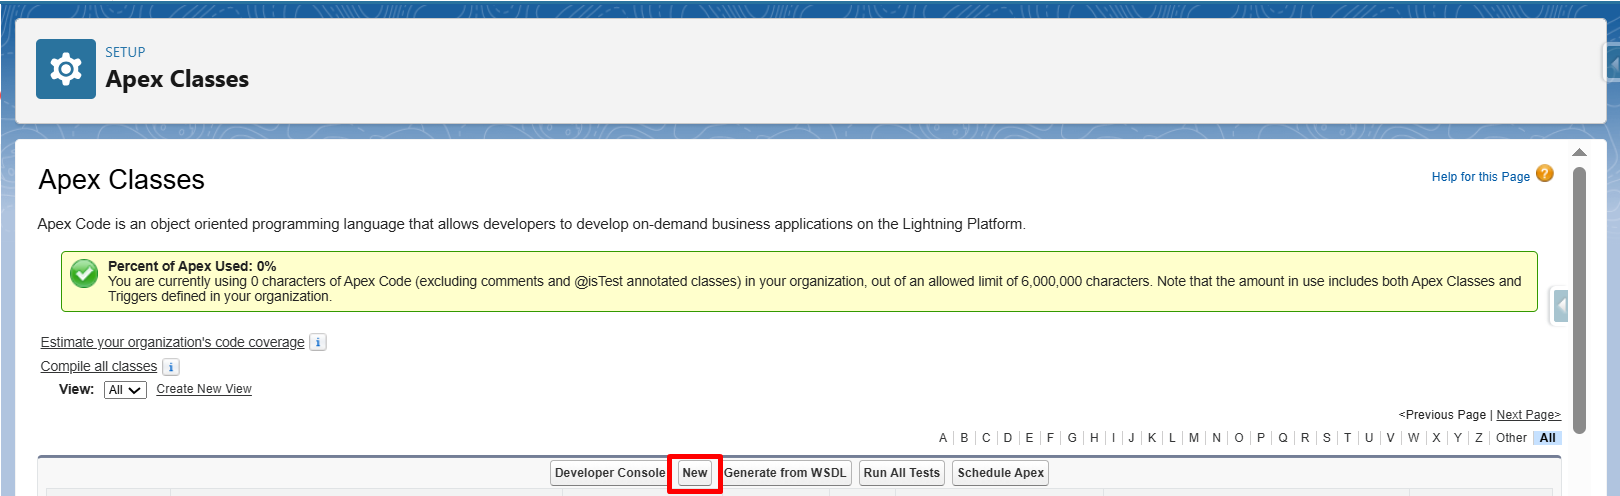
Step 3. Click on New Button to create a new Apex Class.
Provide a meaningful name and write your logic to fetch and process the required data and Save the Class.
Write your logic to fetch and process the required data.
Example:
global class SampleDmeApex implements hic_docmerge.IDmeApexDataSourceProvider {


    /*
     * Primary method used by Docs Made Easy.
     * Fetch and return your datasets using a Map<String, Object>.
     */
    global Map<String, Object> getData(String recordId, Map<String, Object> params) {

        Map<String, Object> data = new Map<String, Object>();

        // Fetch Accounts
        List<Account> accounts = [
            SELECT Id, Name, Industry
            FROM Account
            LIMIT 10
        ];

        // Fetch Contacts
        List<Contact> contacts = [
            SELECT Id, FirstName, LastName, Email, Phone
            FROM Contact
            LIMIT 10
        ];

        // Fetch Opportunities
        List<Opportunity> opportunities = [
            SELECT Id, Name, StageName, Amount, CloseDate
            FROM Opportunity
            LIMIT 10
        ];

        // Add datasets to the response map
        data.put('Accounts', accounts);
        data.put('Contacts', contacts);
        data.put('Opportunities', opportunities);

        return data;
    }
   /*
    * Reserved for future use by Docs Made Easy.
    */
    global List<Map<Object, Object>> getData(String recordId) {
        return new List<Map<Object, Object>>();
    }

}
The class should return the required datasets using a Map<String, Object>, allowing Docs Made Easy to merge the data into the generated document.
After completing the implementation, save the Apex class.
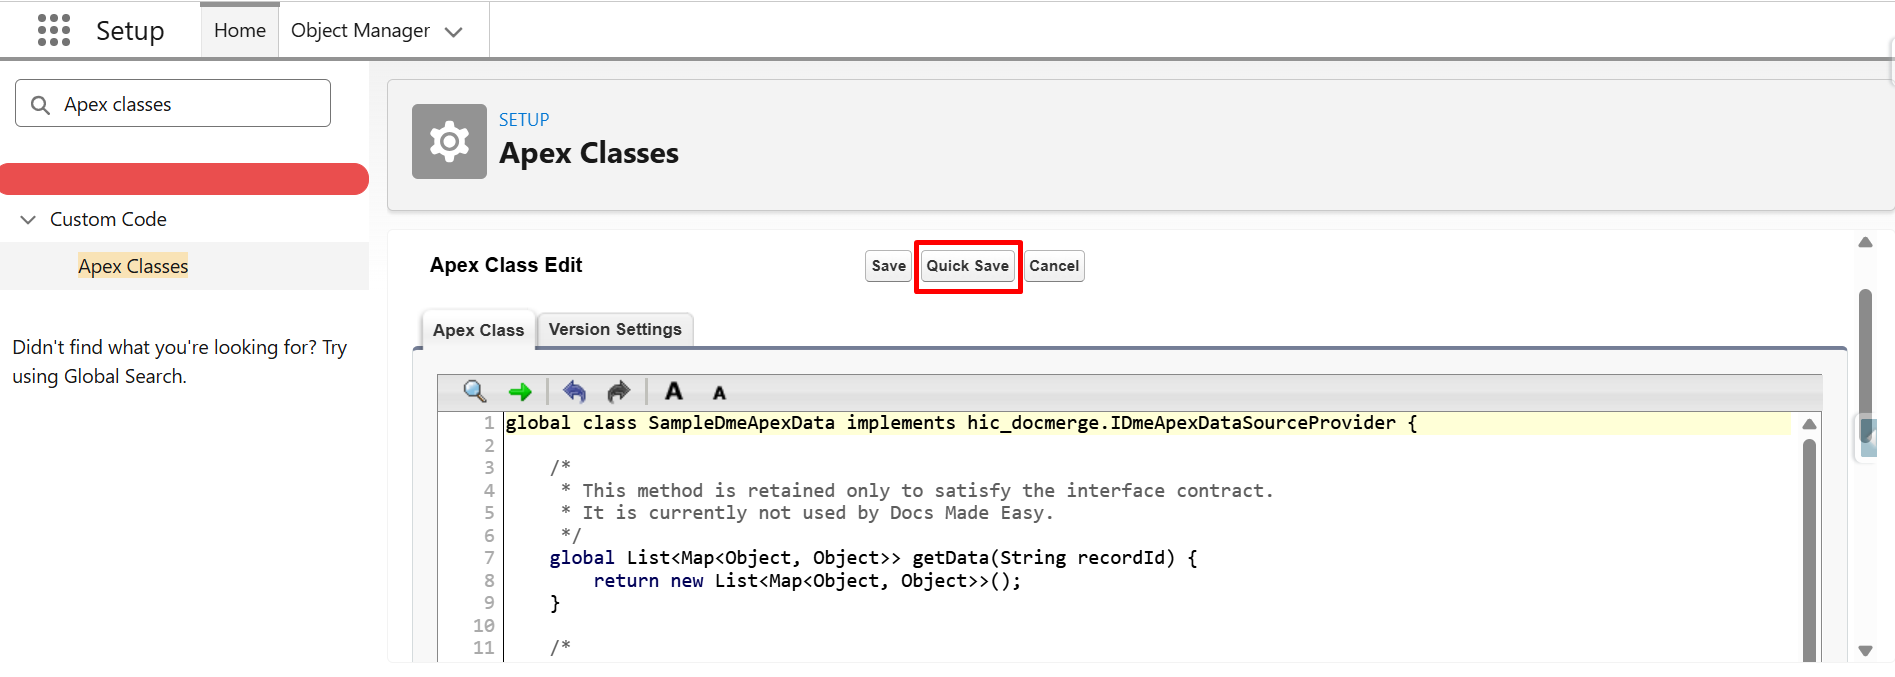
Step 4. Save the Class.
Registering the Apex Data Relationship in Docs Made Easy
Step 1. Navigate to Docs Made Easy
Step 2. From the Salesforce App Launcher, select Docs Made Easy.
Step 3. Create a Solution
Step 4. Go to the Gather Data.
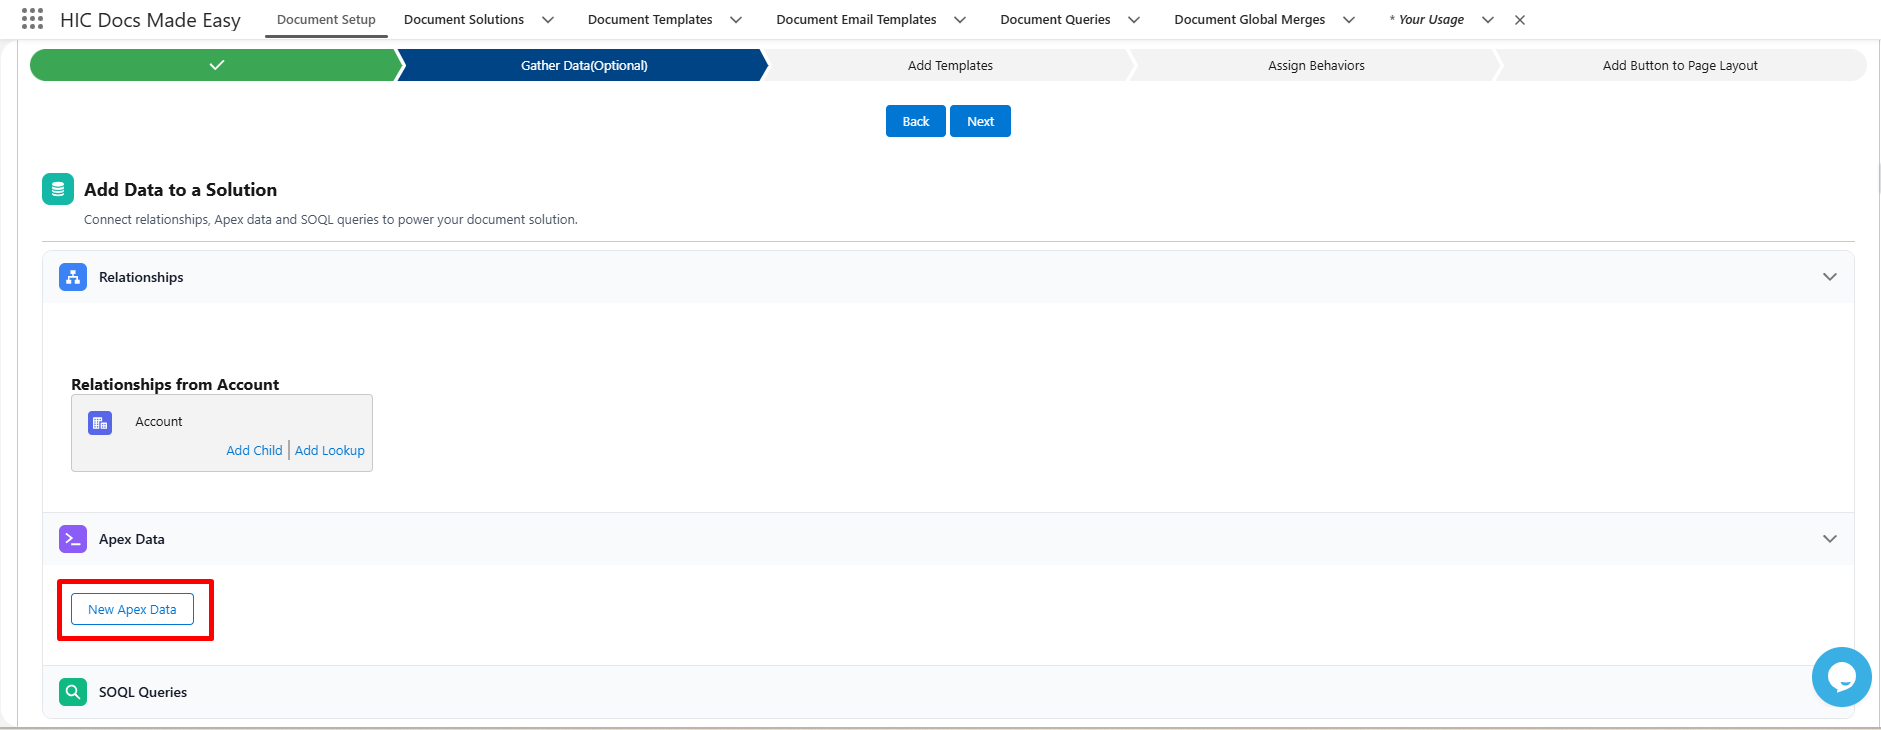
Step 5. Add the Apex Data by clicking on New Apex Data.
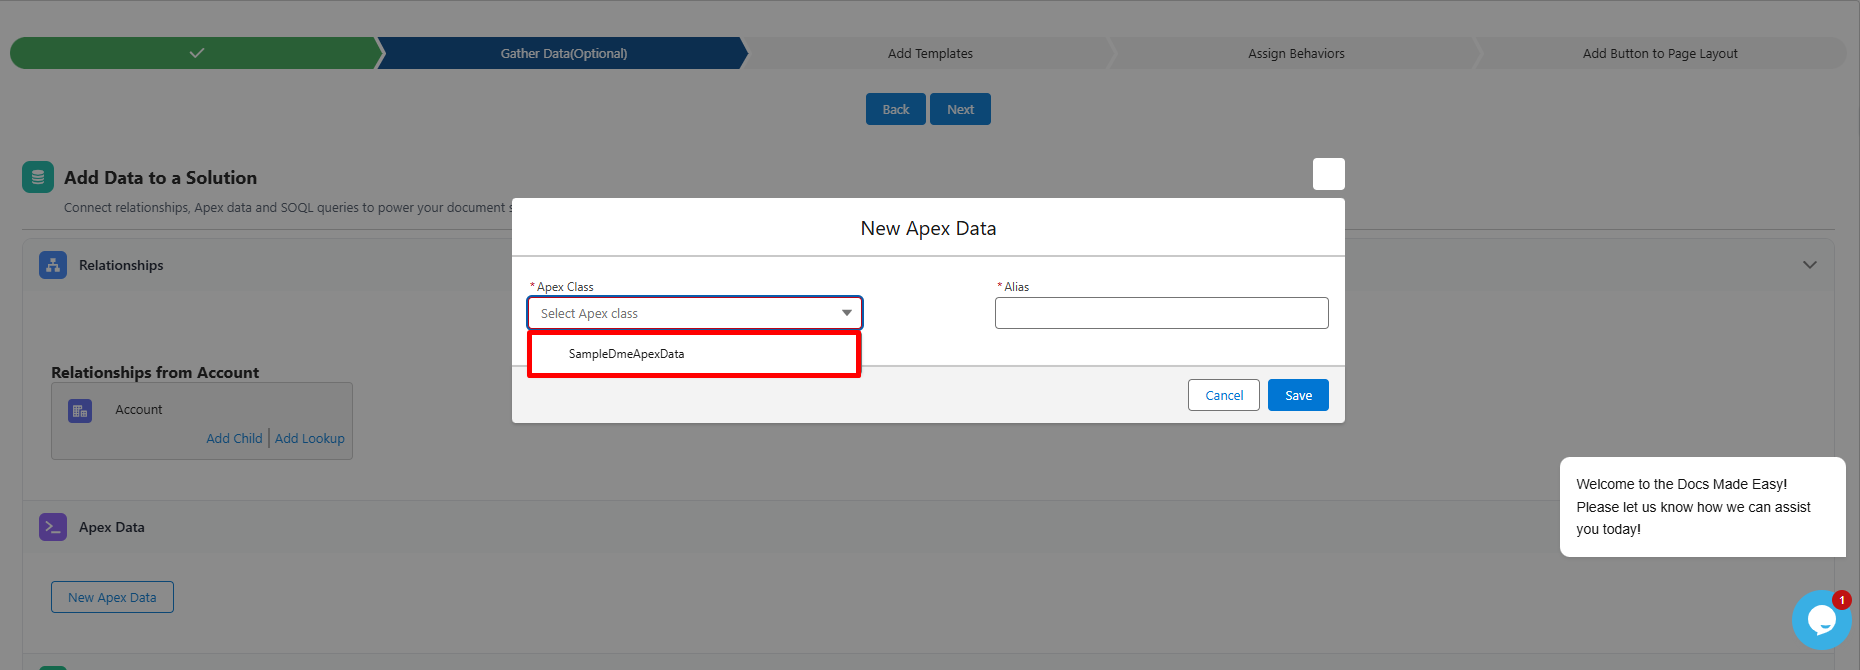
Step 6. Select your Apex Class.
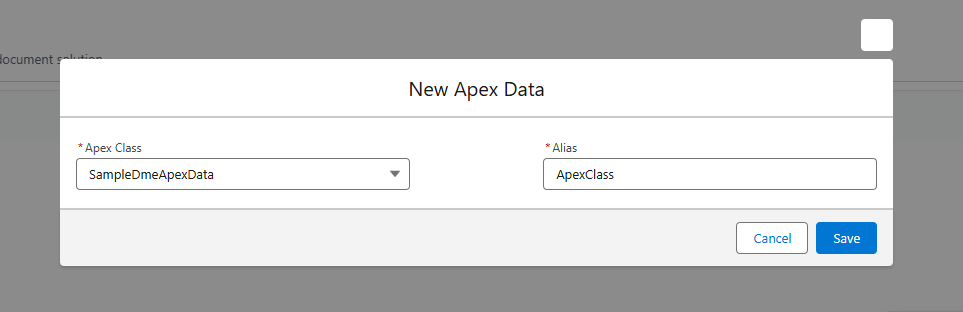
Step 7. Give Alias to your Apex Data and Click on Save.
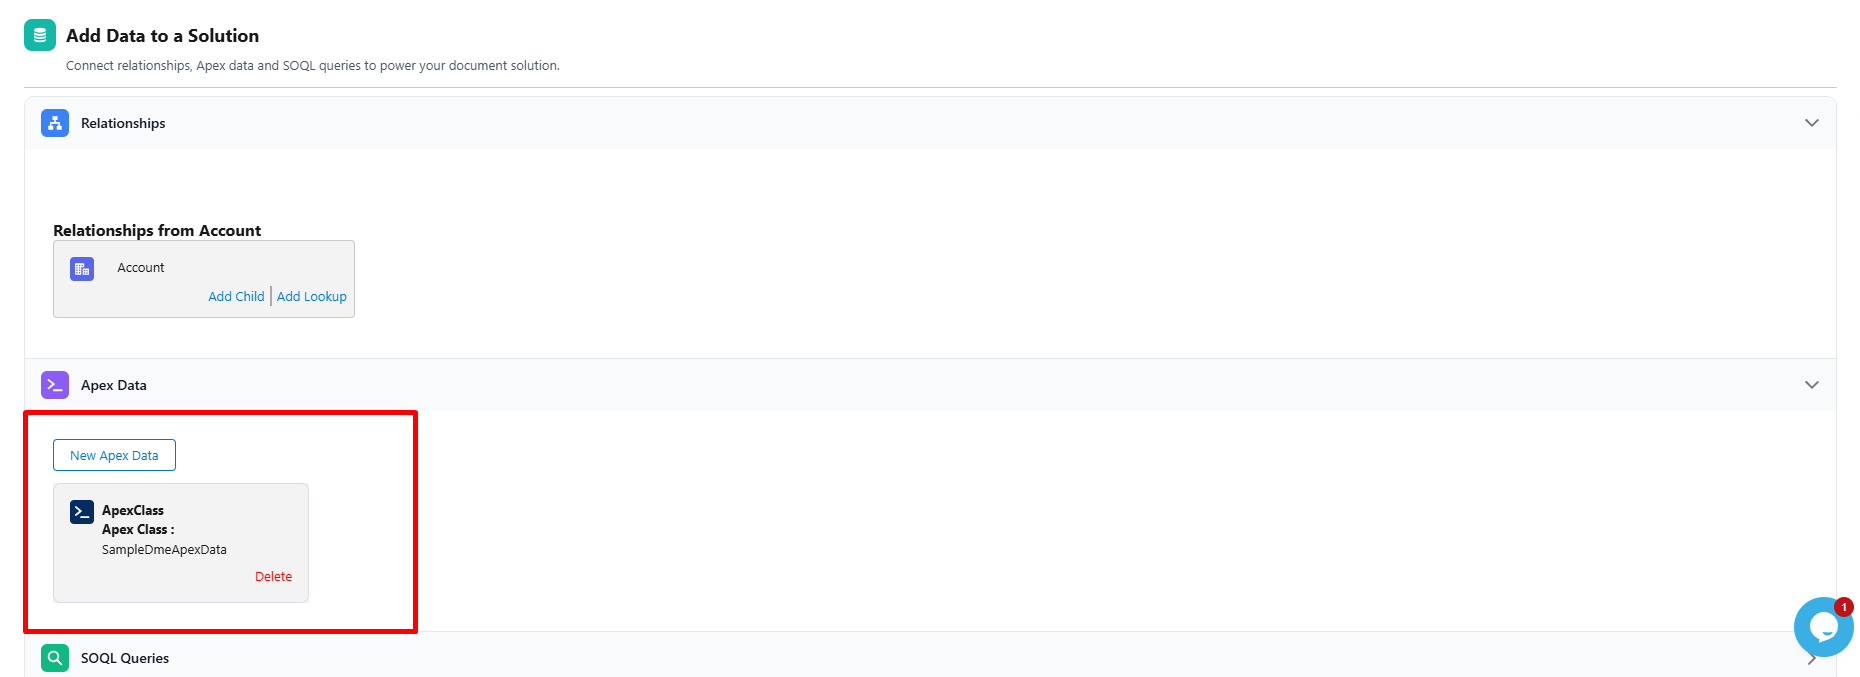
Now your Apex Data is Saved.
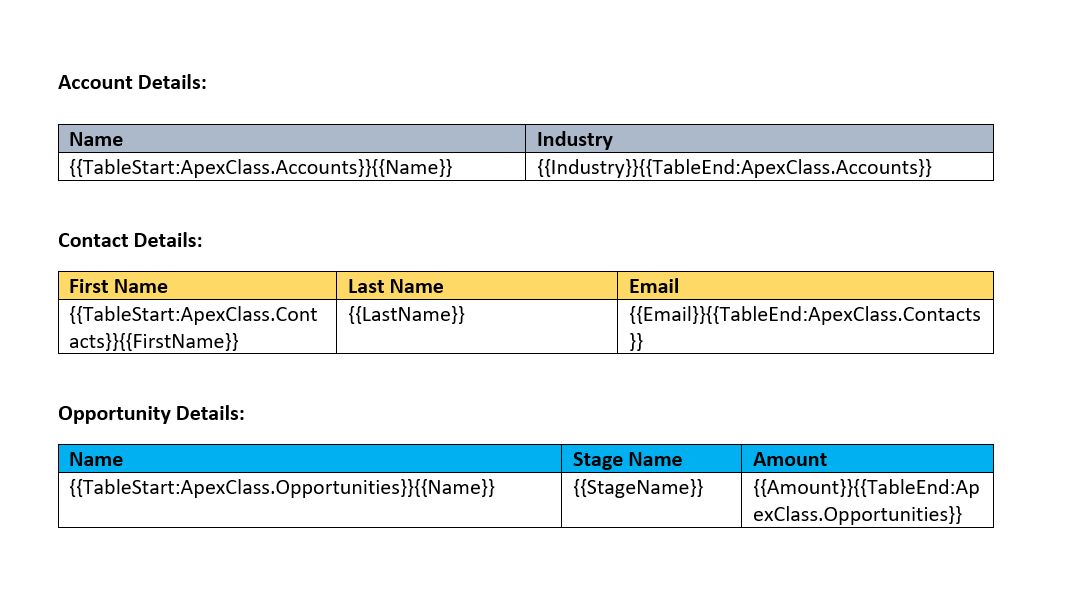
Add SYNTAX to the template and upload it.
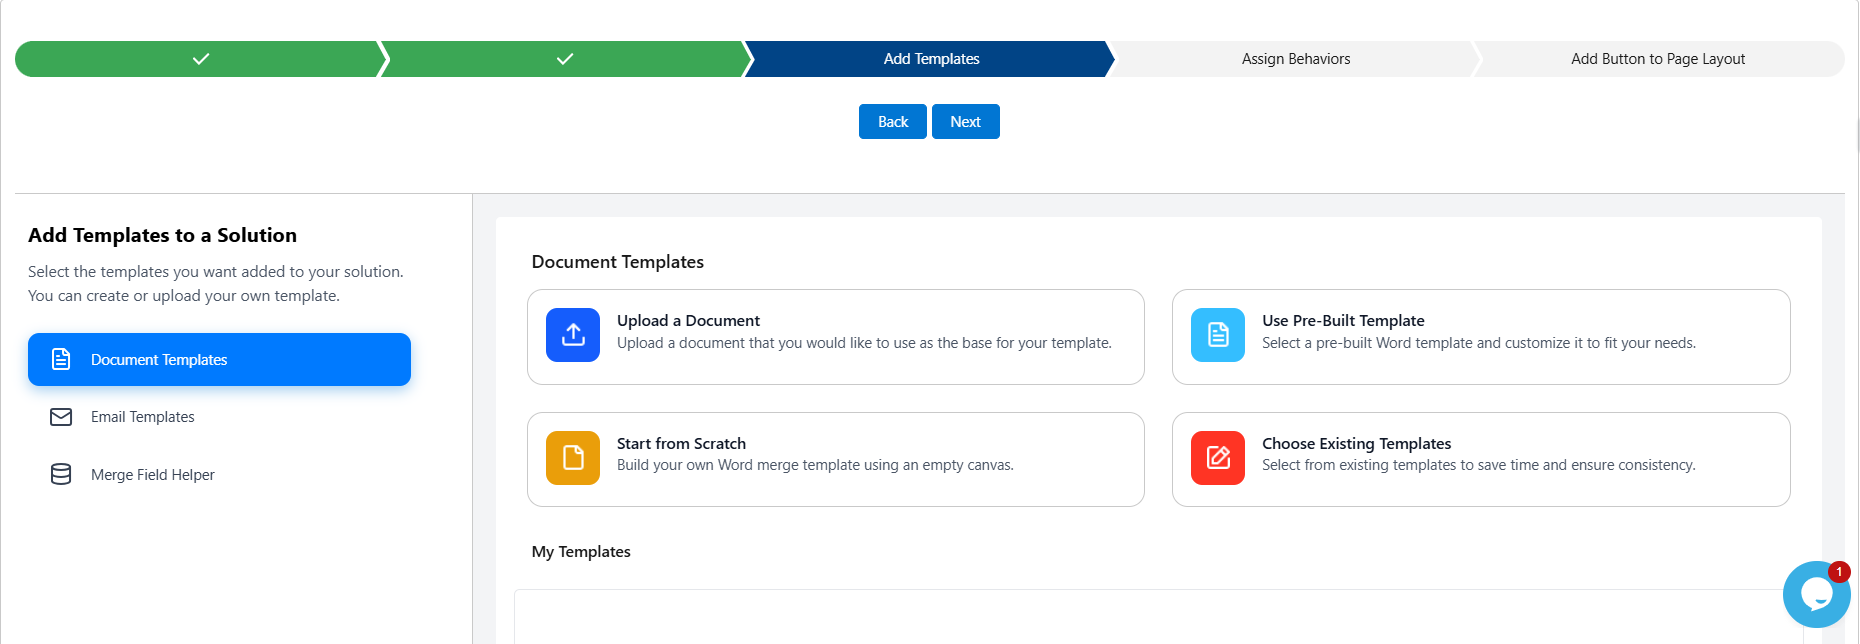
Now you can proceed with next Steps and Create the solution.
Click here to know more.
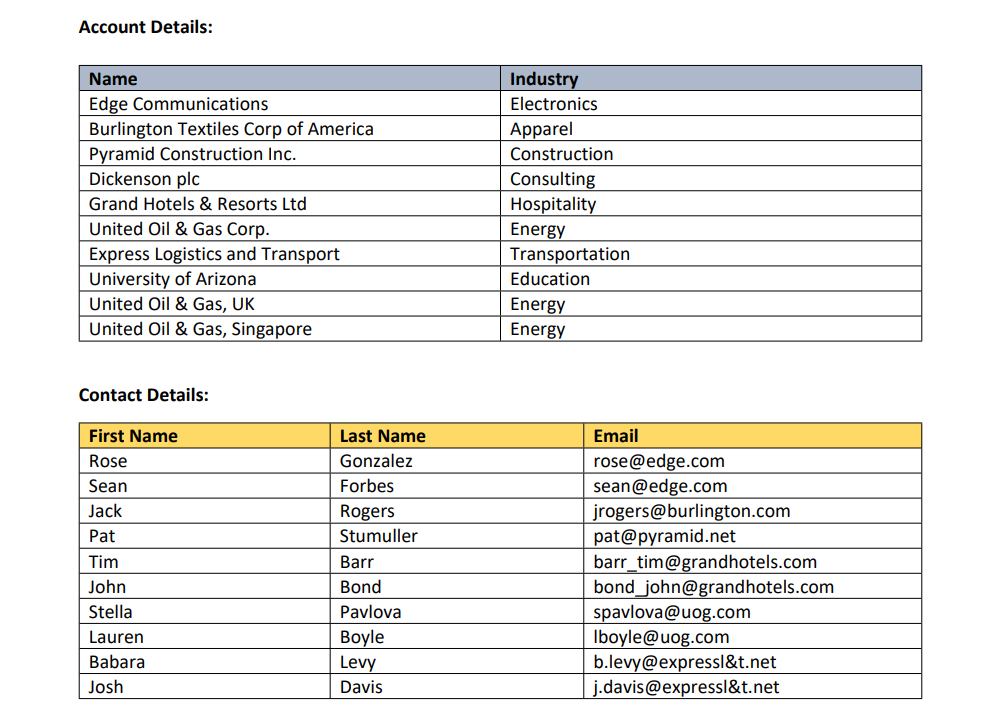
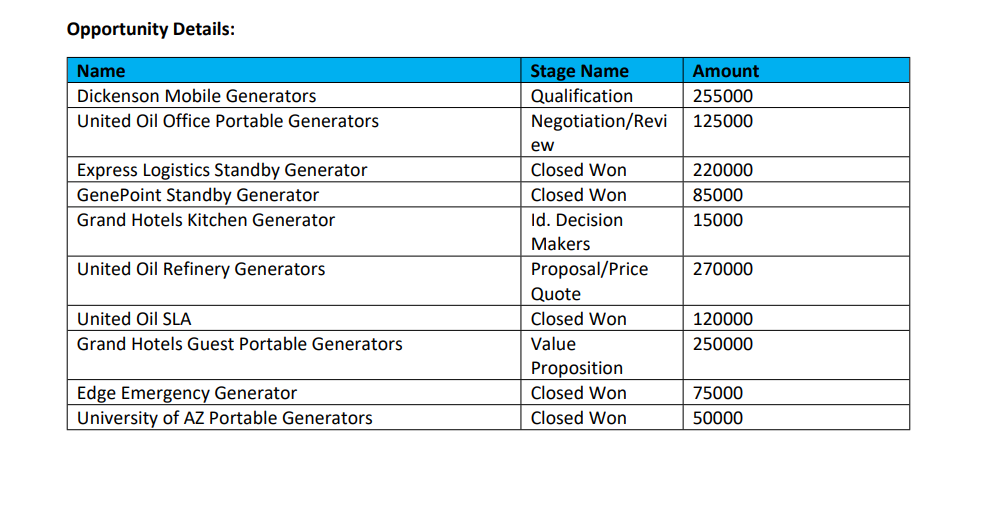
Sample Output:
Records can also be filtered based on their Record ID.
You can implement this by adding the desired filter condition within the Apex class
// Fetch current Account
List<Account> accounts = [
                SELECT Id, Name, Industry
                FROM Account WHERE Id =: recordid
                LIMIT 5
            ];
// Fetch related contacts
            List<Contact> contacts = [
                SELECT Id, FirstName, LastName, Email, AccountId
                FROM Contact WHERE AccountId =:recordid
                LIMIT 5
            ];
// Fetch related opportunities
            List<Opportunity> opportunities = [
                SELECT Id, Name, StageName, CloseDate, AccountId , Amount
                FROM Opportunity WHERE AccountId =:recordid
                LIMIT 5
            ];
Add the Record ID in the Other Parameters on the Assign Behavior page.
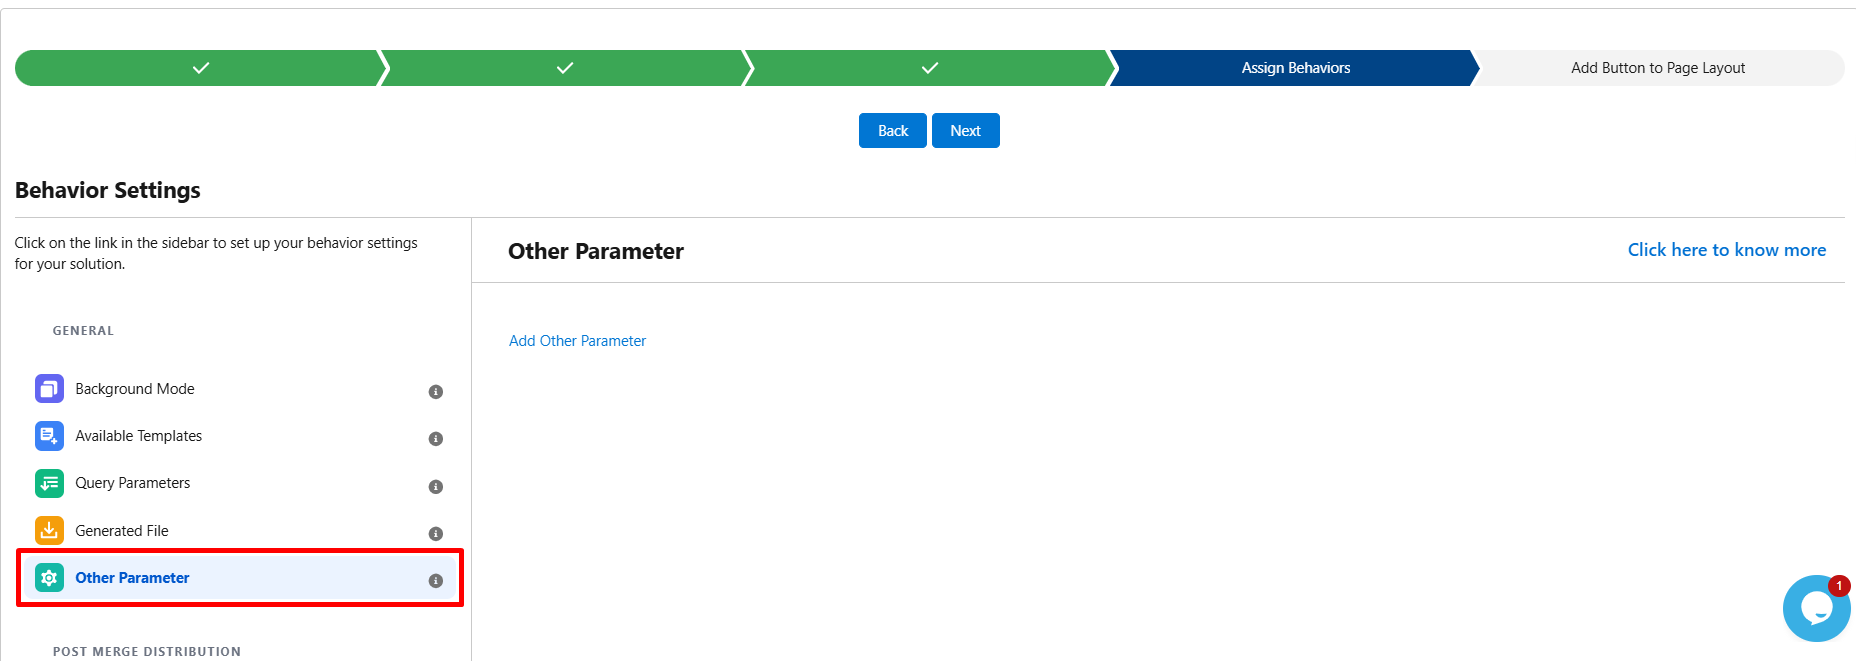
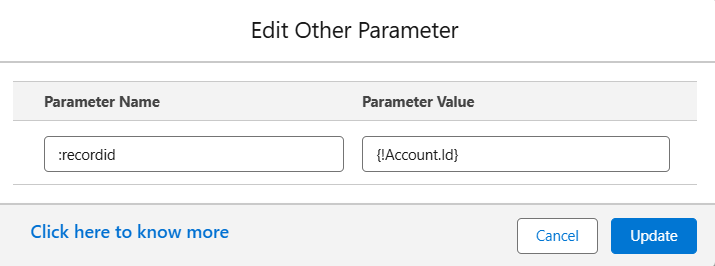
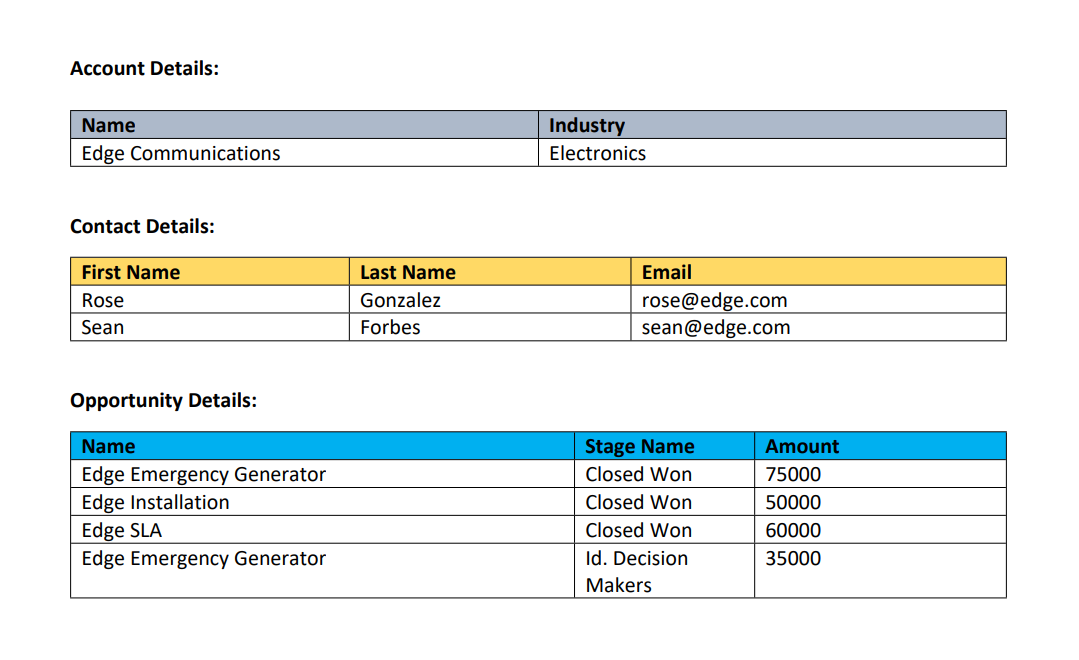
Records will now be fetched based on the specified condition.
Output:
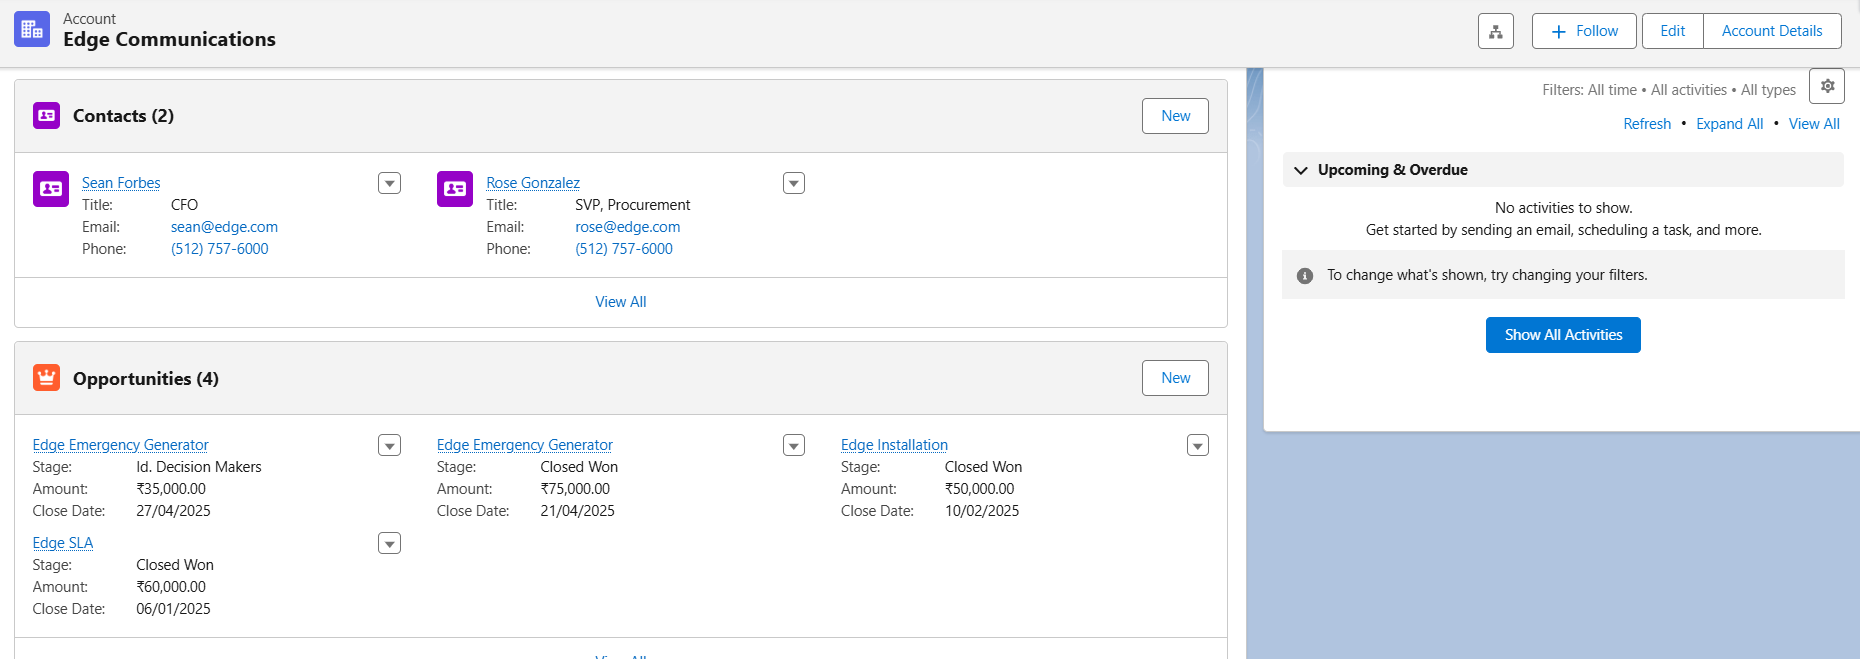
Record in Salesforce:
Was this article helpful?
That’s Great!
Thank you for your feedback
Sorry! We couldn't be helpful
Thank you for your feedback
Feedback sent
We appreciate your effort and will try to fix the article