Setting up Docs Made Easy Pro
Work through the three sections below in order. You will install the packages, assign licenses, then assign permission sets.
Sign in to Salesforce as a System Administrator before you start.
Section 1 of 3
Install the package
Install the base app and the Pro package, then send us your Org ID so we can enable the Pro features.
Step 1
Upgrade the Docs Made Easy app to v1.23.15
Use the link that matches the org you are installing into.
Step 2
Install Docs Made Easy Pro v1.9
Install the Pro package in the same instance, then contact support so we can update the features on your account.
Step 3
Share your Org ID
Once both packages are installed, reply to our email with your Salesforce Org ID so we can enable the feature.
Do not stop here
Installing the packages is not enough on its own. Continue to sections 2 and 3 to assign licenses and permission sets, or the app will not work for your users.
Section 2 of 3
Assign licenses
Assign Docs Made Easy and Docs Made Easy Pro licenses to your users after installation.
Step 1
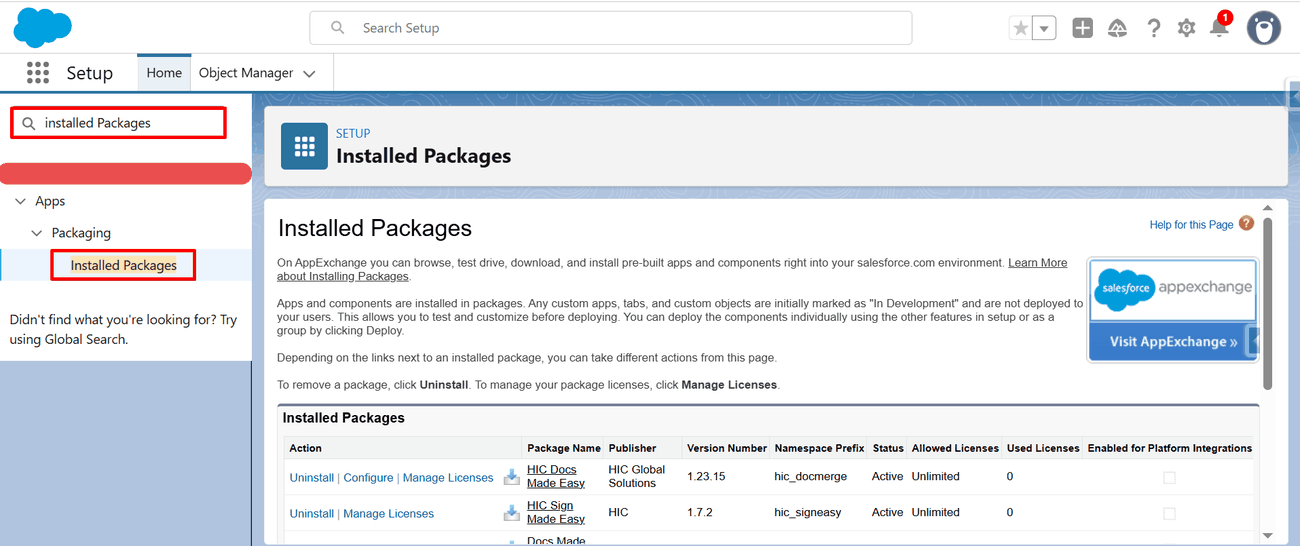
Open Installed Packages
Once installation is complete, navigate to Installed Packages in your Salesforce org settings.
Step 2
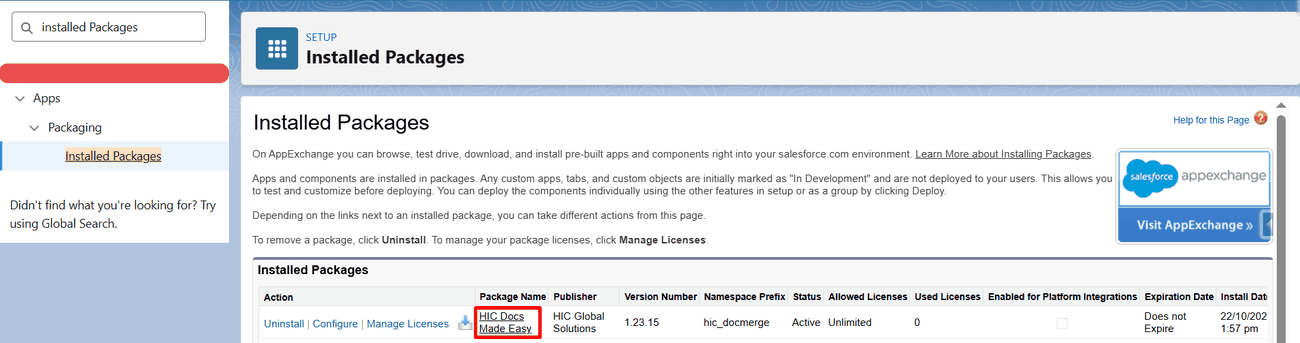
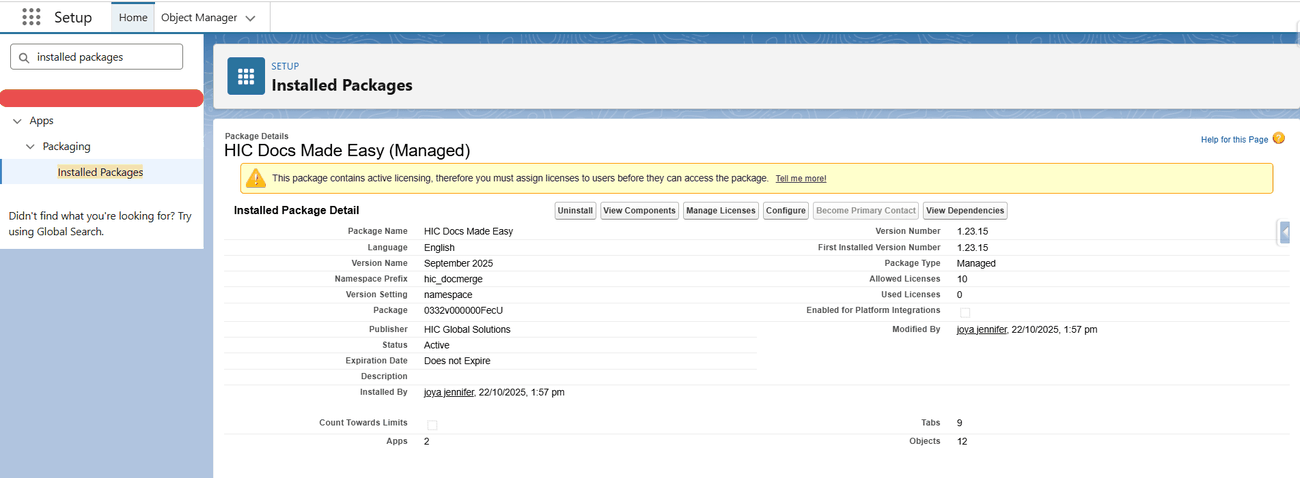
Select the HIC Docs Made Easy package
Click HIC Docs Made Easy in the list of installed packages.
Step 3
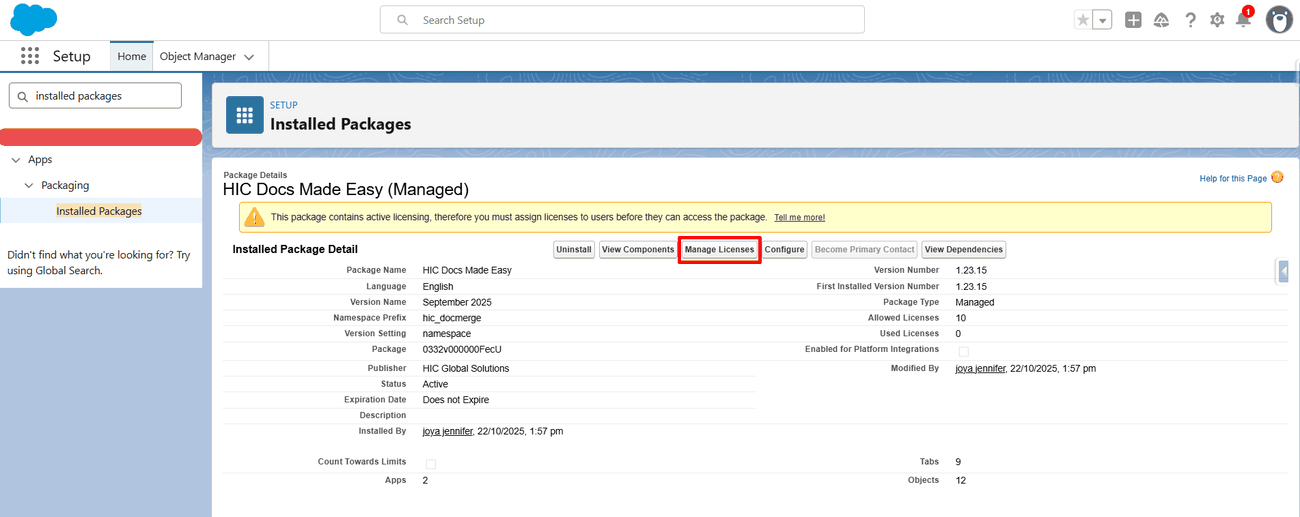
Open Manage Licenses
Inside the package details, click Manage Licenses.
Step 4
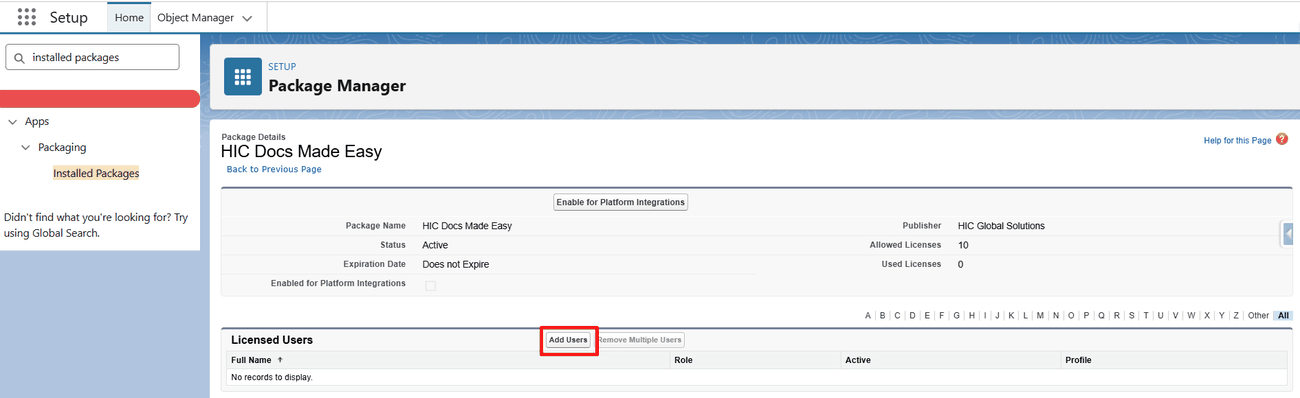
Add users
Click the Add Users button to begin assigning licenses.
Step 5
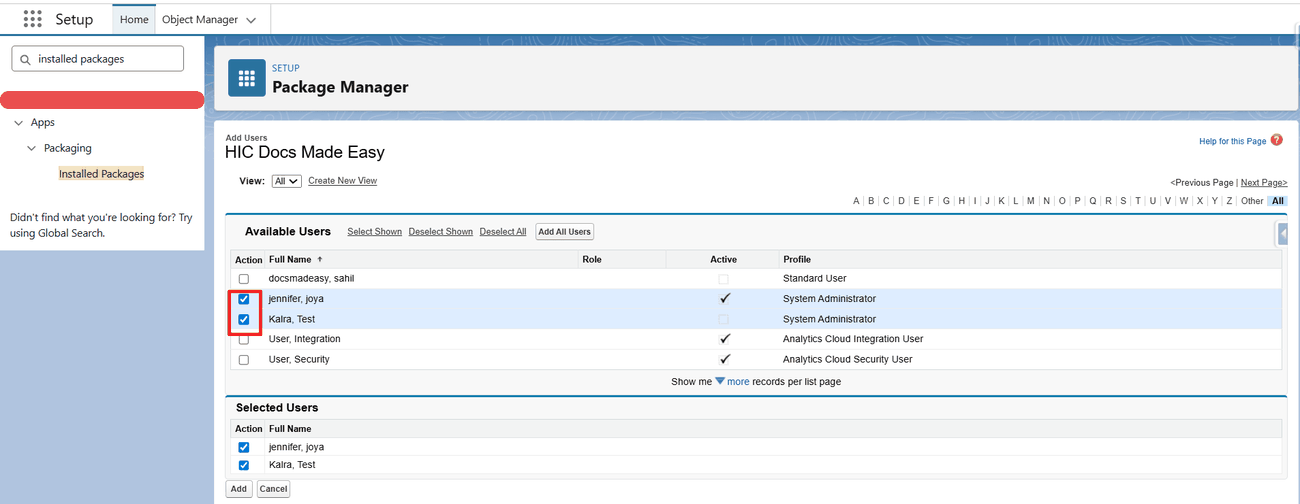
Select the user
Search for and select the user you want to grant access to the Docs Made Easy app.
Step 6
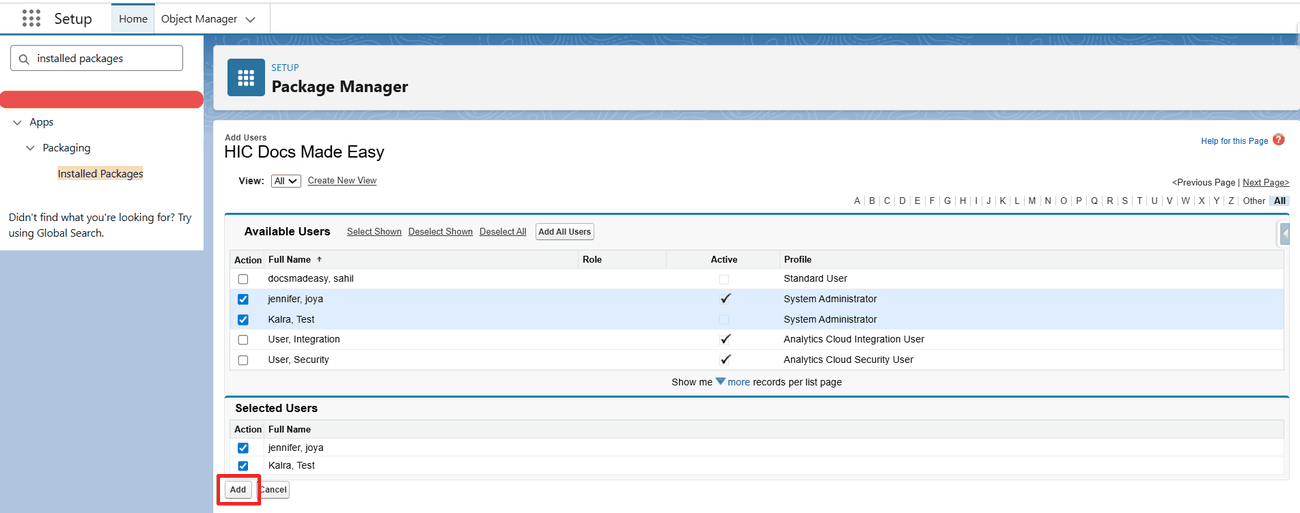
Confirm the assignment
Click the Add button to confirm and assign the license to the selected user.
Step 7
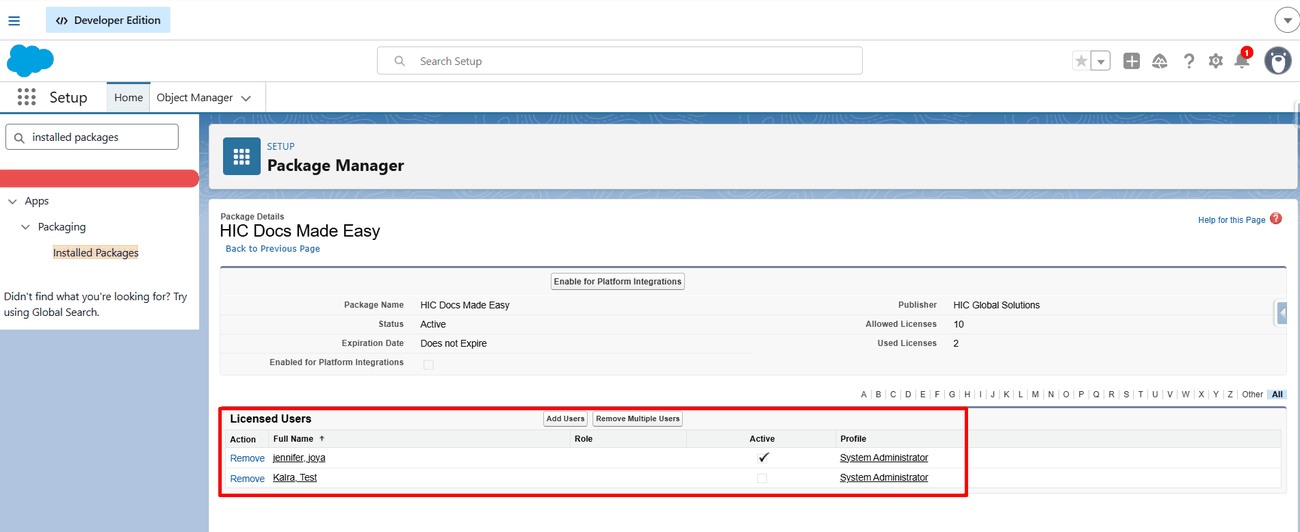
License assigned
The user is now licensed and ready to use the Docs Made Easy app.
Run this twice
Licenses are assigned per package. Repeat all seven steps for the Docs Made Easy Pro package as well, or your users will only have access to the base app.
Section 3 of 3
Assign permissions
This gives your users the Salesforce permissions they need to generate documents. There are 18 steps, grouped into three parts.
Part 1 · Clone the permission set
Step 1
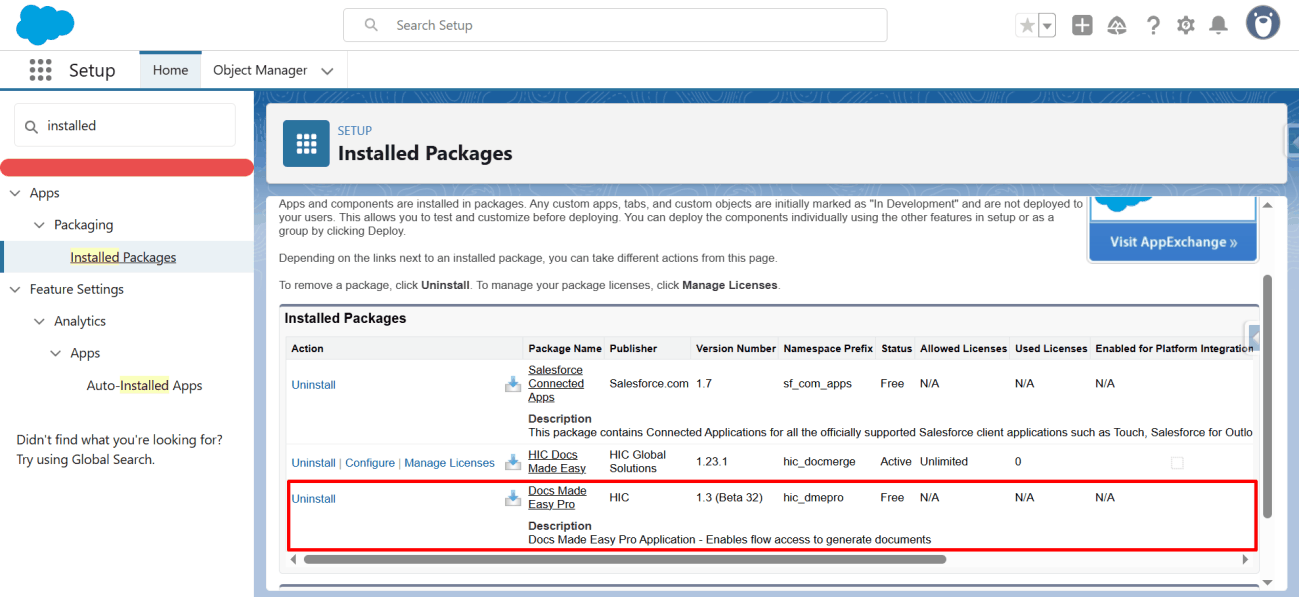
Open Installed Packages
Go to Setup and search for Installed Packages.
Step 2
Verify the package is installed
In the list of installed packages, confirm that Docs Made Easy is installed.
Step 3
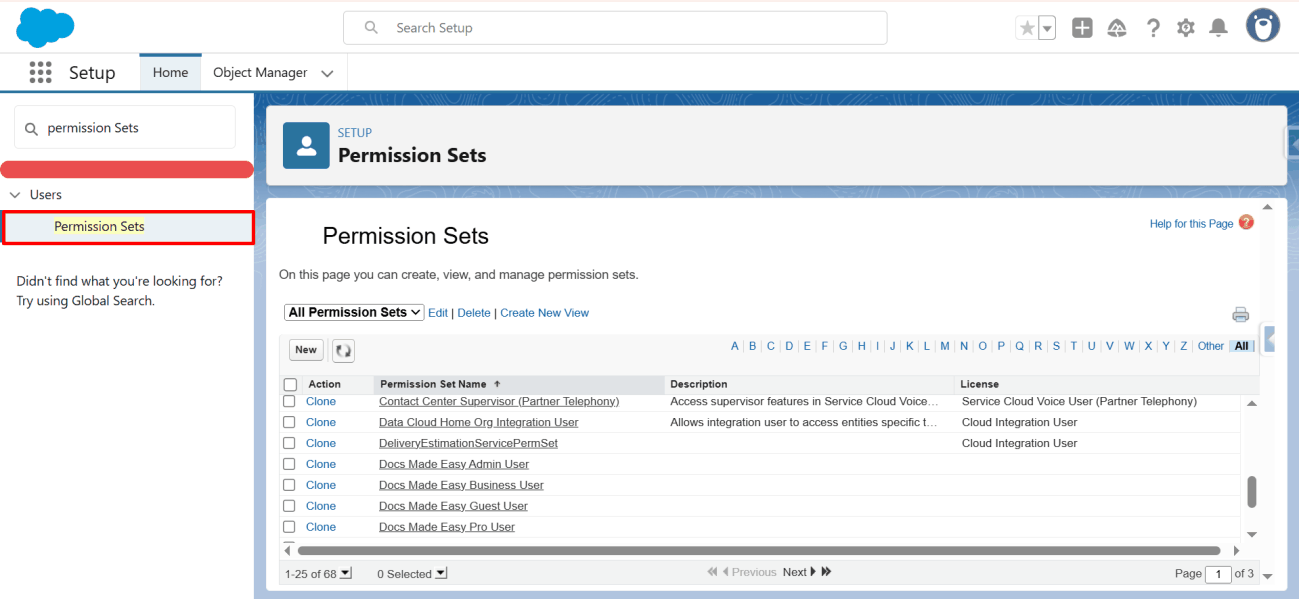
Open Permission Sets
Go back to Setup and search for Permission Sets.
Step 4
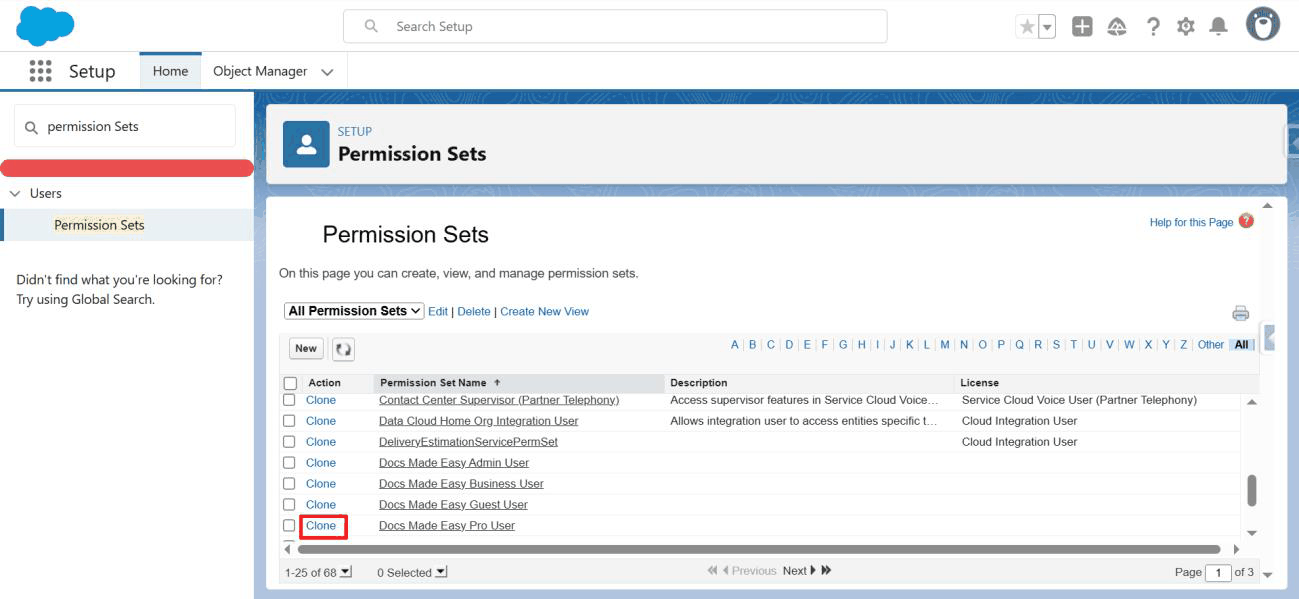
Clone the Pro user permission set
Locate Docs Made Easy Pro User in the list and click Clone.
Step 5
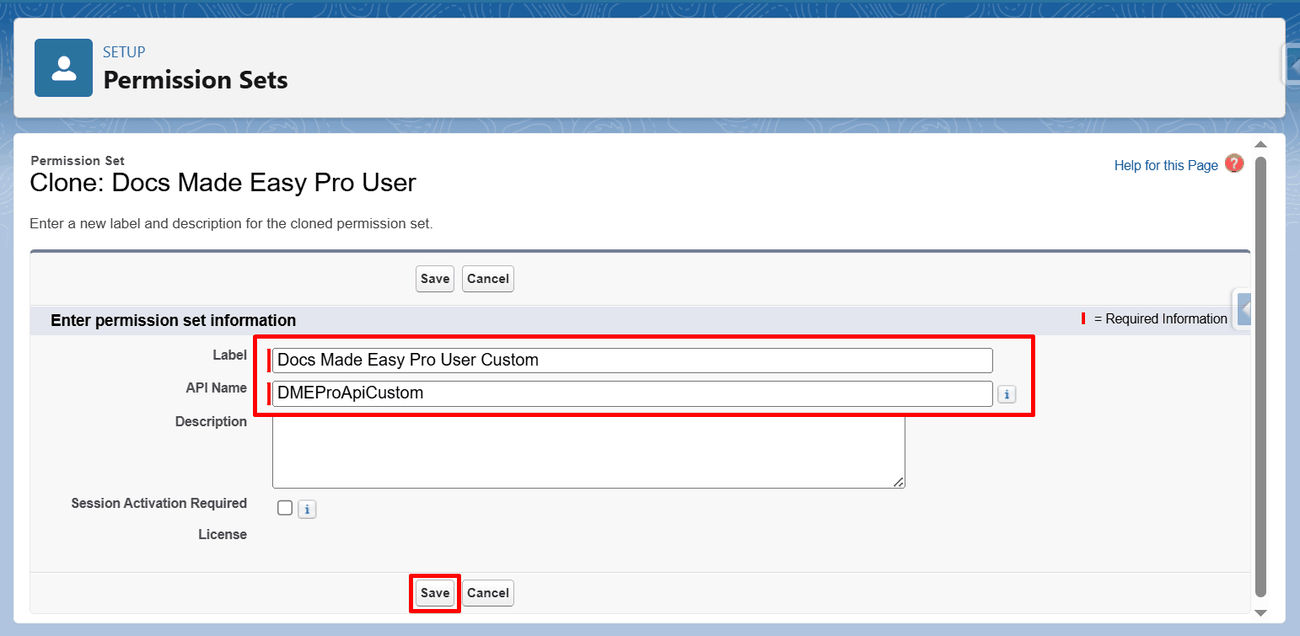
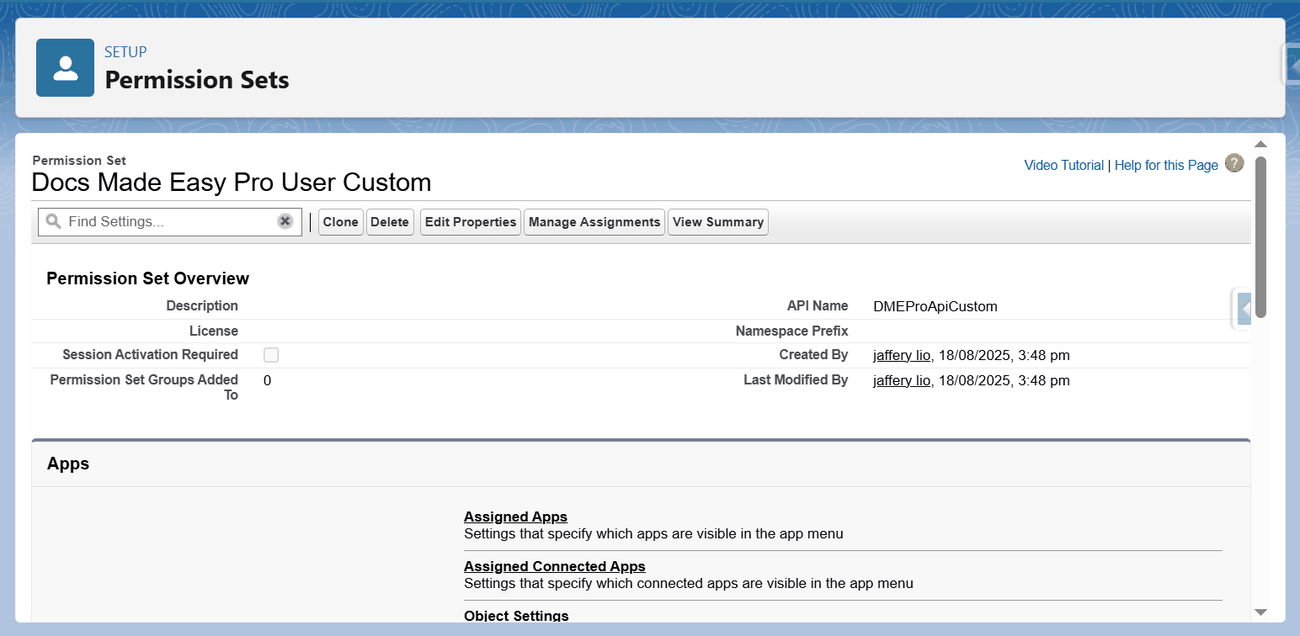
Name and save the clone
Enter a Label for the new permission set, for example Docs Made Easy Pro User Custom with the API name DMEProApiCustom, then click Save. The cloned permission set is now created.
Part 2 · Enable the API and assign users
Step 6
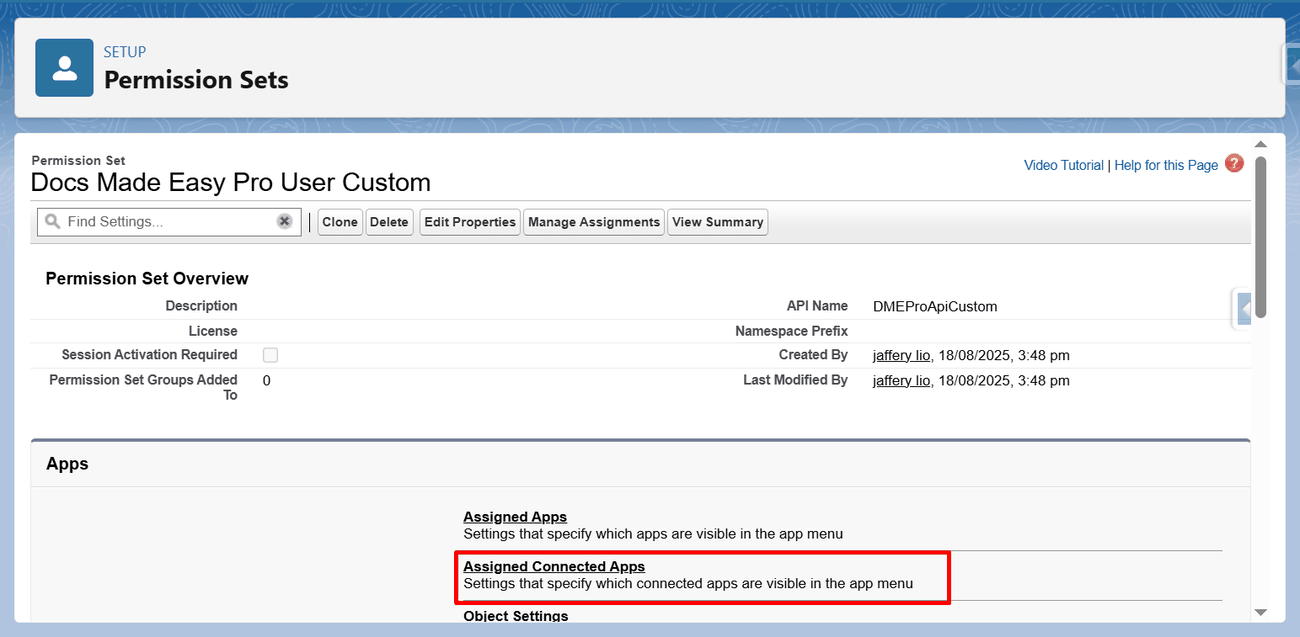
Open Assigned Connected Apps
In your new permission set, click Assigned Connected Apps.
Step 7
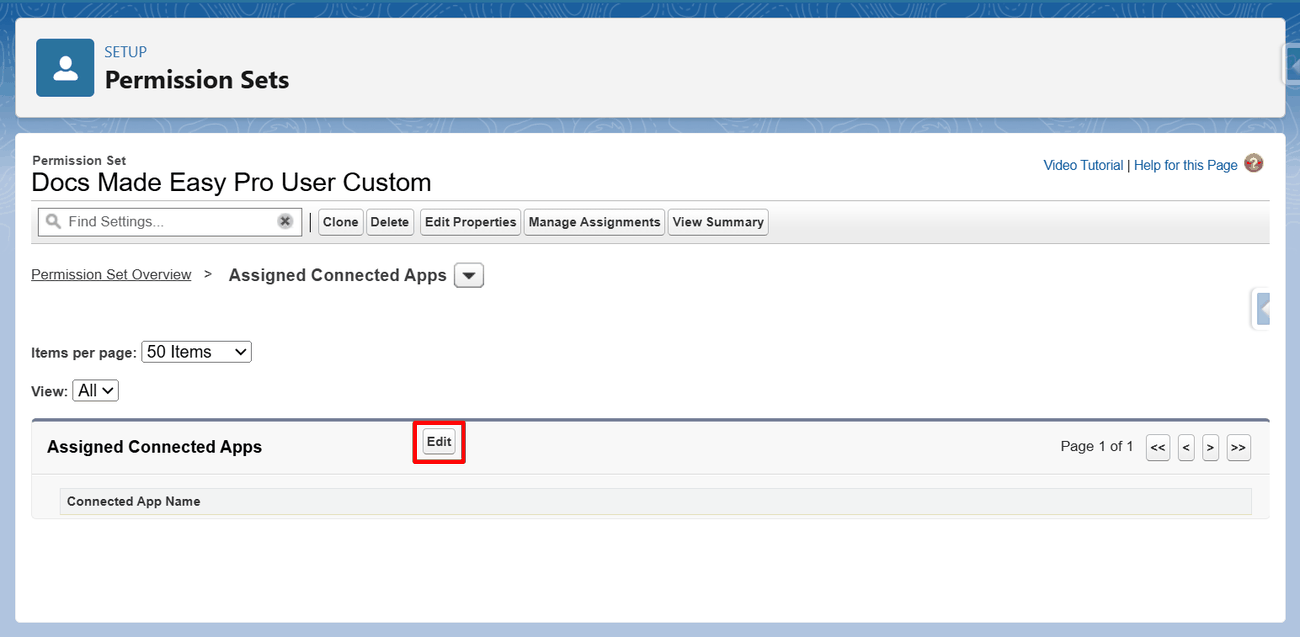
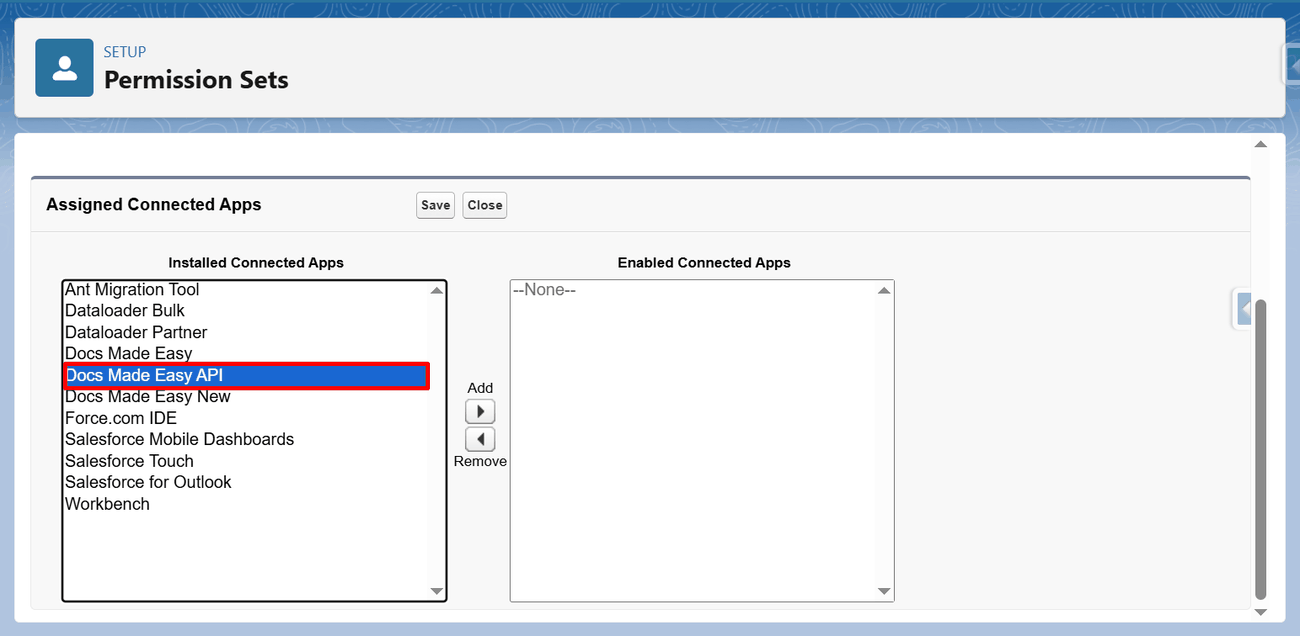
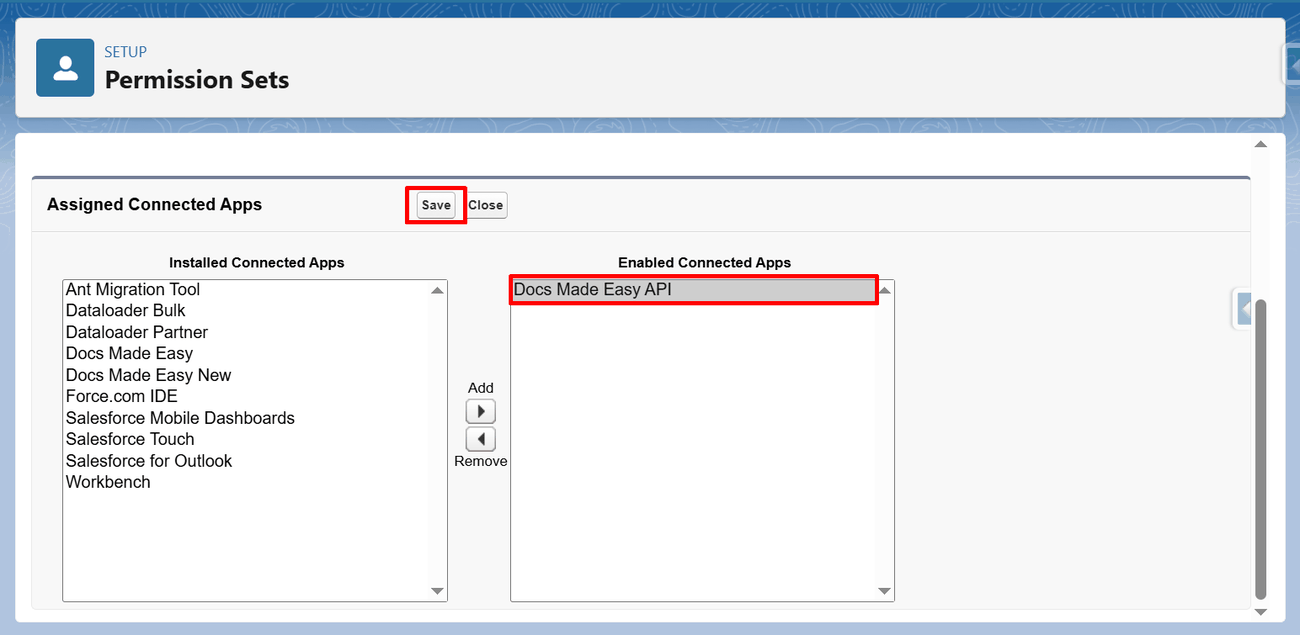
Enable the Docs Made Easy API
Click Edit, select Docs Made Easy API from the Installed Connected Apps list, move it to Enabled Connected Apps using the Add arrow, and save.
Step 8
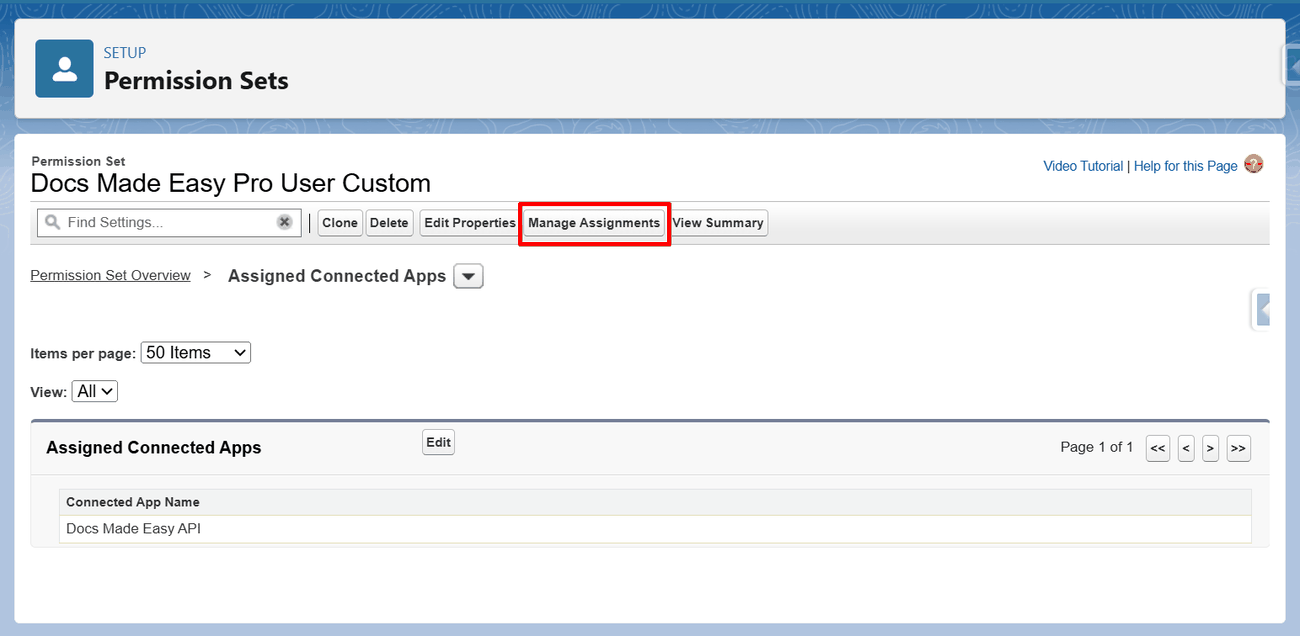
Open Manage Assignments
Click Manage Assignments at the top of the permission set.
Step 9
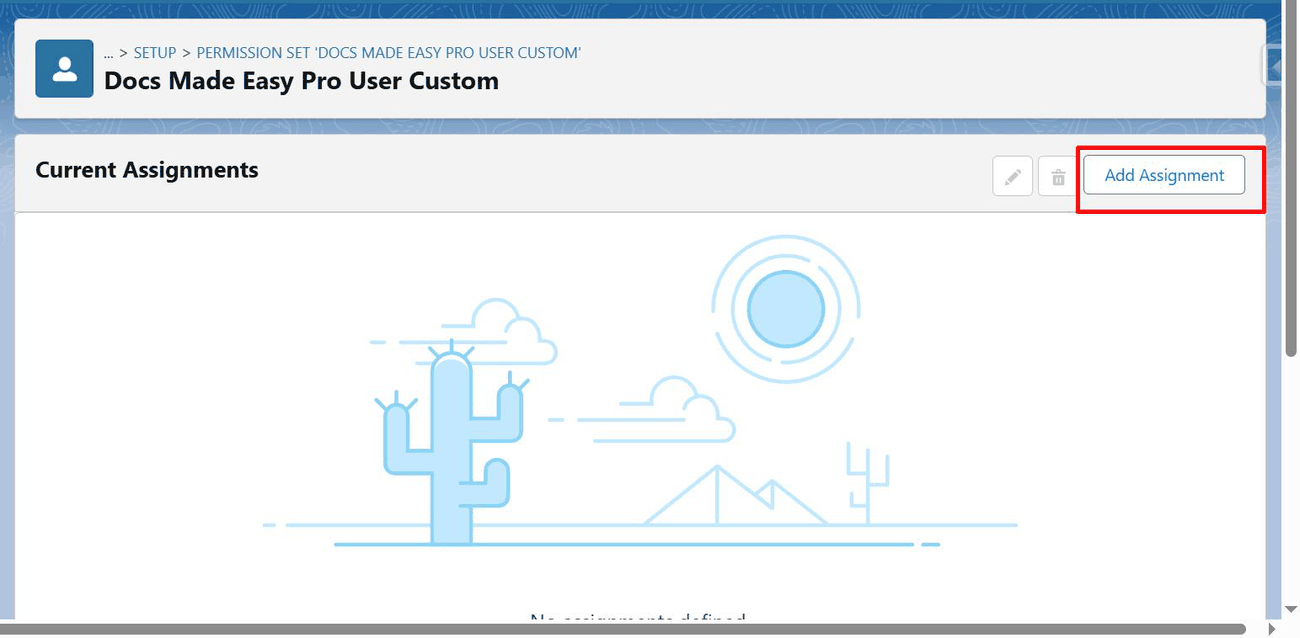
Add an assignment
Click the Add Assignment button.
Step 10
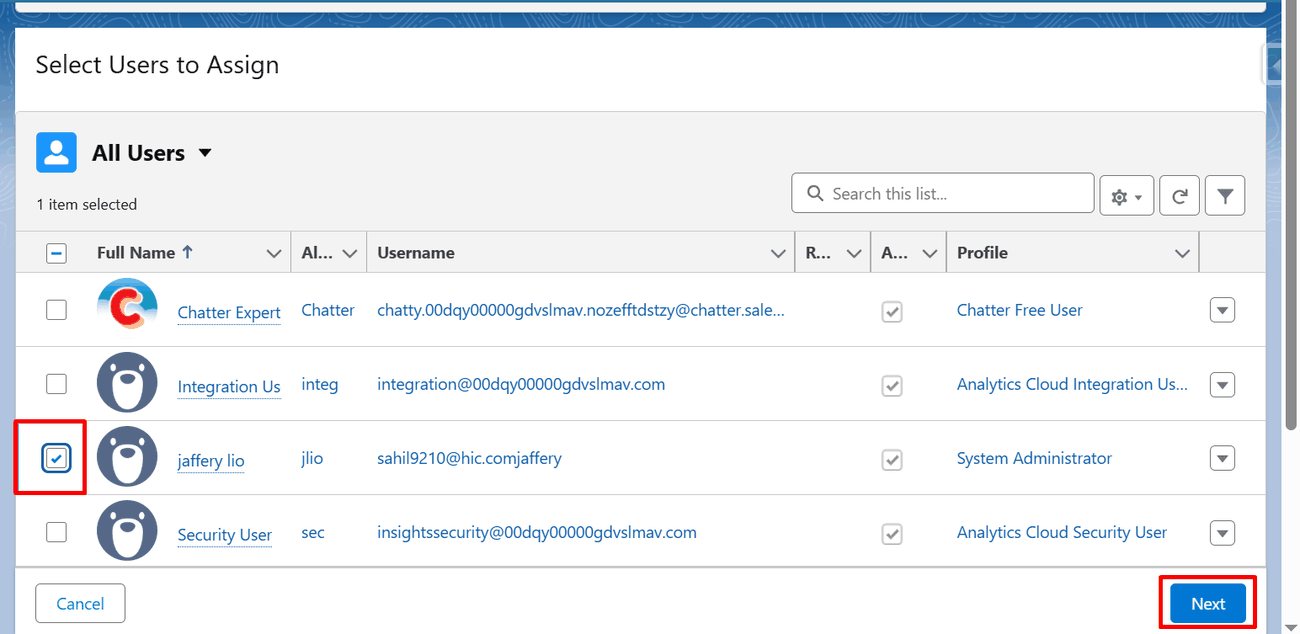
Select the users
Select the user or users you want to assign the permission set to, then click Next.
Step 11
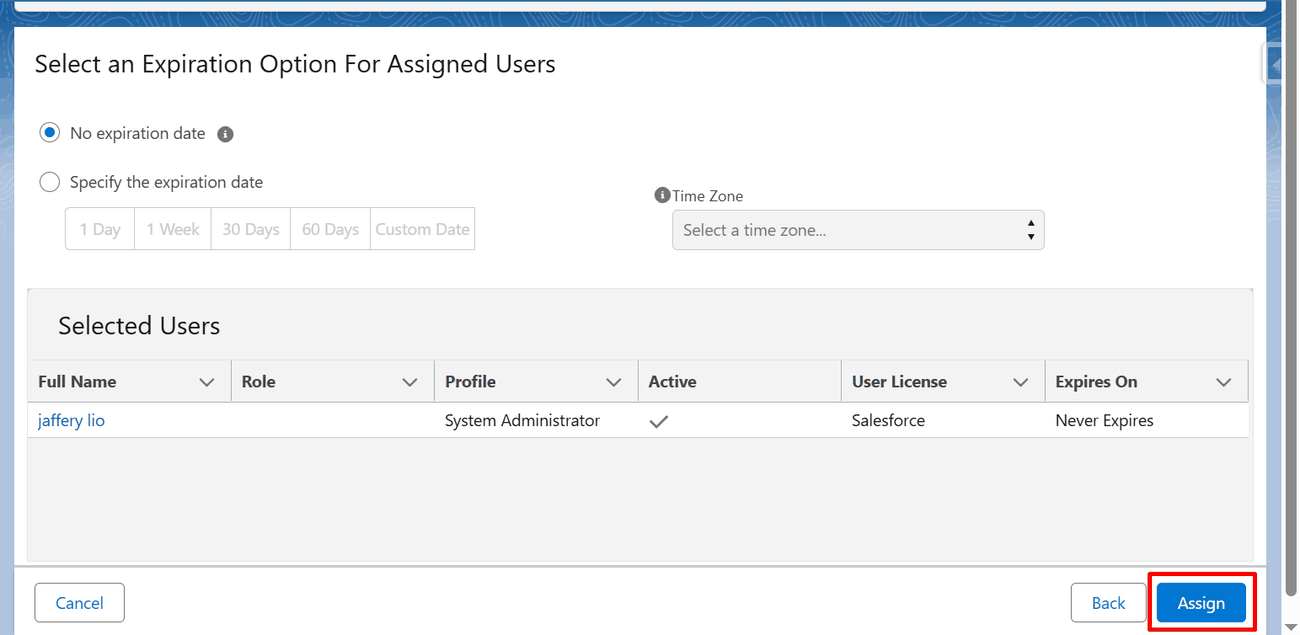
Assign
Click Assign. The permission set is now assigned to the selected users.
Part 3 · App policies and trusted URLs
Step 12
Open App Manager
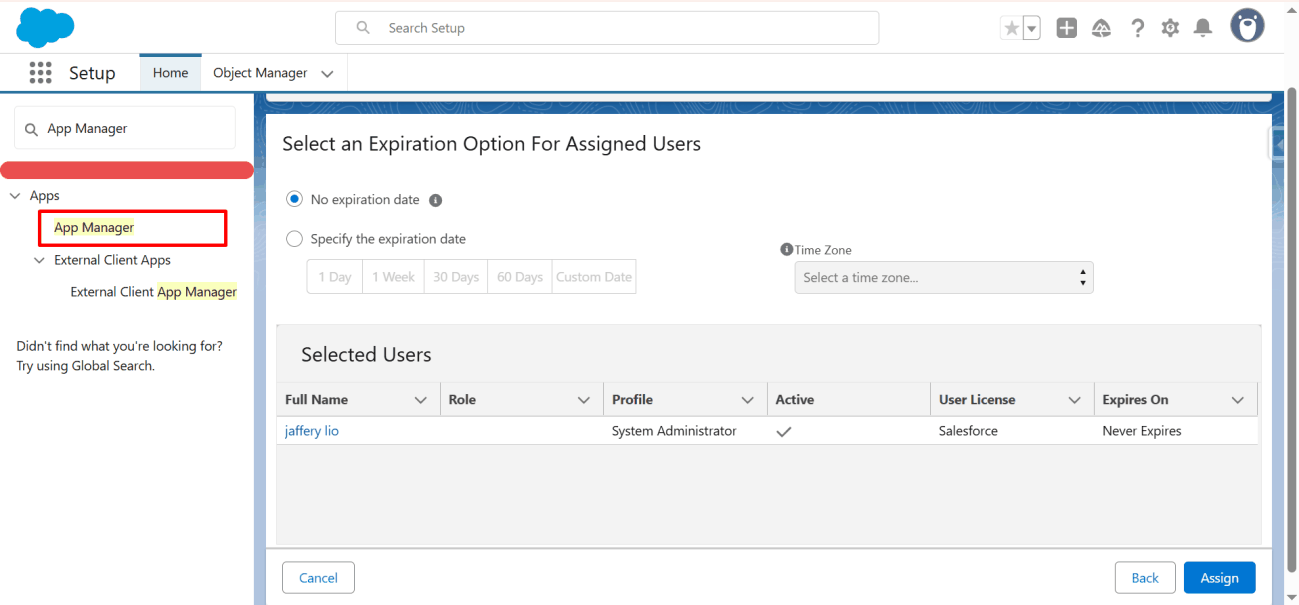
In the Setup search box, search for App Manager and open it.
Step 13
Manage the Docs Made Easy API app
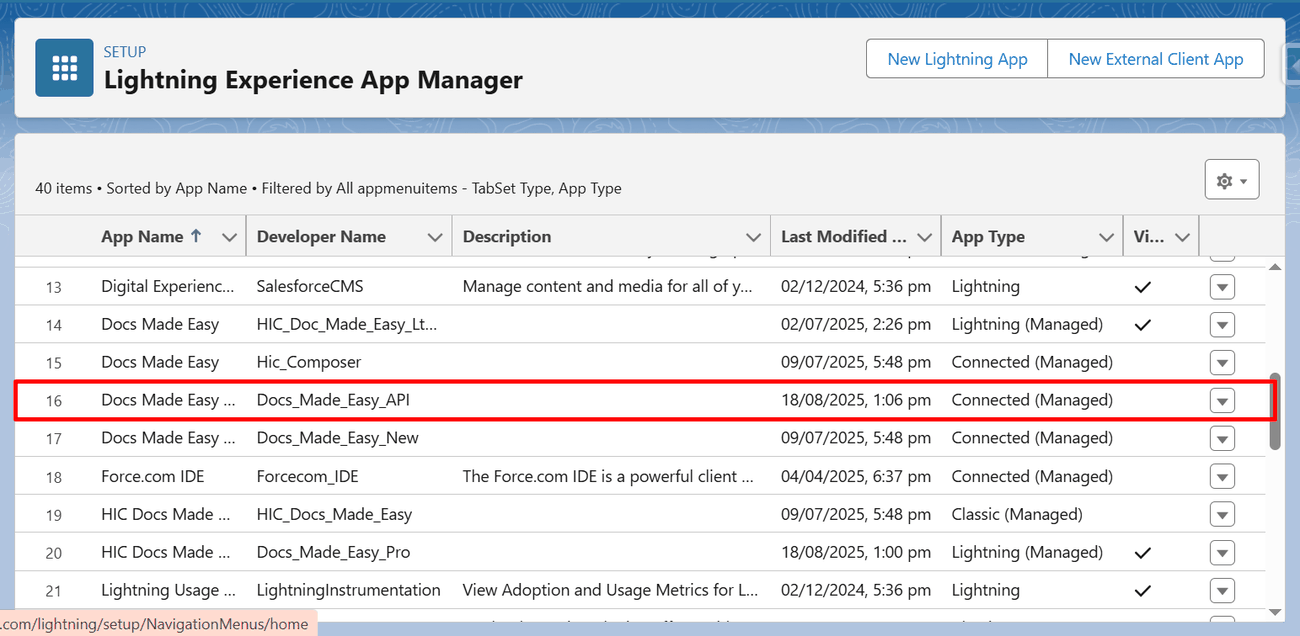
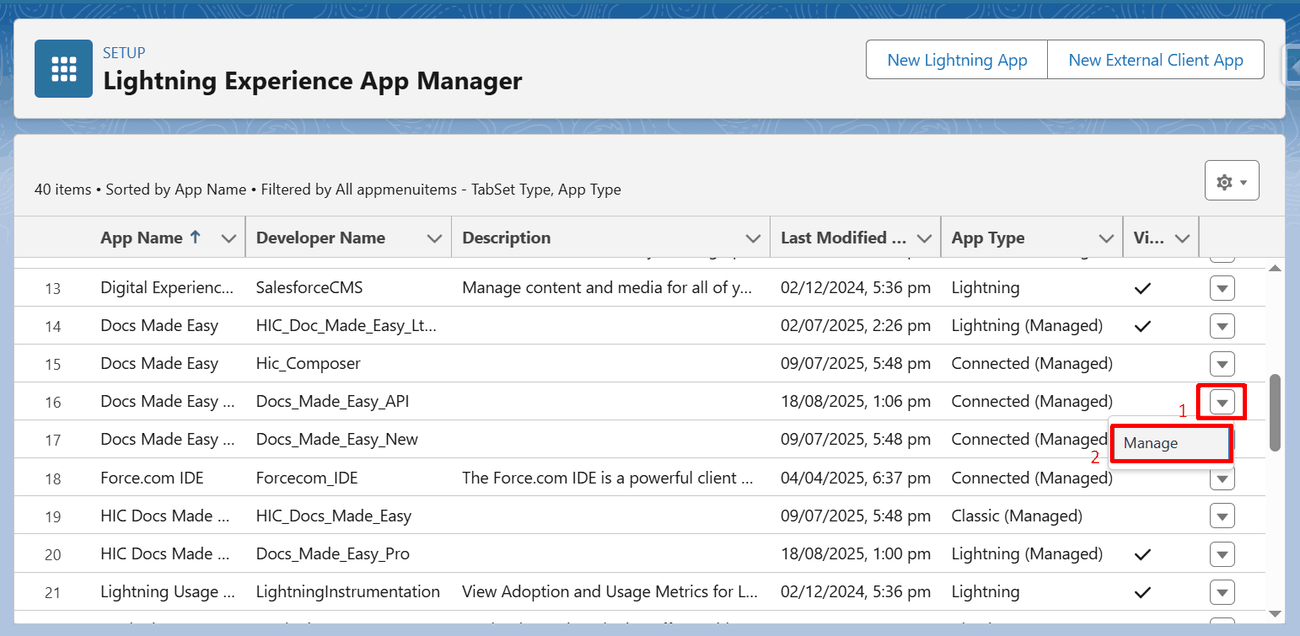
Locate Docs Made Easy API in the list, click the dropdown arrow on the far right, and select Manage.
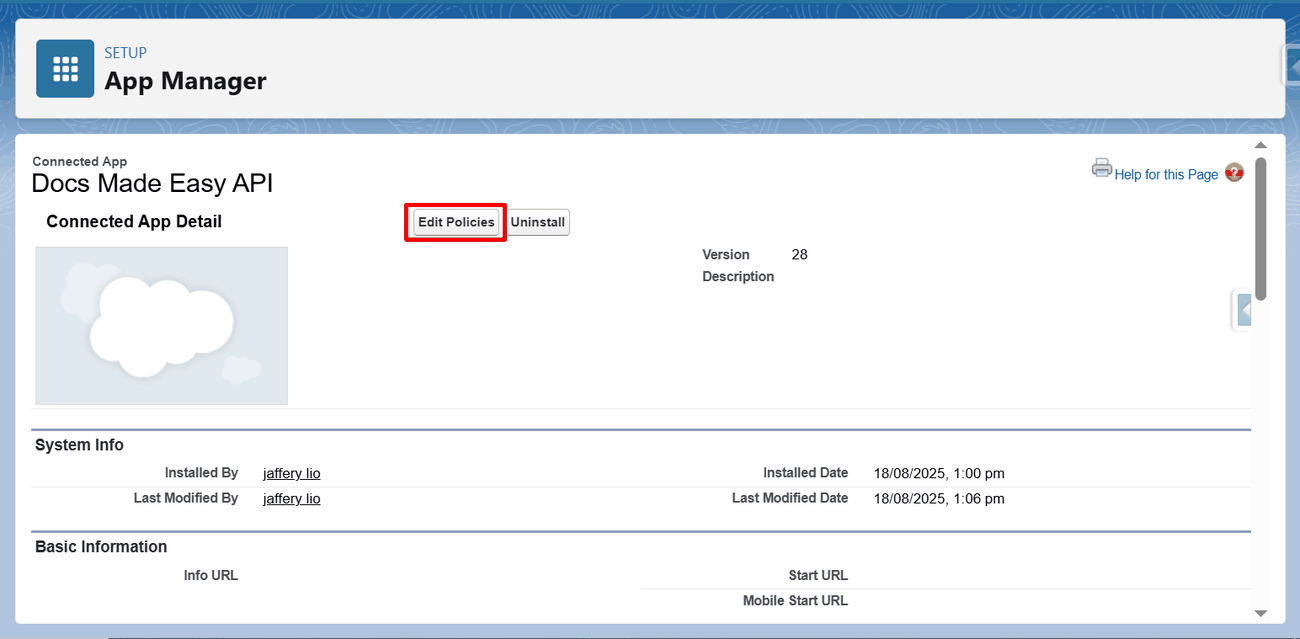
Step 14
Edit the policies
Click Edit Policies at the top of the connected app detail page.
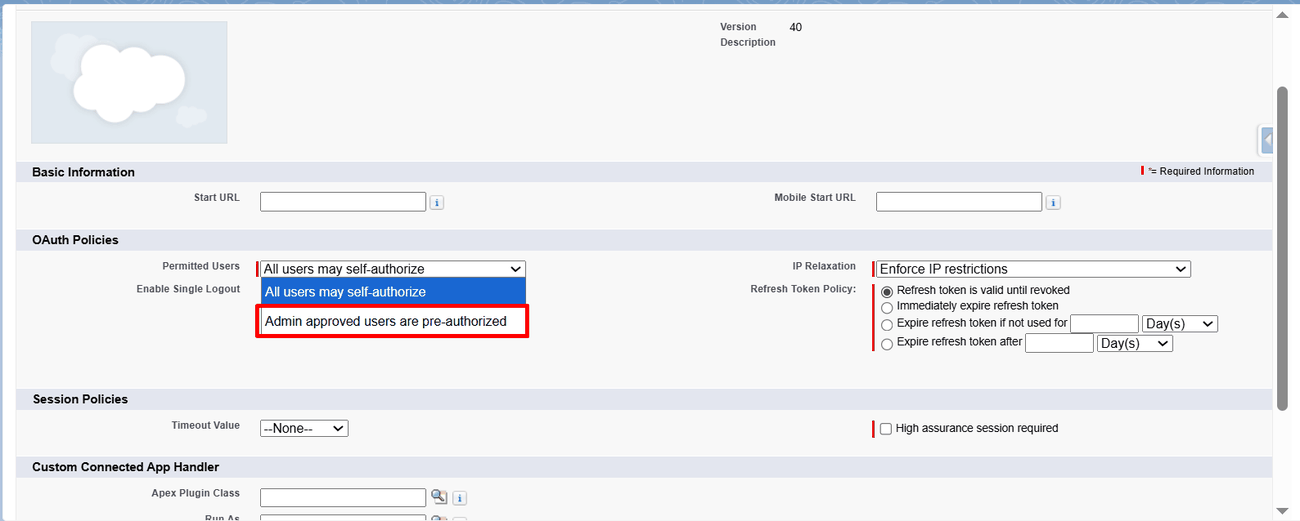
Step 15
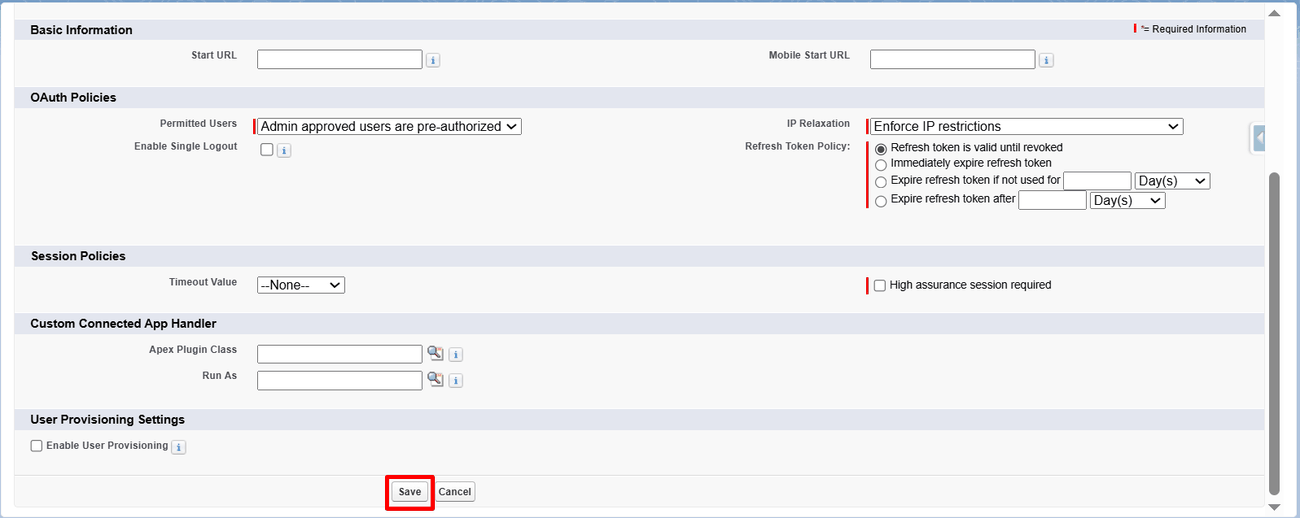
Pre-authorize admin approved users
Under Permitted Users, select Admin approved users are pre-authorized, then save the settings.
Step 16
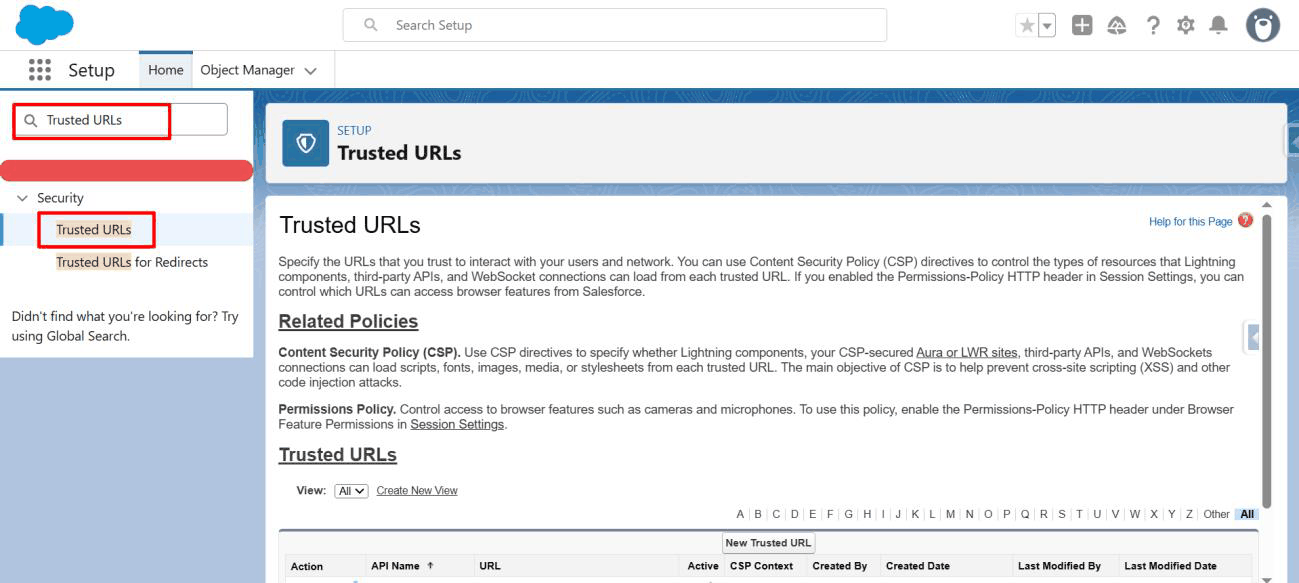
Open Trusted URLs
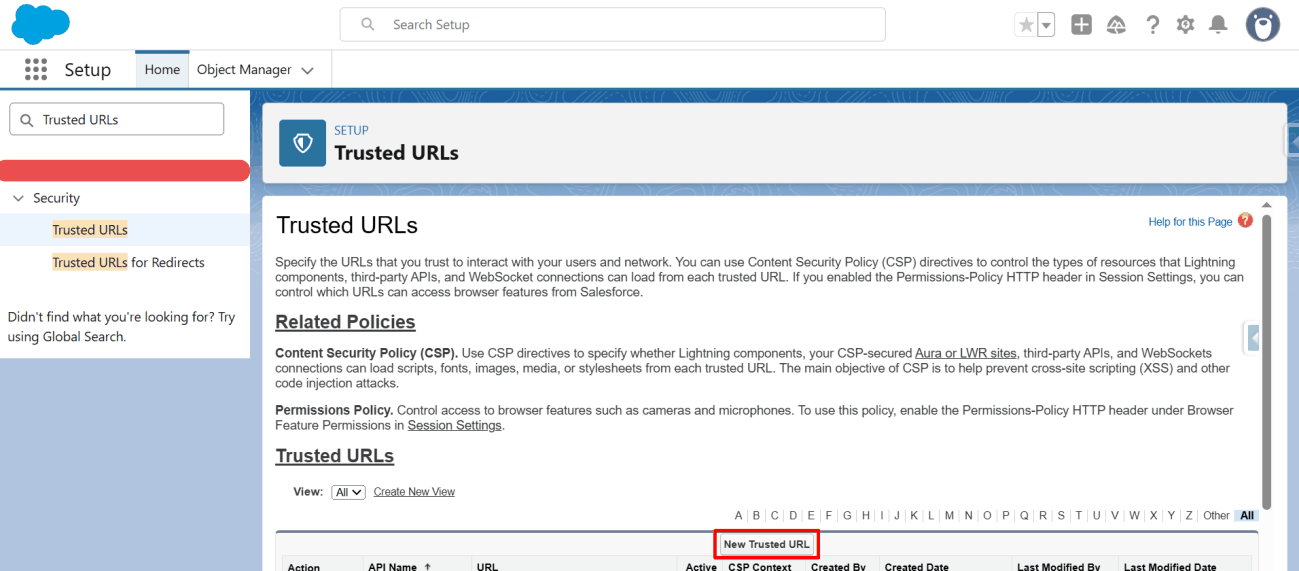
Go back to the Setup search box, search for Trusted URLs, and open it.
Step 17
Create a new trusted URL
Click New Trusted URL.
Step 18
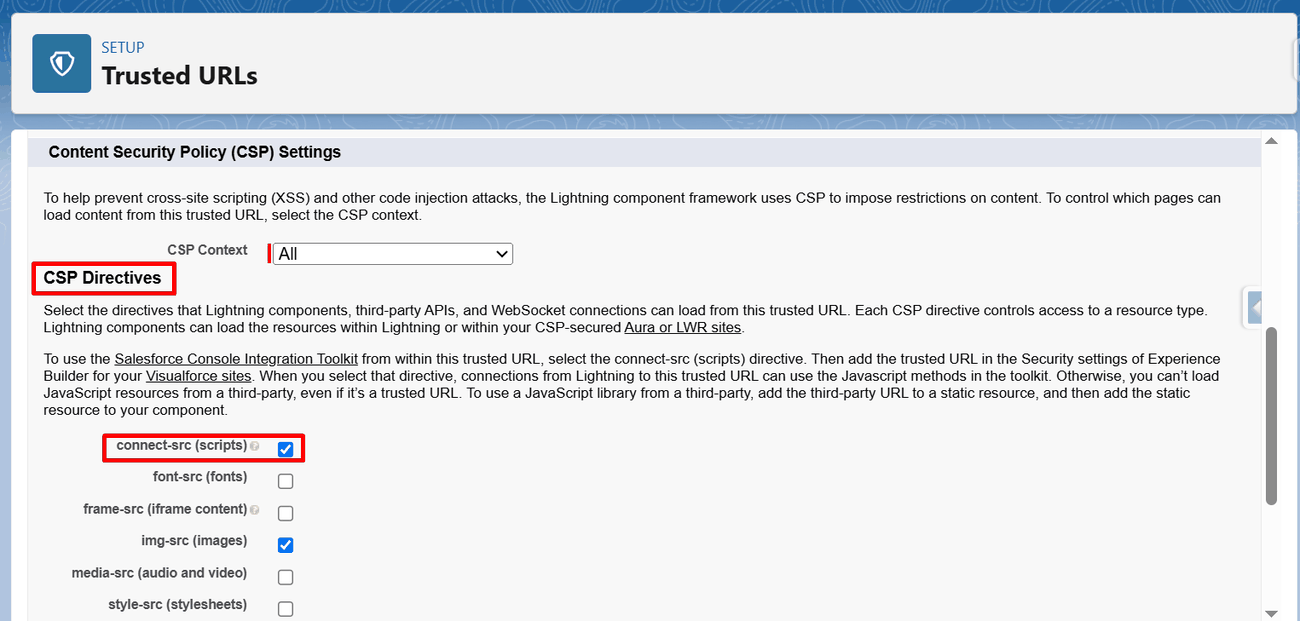
Fill in the URL and CSP directives
Enter the API name and URL below, scroll down to the CSP Directives section, tick connect-src (scripts), and click Save.
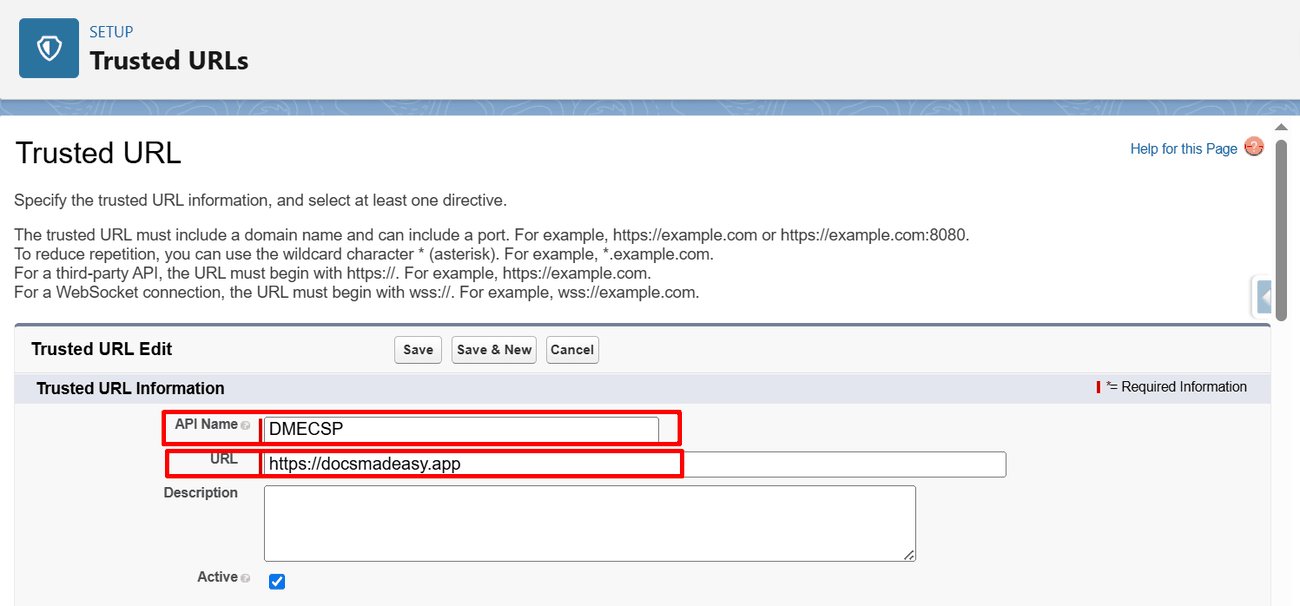
API Name
DMECSP
URL
https://docsmadeasy.app
Was this article helpful?
That’s Great!
Thank you for your feedback
Sorry! We couldn't be helpful
Thank you for your feedback
Feedback sent
We appreciate your effort and will try to fix the article