Here are the steps to create a Receipt in Salesforce in just a minute.
Step 1: First, log in to Salesforce using your credentials to access your org.
Step 2: Now, open Docs Made Easy from the App Launcher.
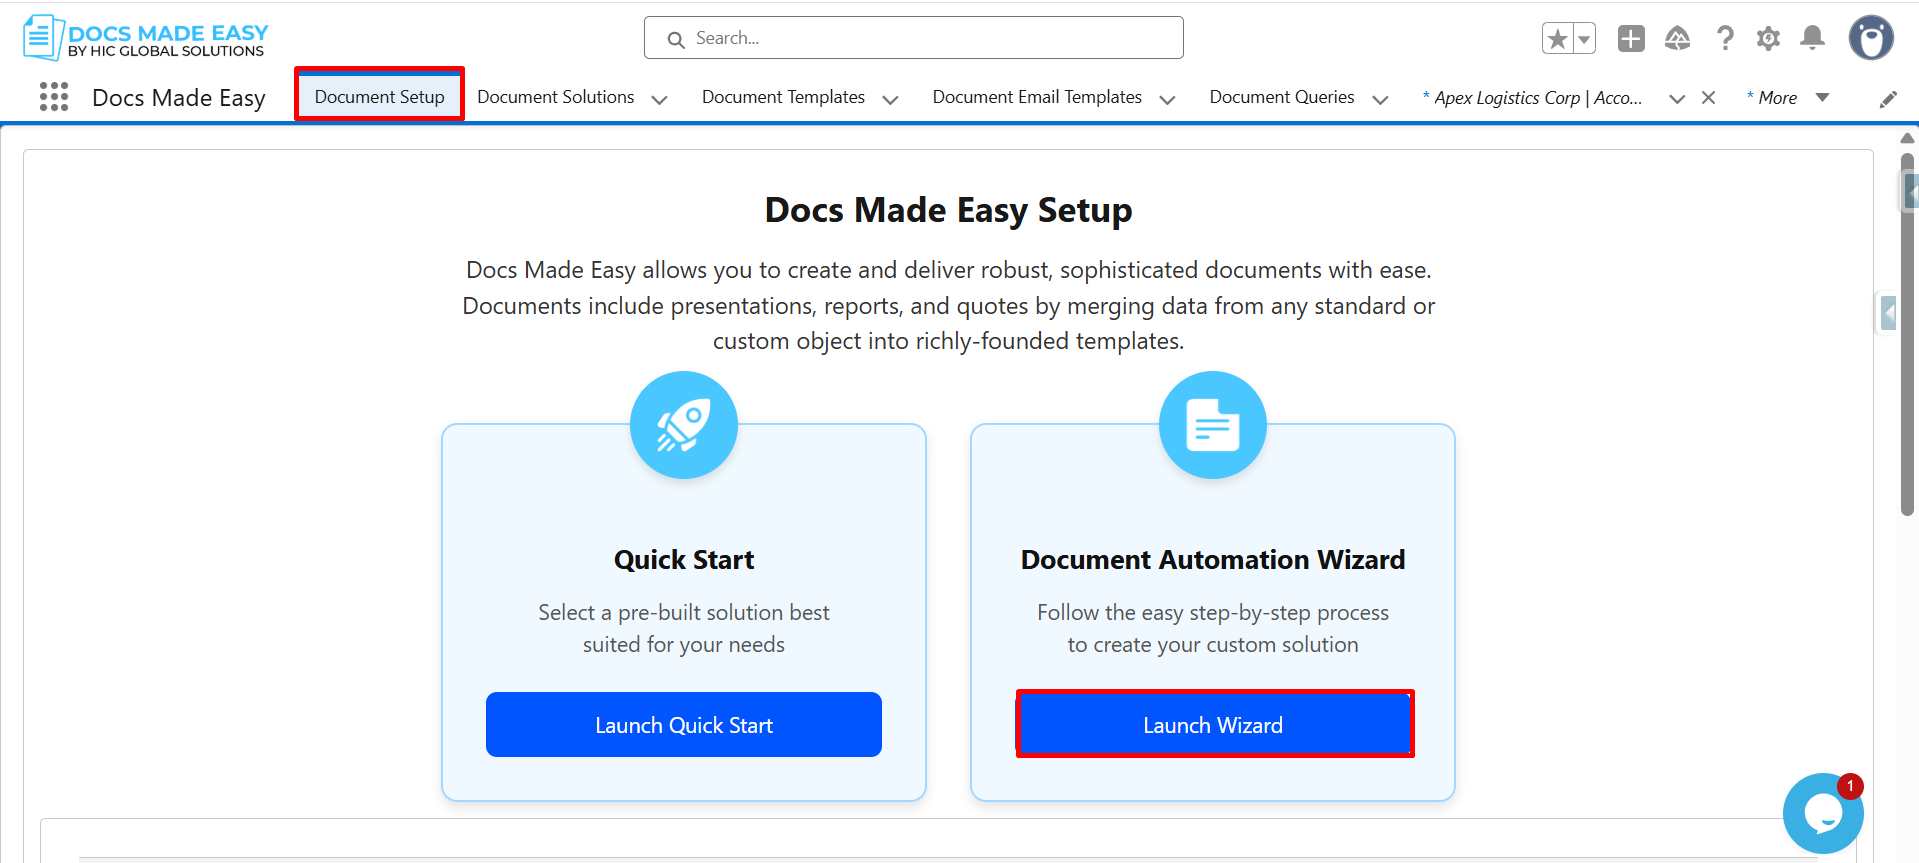
Step 3: Next, click on Document Setup and then click on Launch Wizard to start the process.
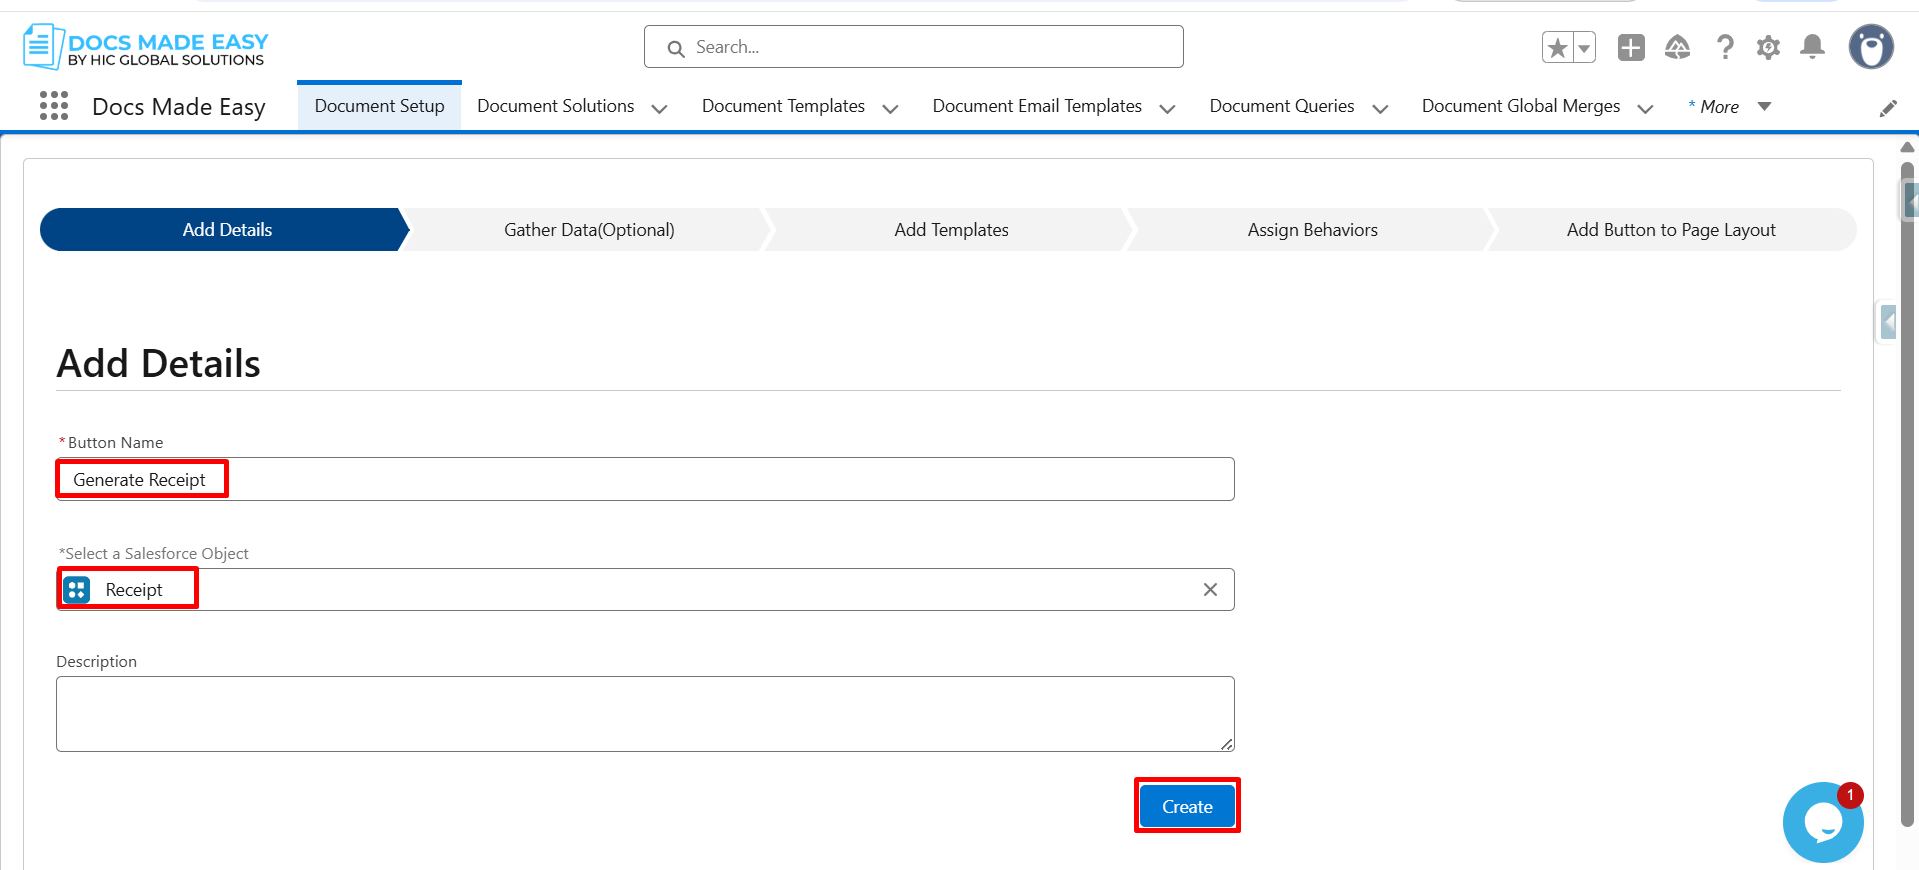
Step 4: Enter the Button Name, select the Salesforce object (Receipt), and click on Create.
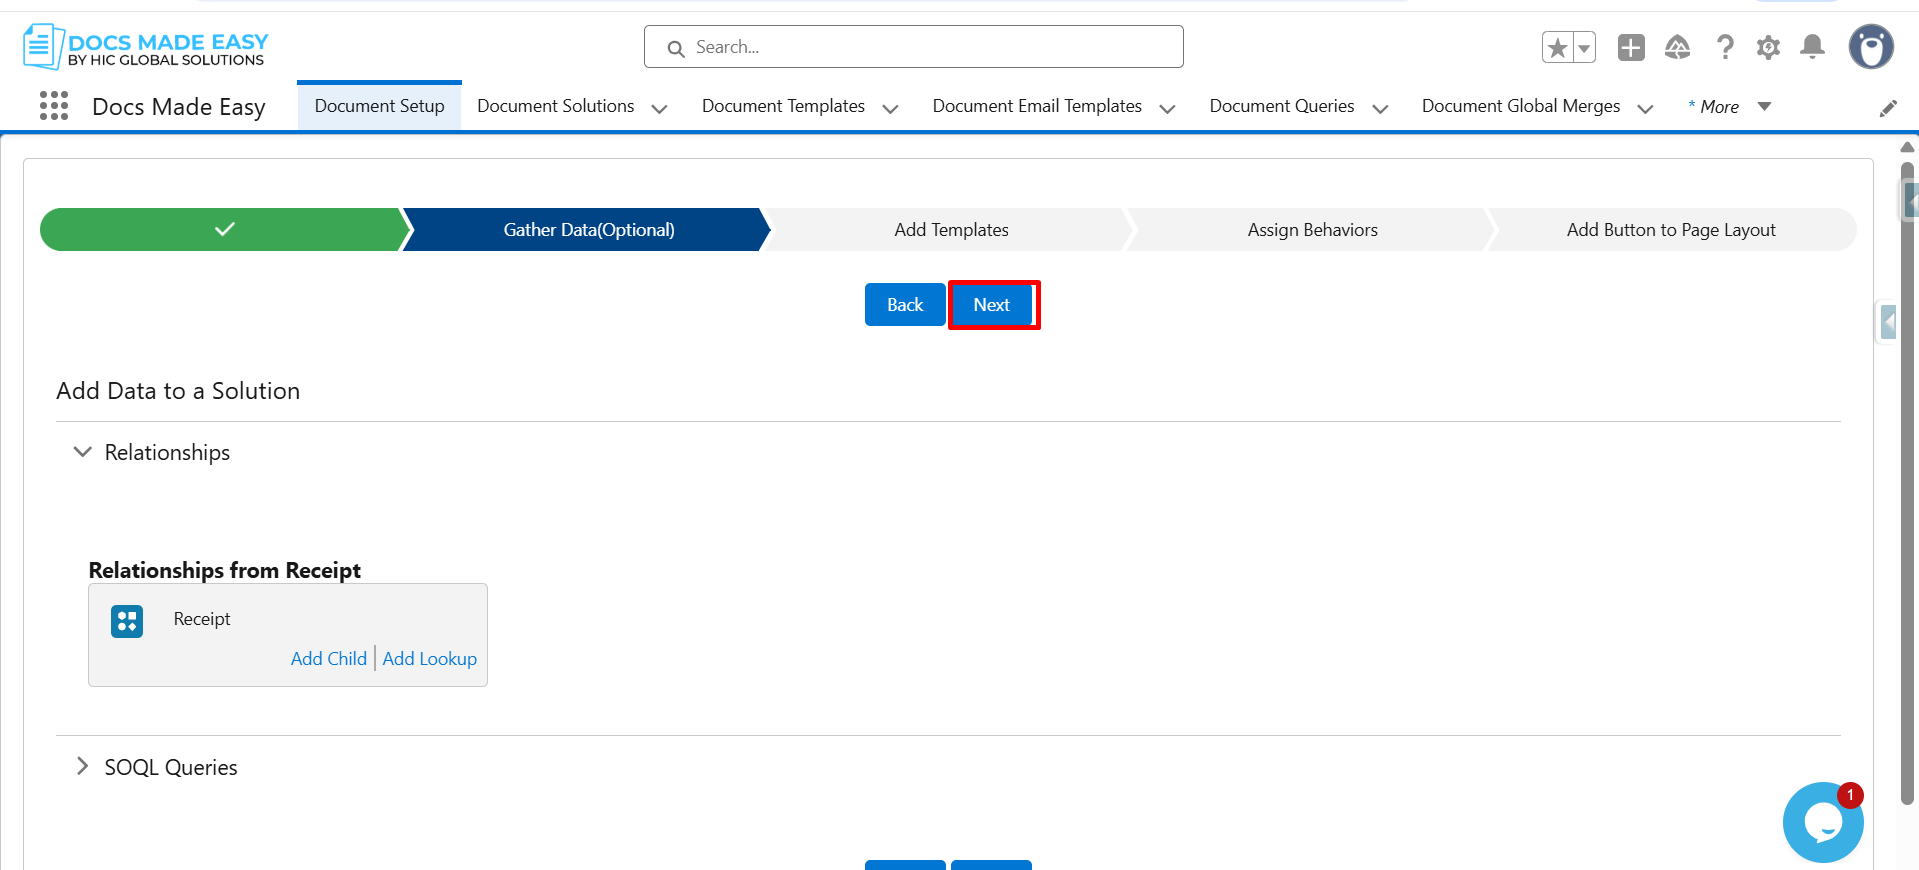
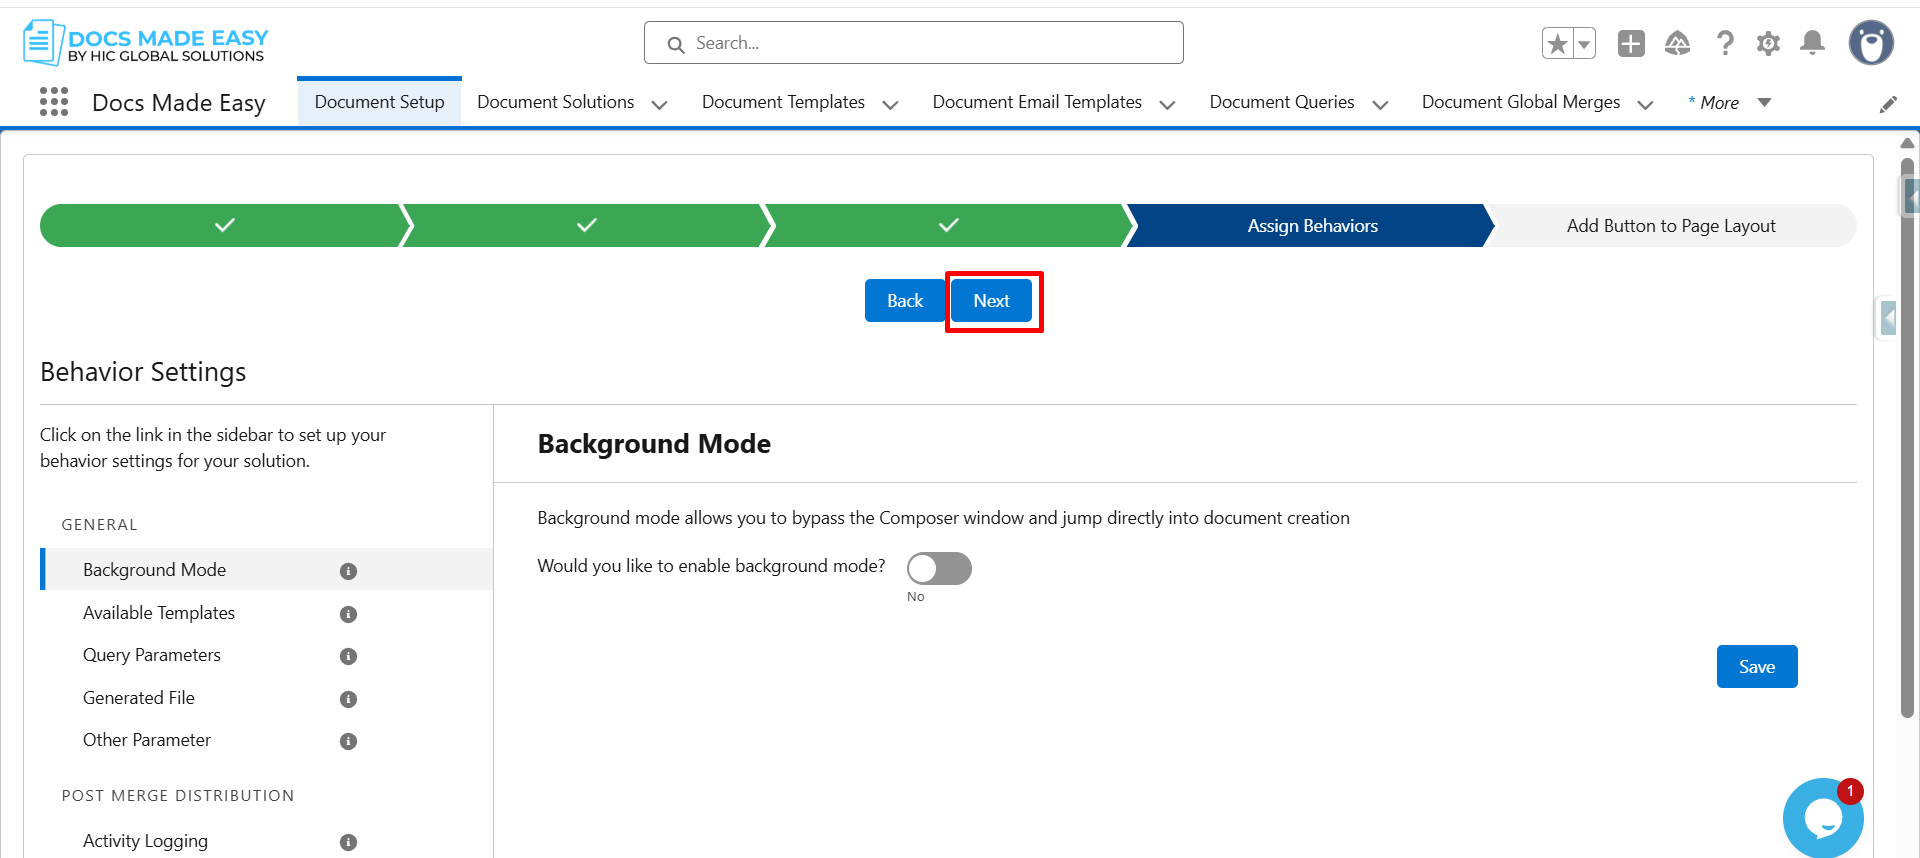
Step 5: After that, click on Next to proceed further.
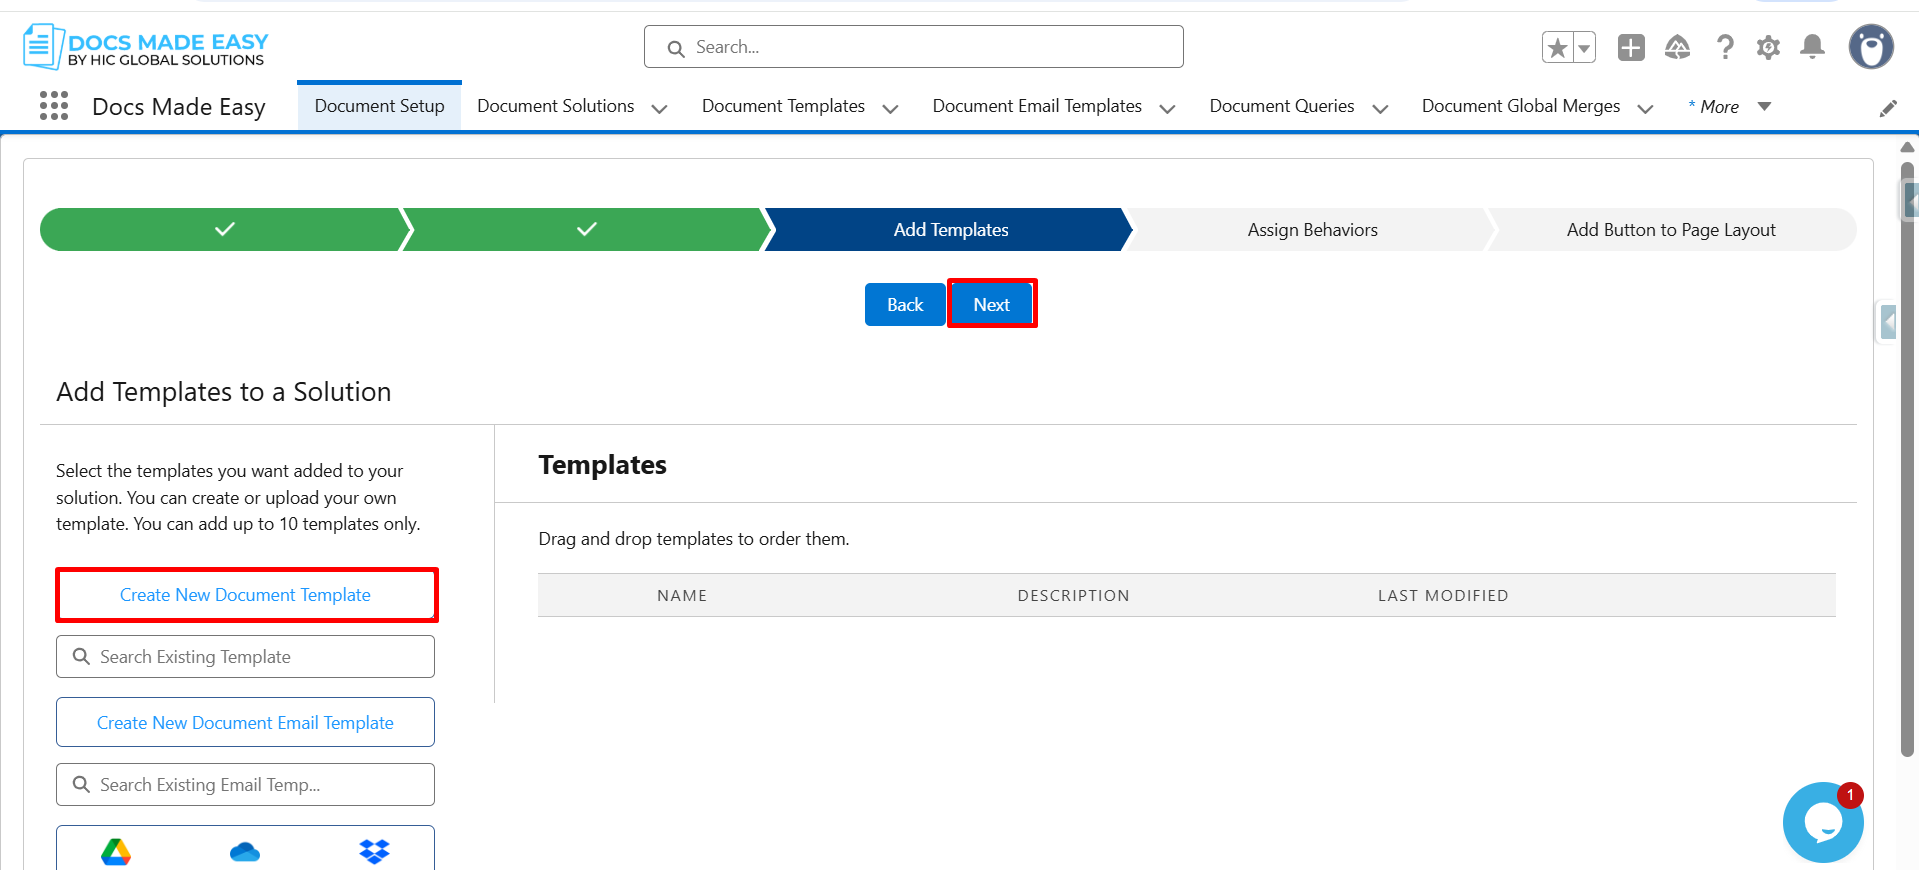
Step 6: Again, click on Next to move to the template configuration section.
Step 7: Now, open the Merge Field Helper so you can insert dynamic fields into your template.
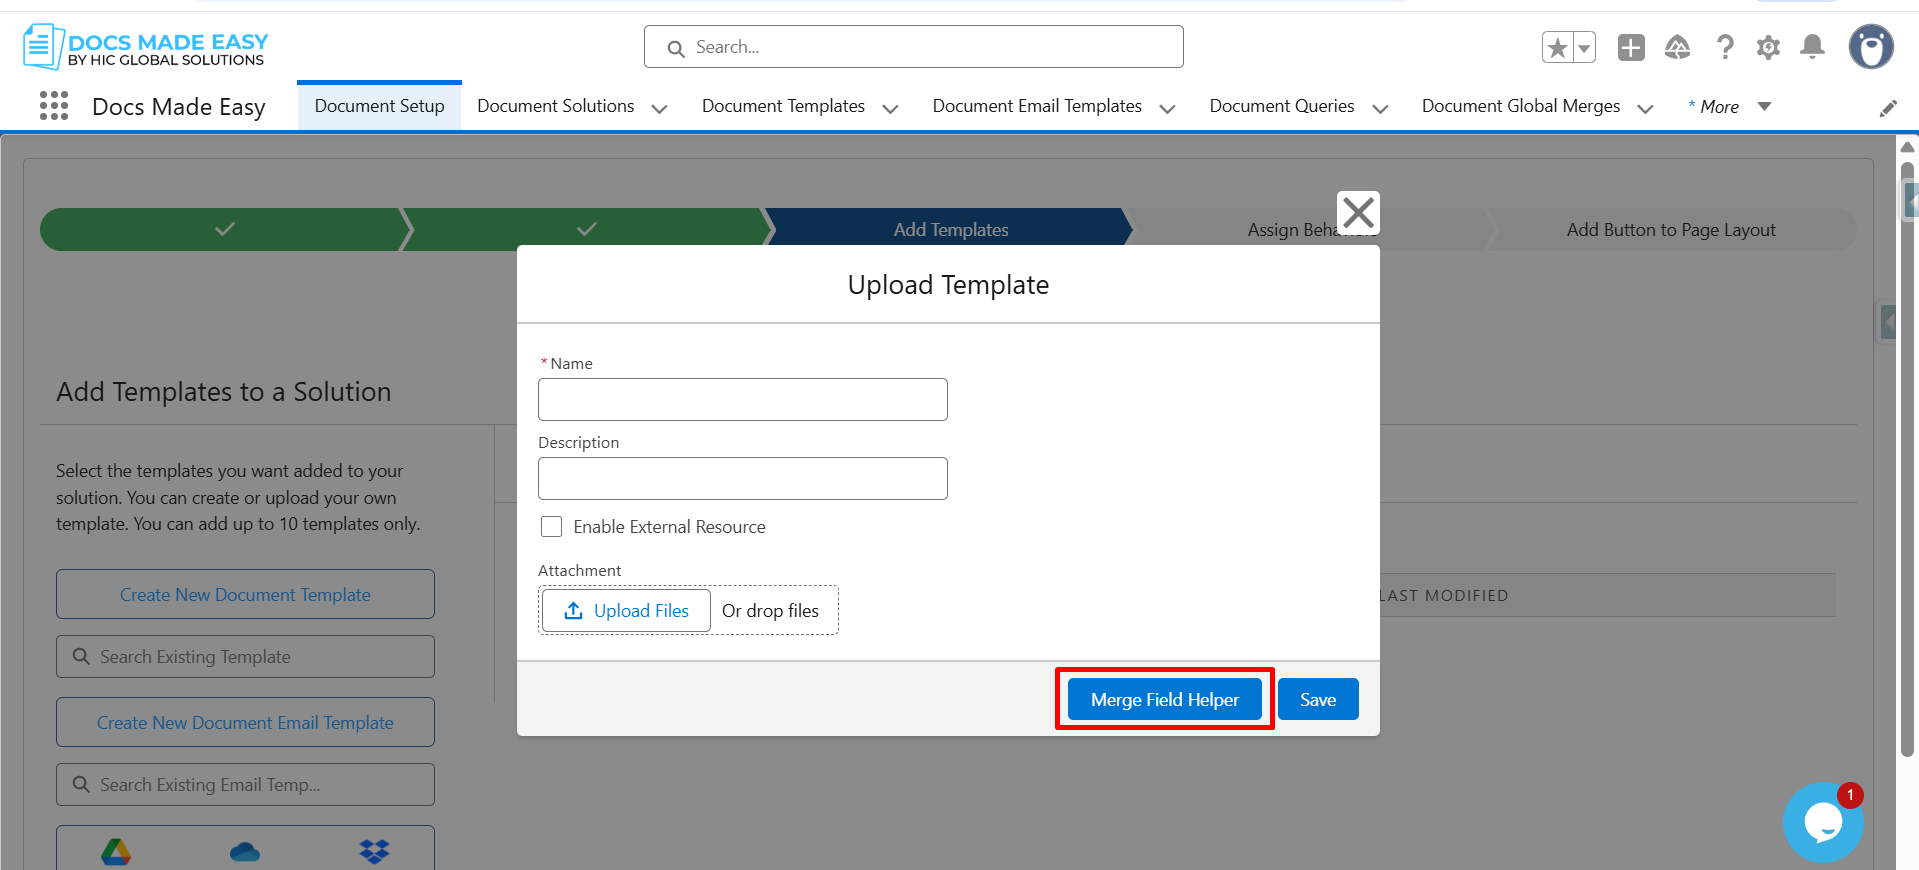
Step 8: Click on Insert Field, select Created Date, and then click Copy to Clipboard to copy the merge field {{Receipt__c.CreatedDate}}.
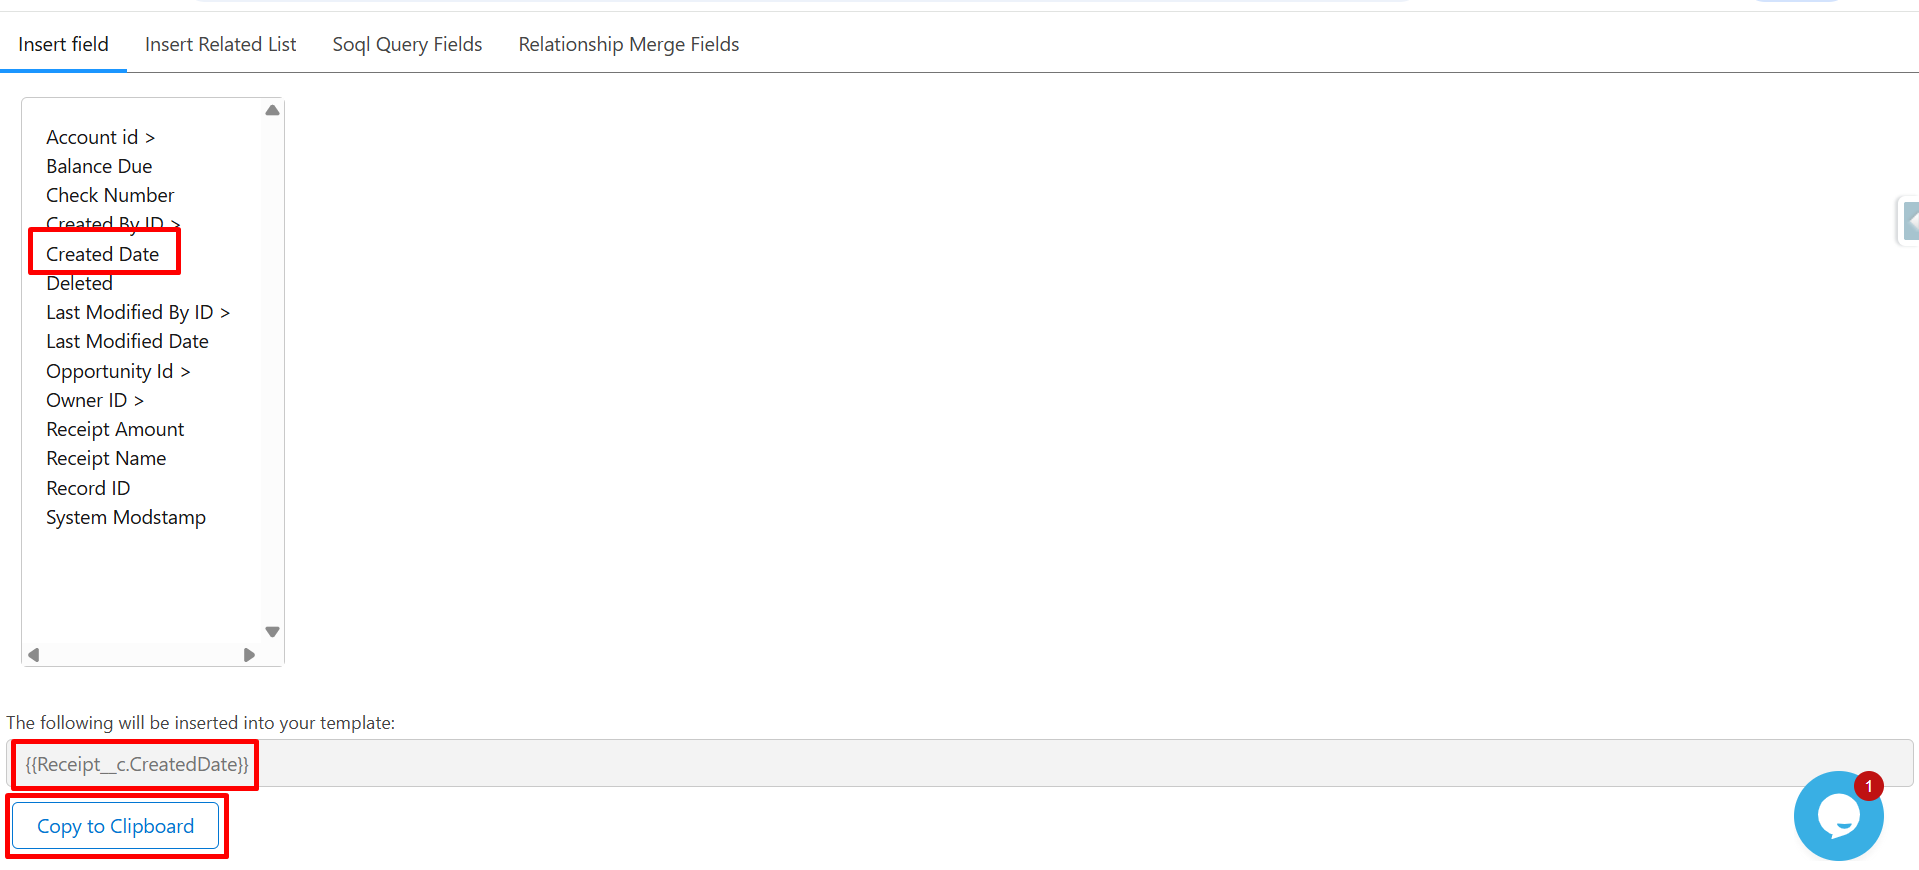
Step 9: Select Account Id to access Account-related fields.
● Select Billing City.
● Verify that the merge field appears in the preview section as {{Receipt__c.Account__r.BillingCity}}.
● Click Copy to Clipboard to copy the merge field.
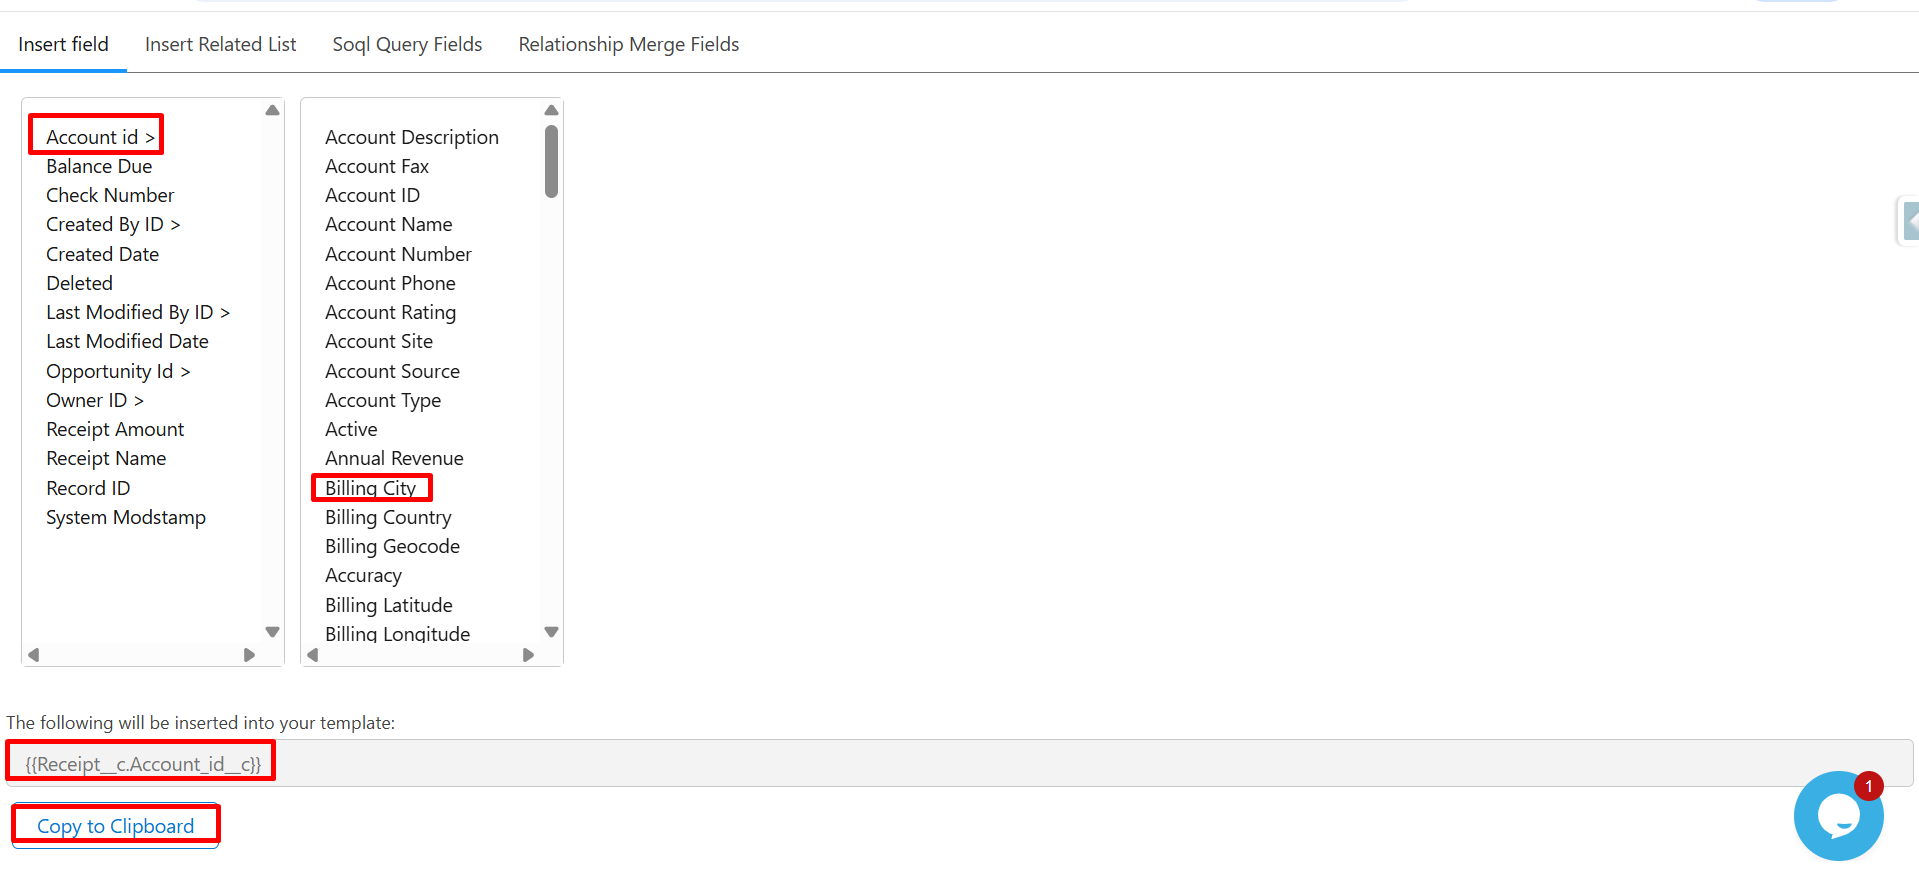
Step 10: Select the Opportunity Id to view Opportunity-related fields.
● From the Opportunity field list, select Amount.
● Verify that the merge field appears in the preview section as {{Receipt__c.Opportunity__r.Amount}}.
● Click Copy to Clipboard to copy the merge field.
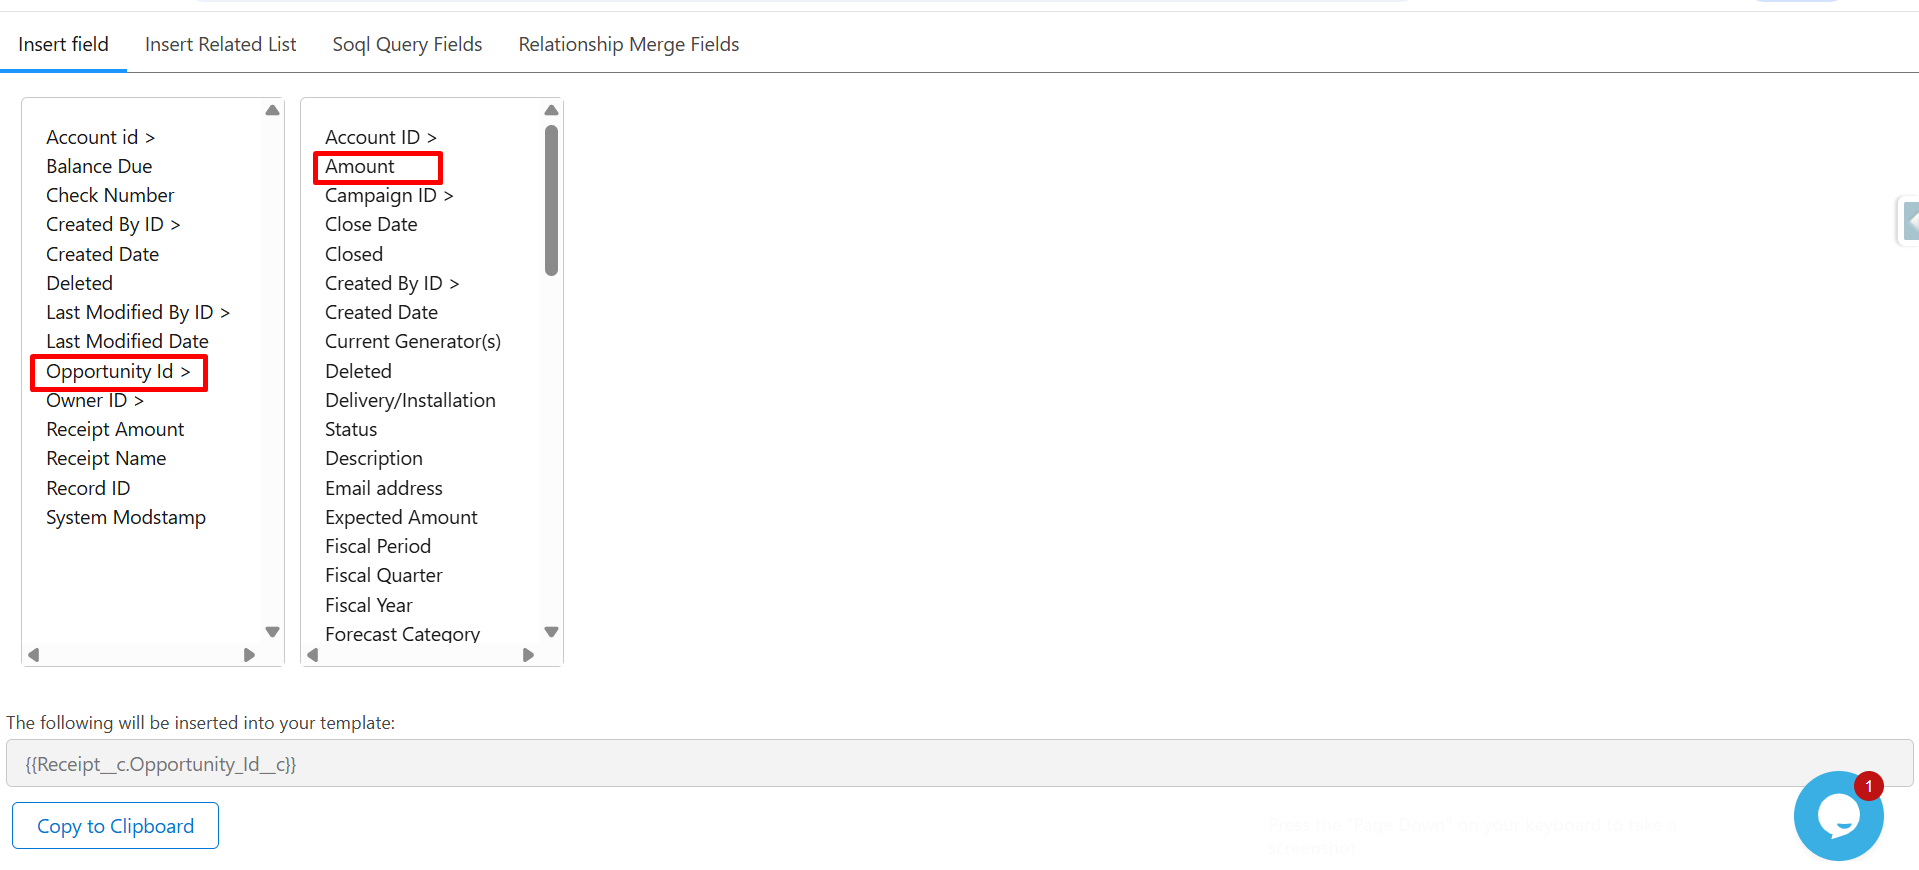
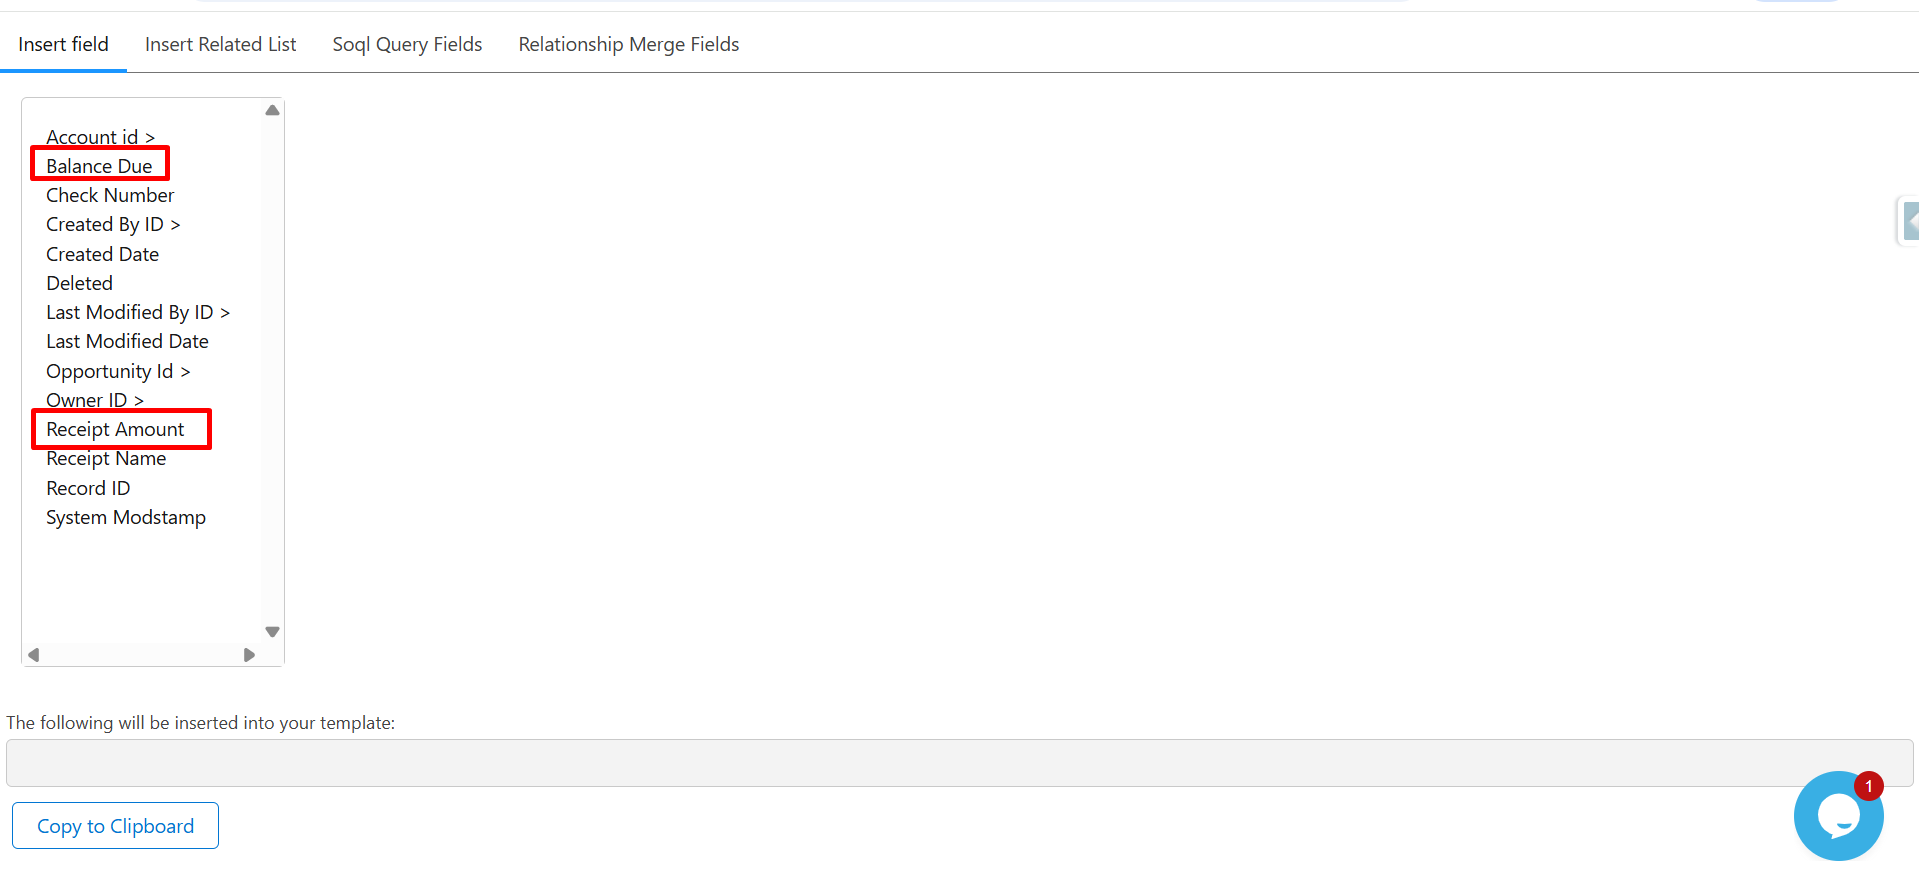
Step 11: Click on Balance Due and Receipt Amount, and then click Copy to Clipboard to copy their merge syntax.
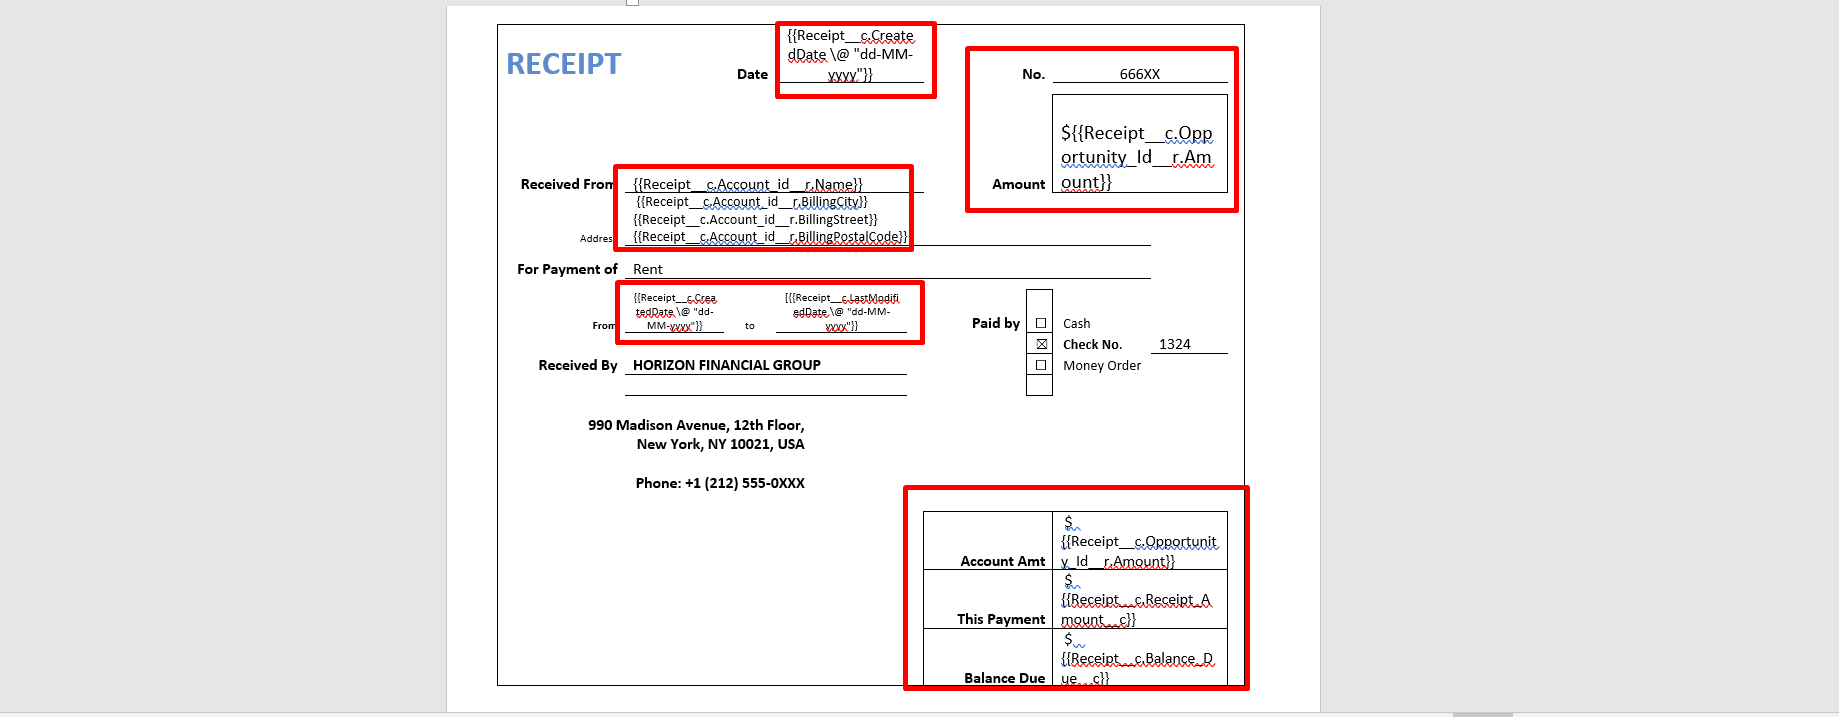
Step 12: Now, paste all the copied merge field syntax into the Template Editor.
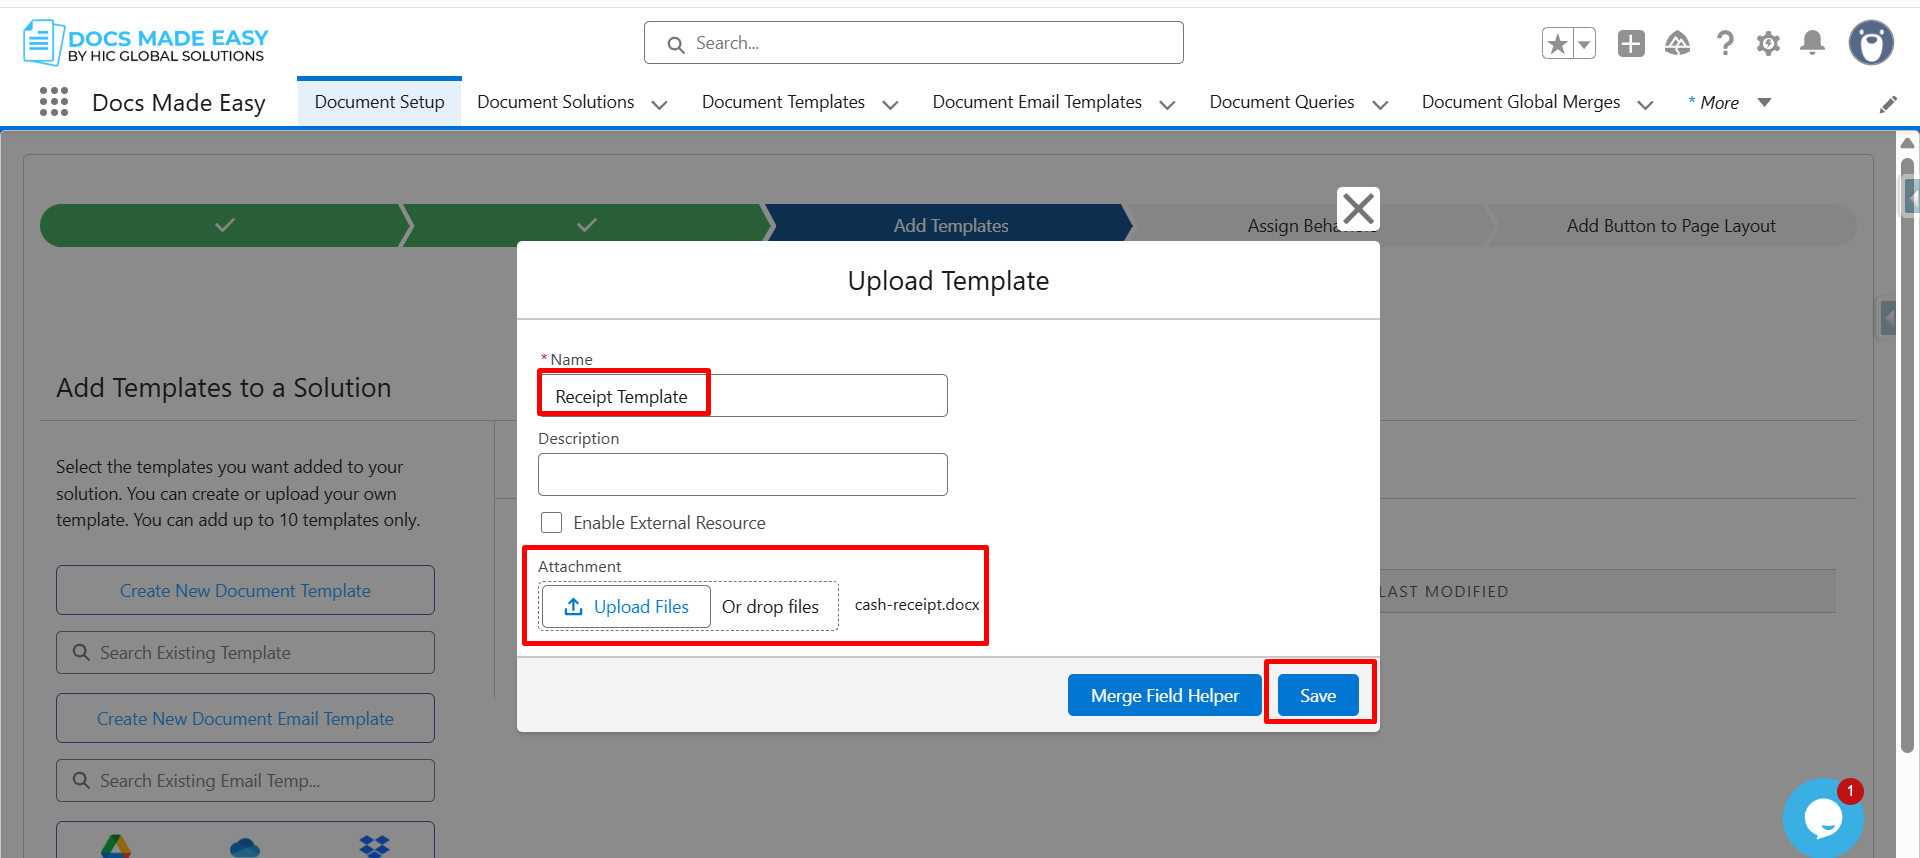
Step 13: Reopen the Upload Template window, enter the Template Name, upload the template file, and click Save.
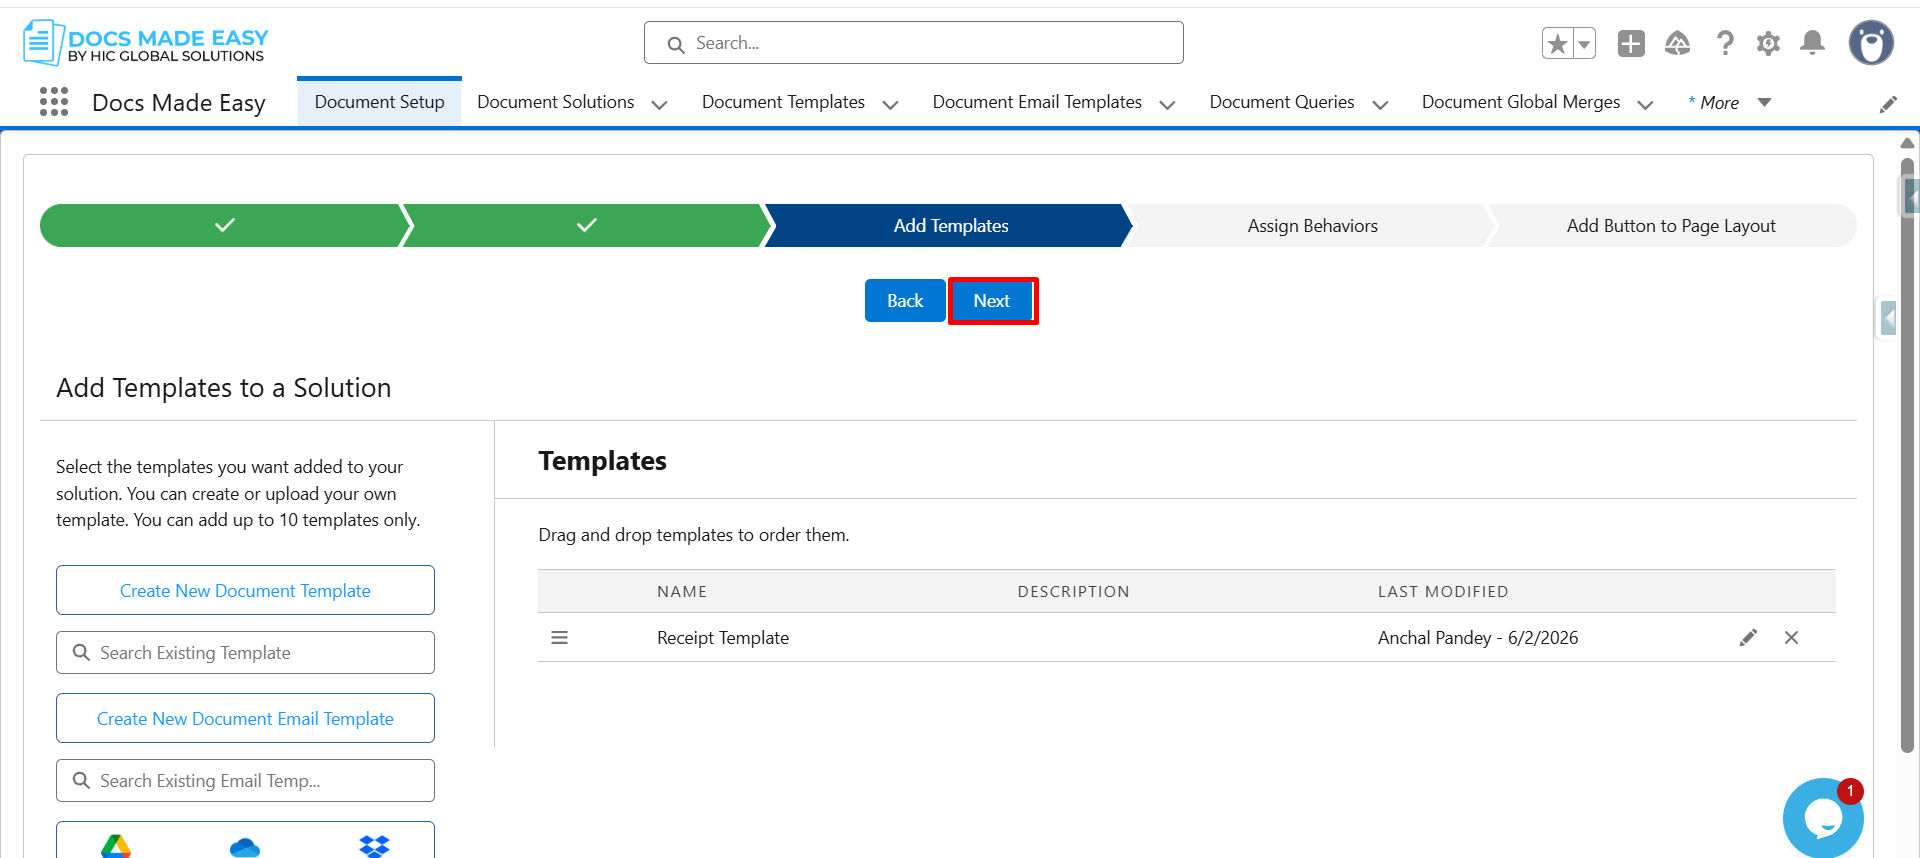
Step 14: Click on Next to continue.
Step 15: Again, click on Next to complete the wizard setup.
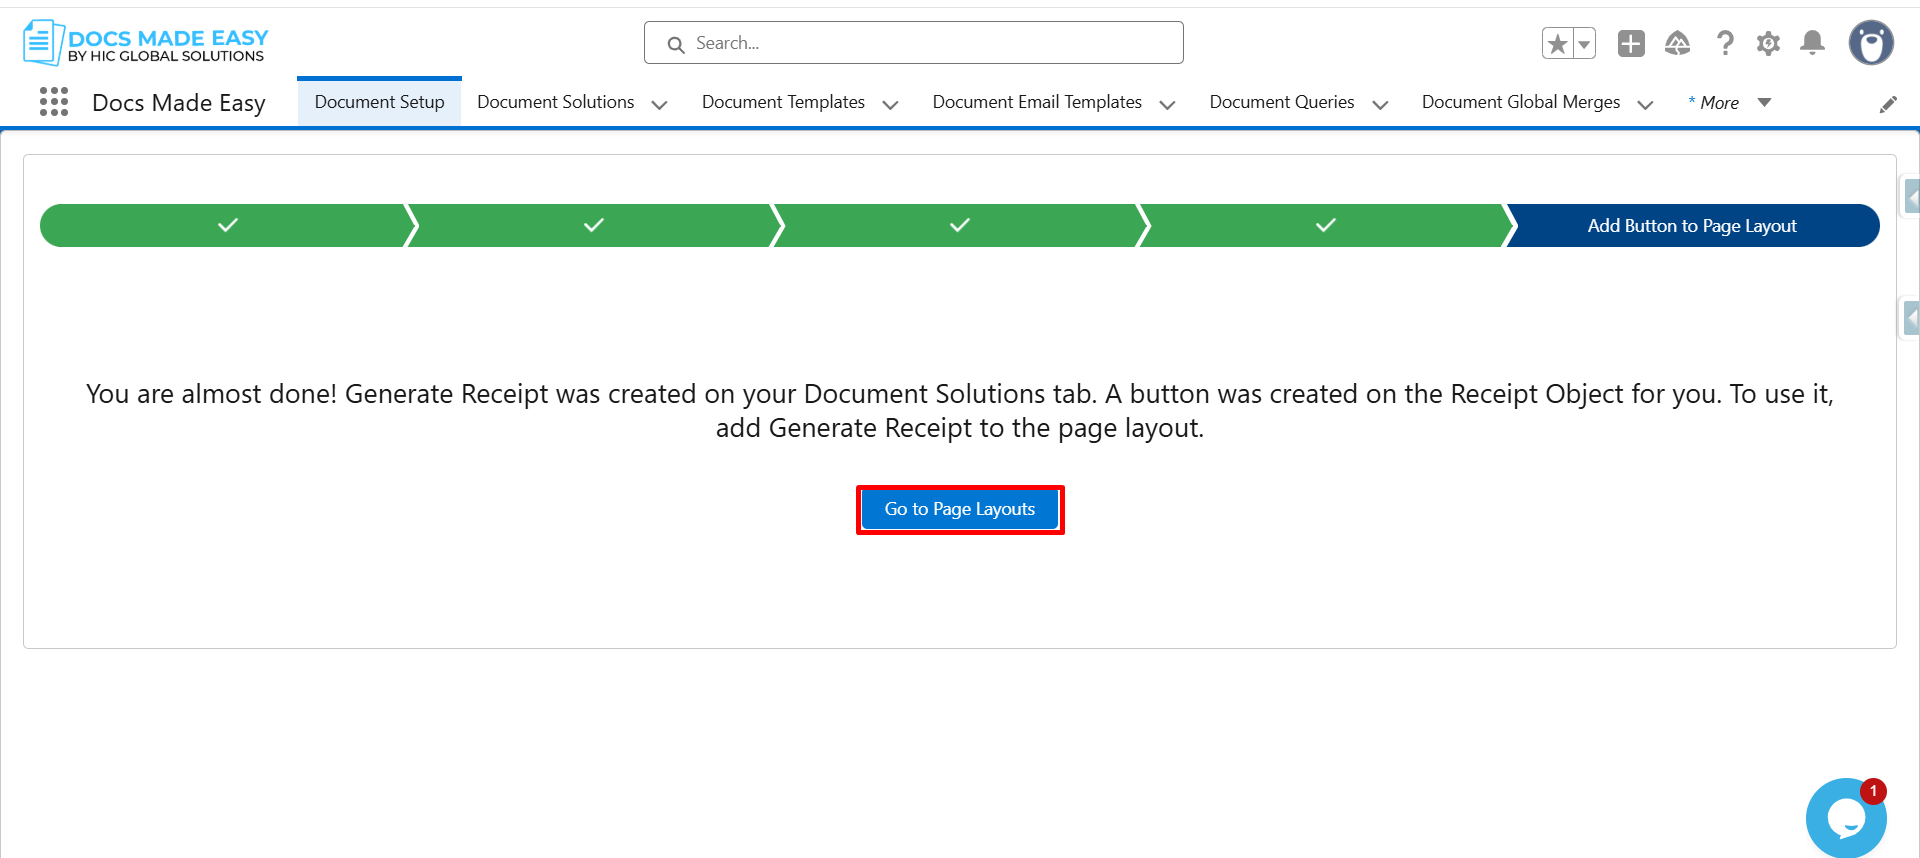
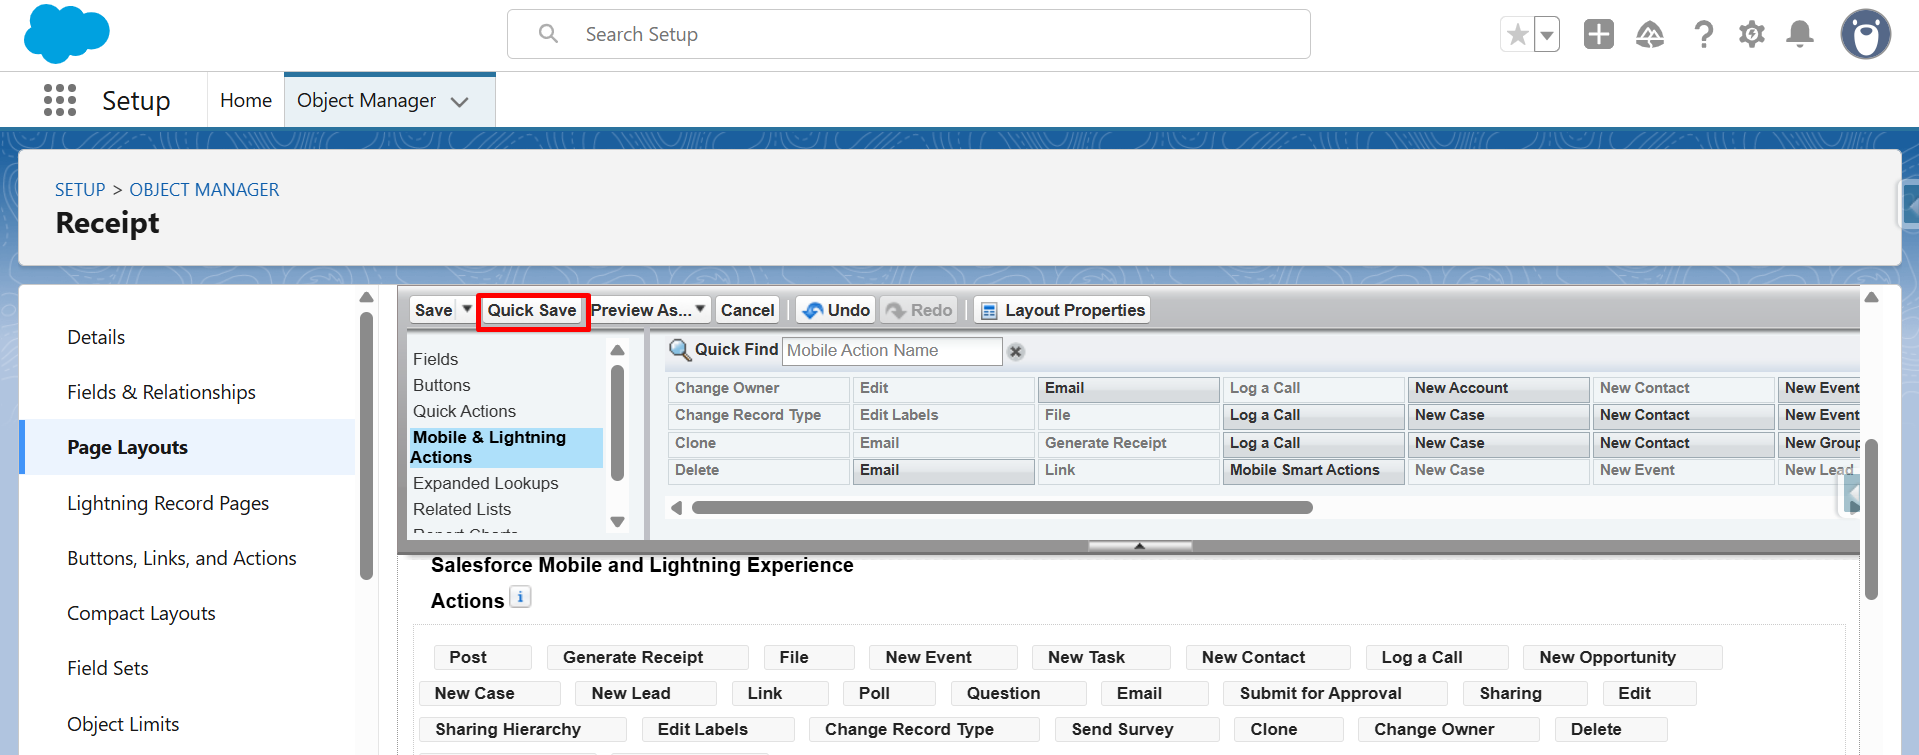
Step 16: Now, Go to Page Layout in the Salesforce setup.
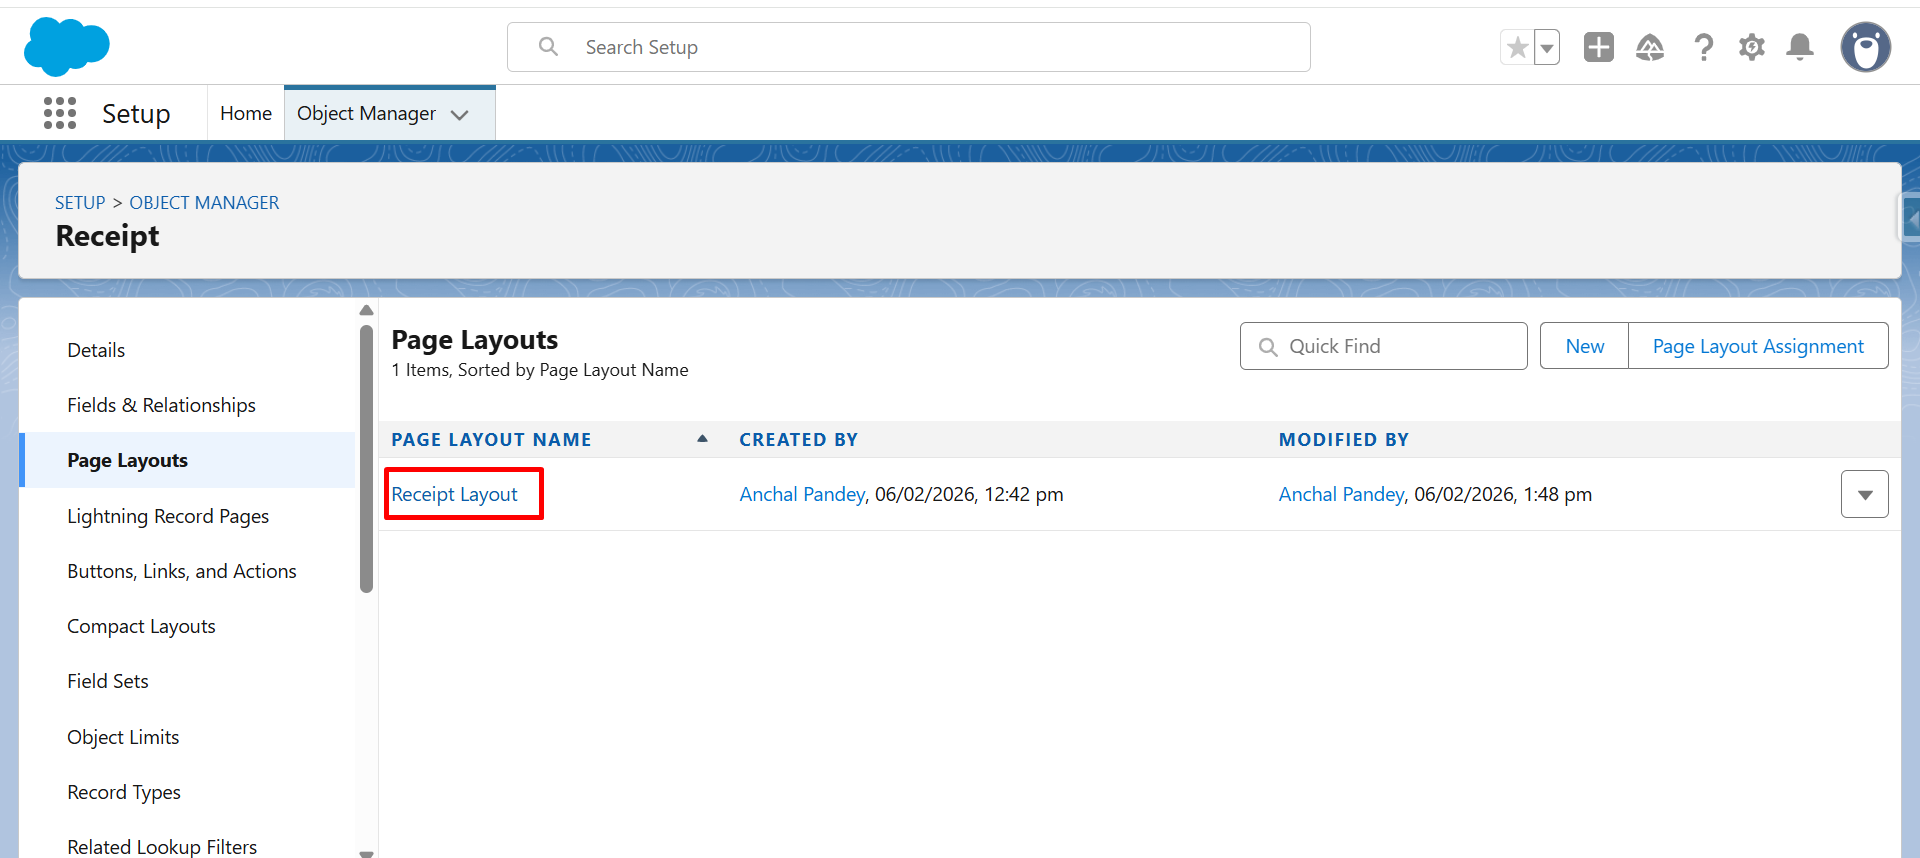
Step 17: Click on Receipt Layout.
Step 18: From Mobile & Lightning Actions, drag and drop the Generate Receipt button into the Salesforce Mobile and Lightning Experience Actions section.
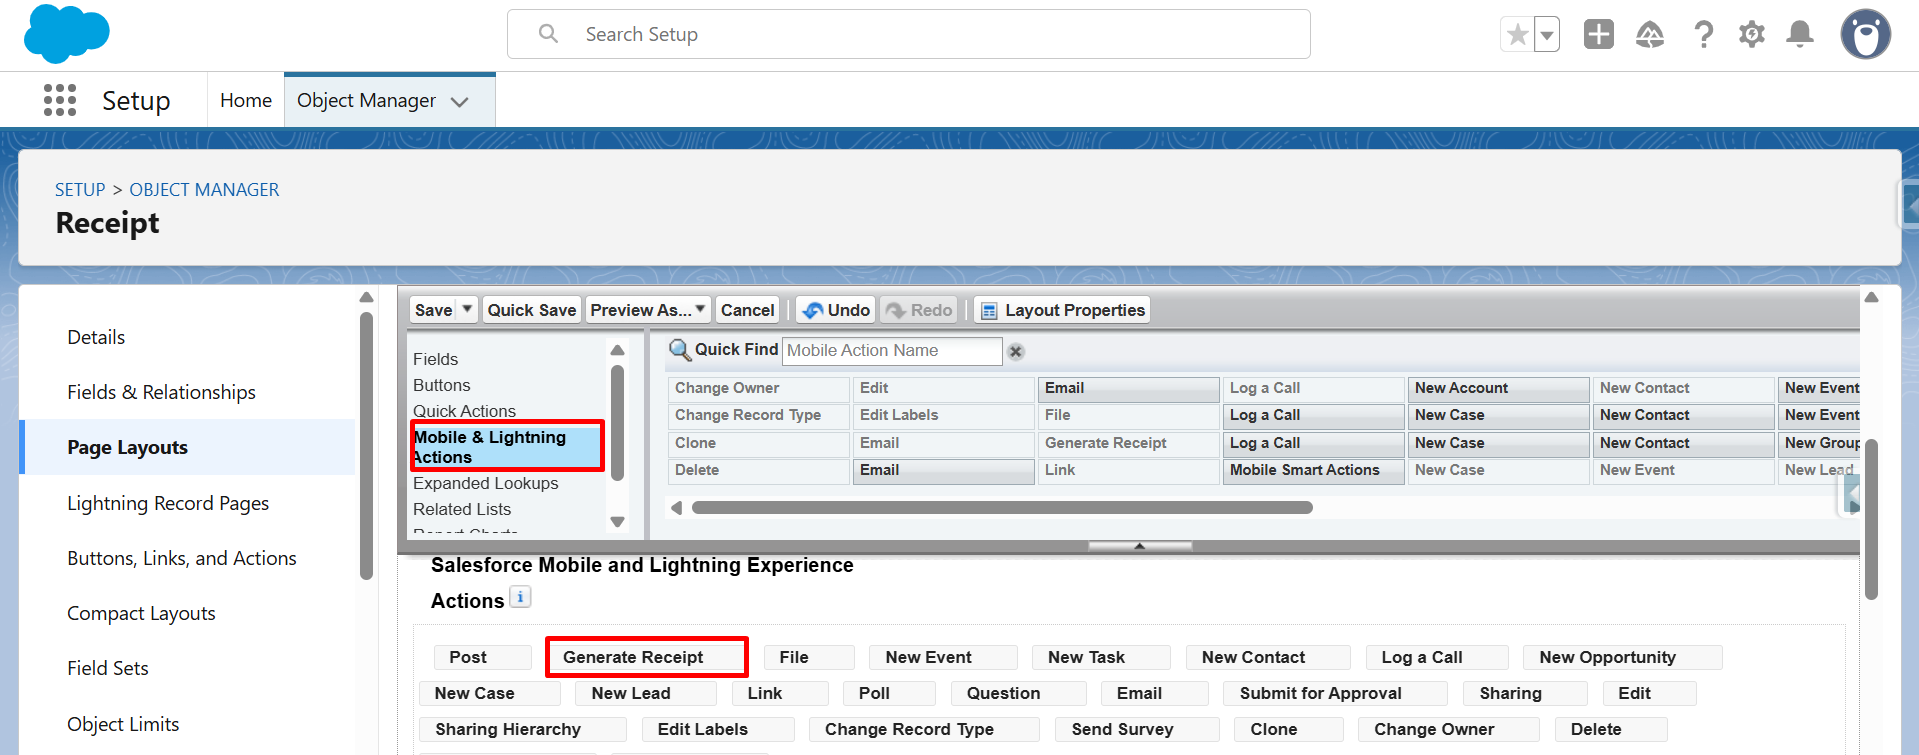
Step 19: Click on Quick Save to save the layout changes.
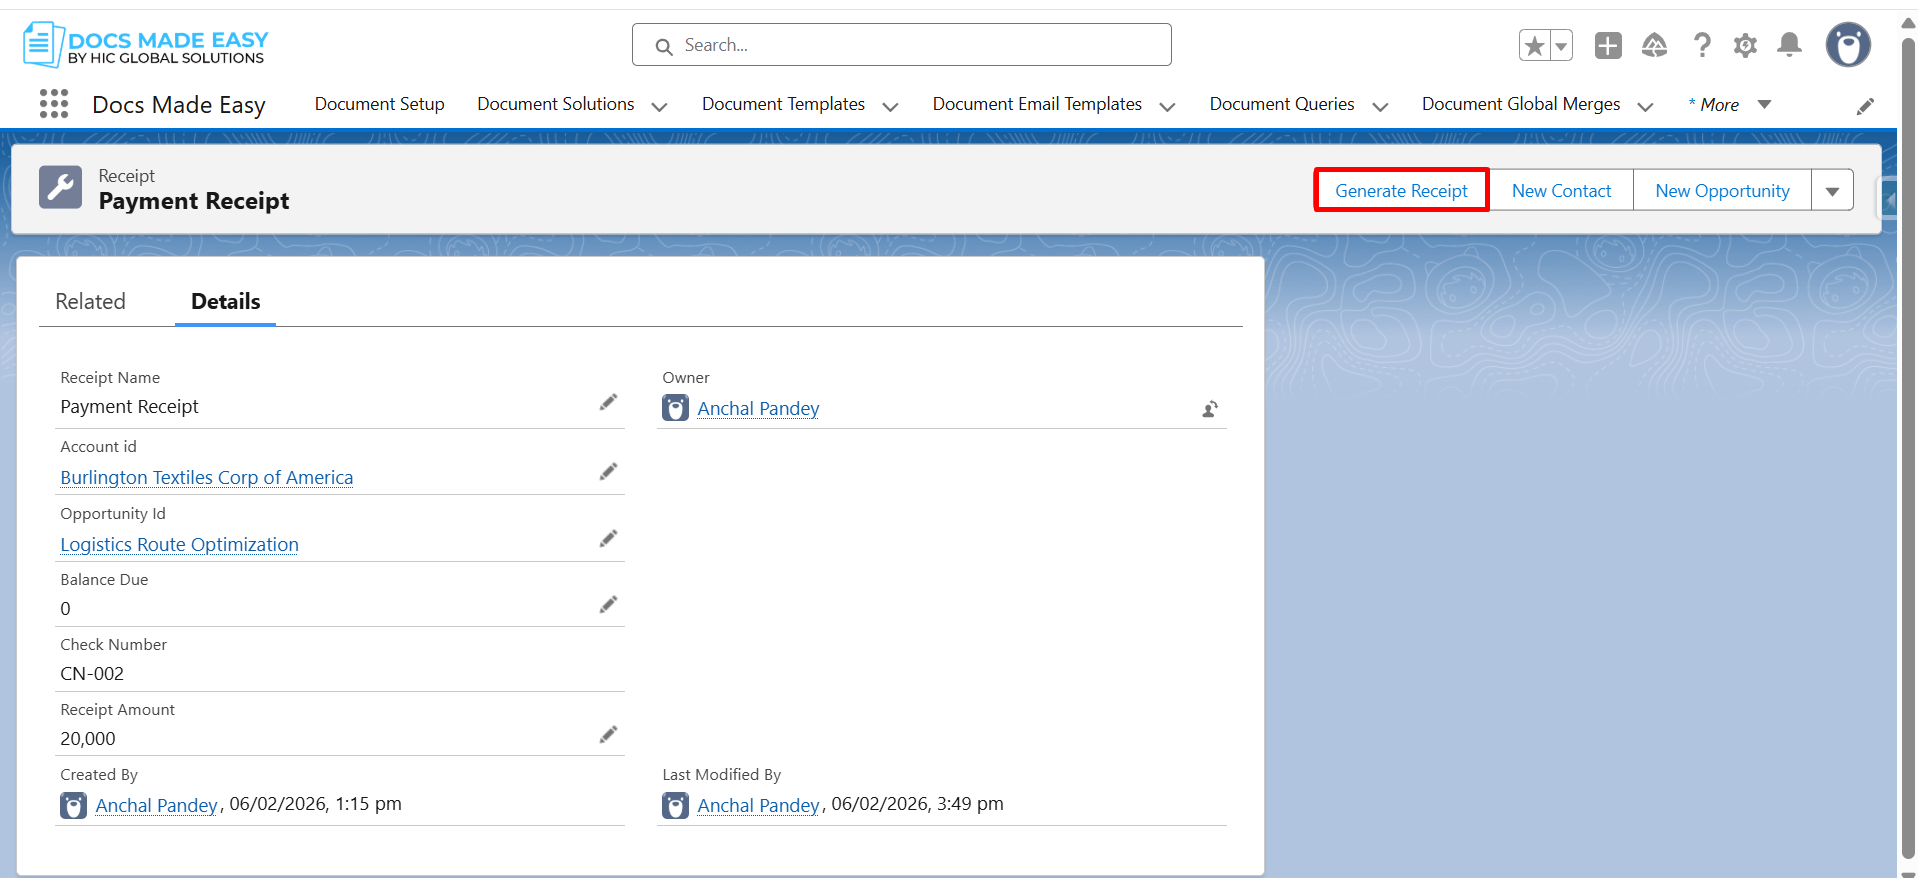
Step 20: Now, go to any Receipt Record and click on the button (Generate Receipt).
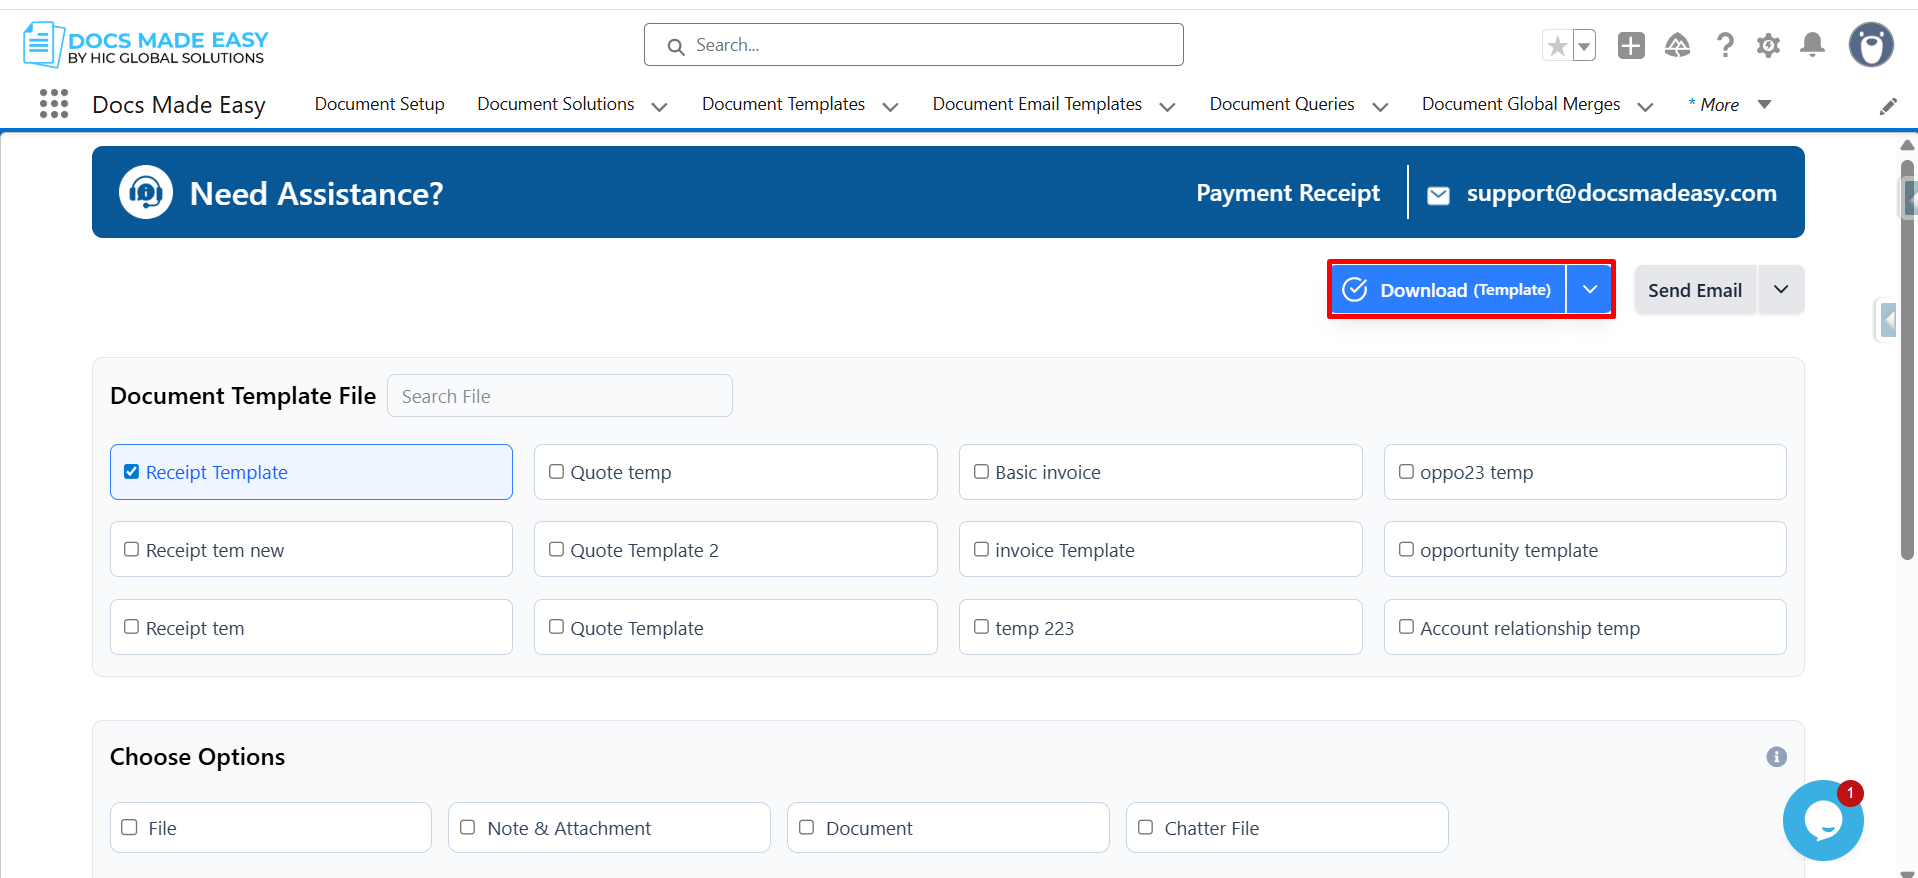
Step 21: Click on Download Template to proceed.
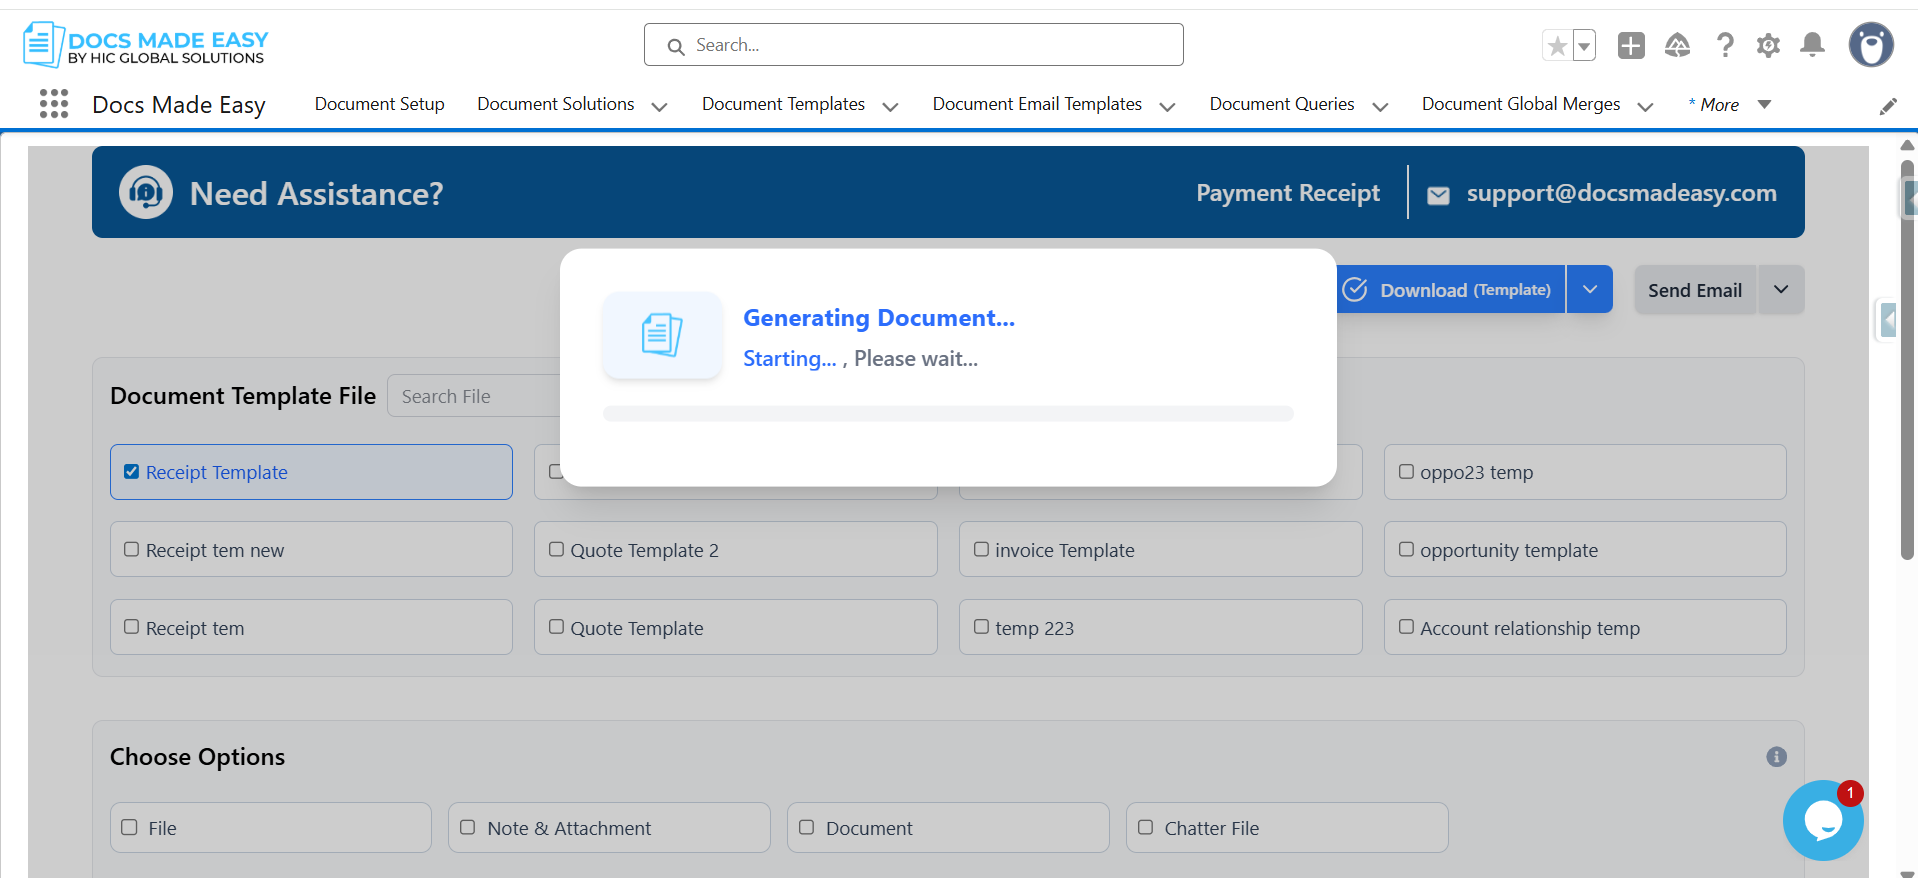
Step 22: The system will automatically start generating the Document.
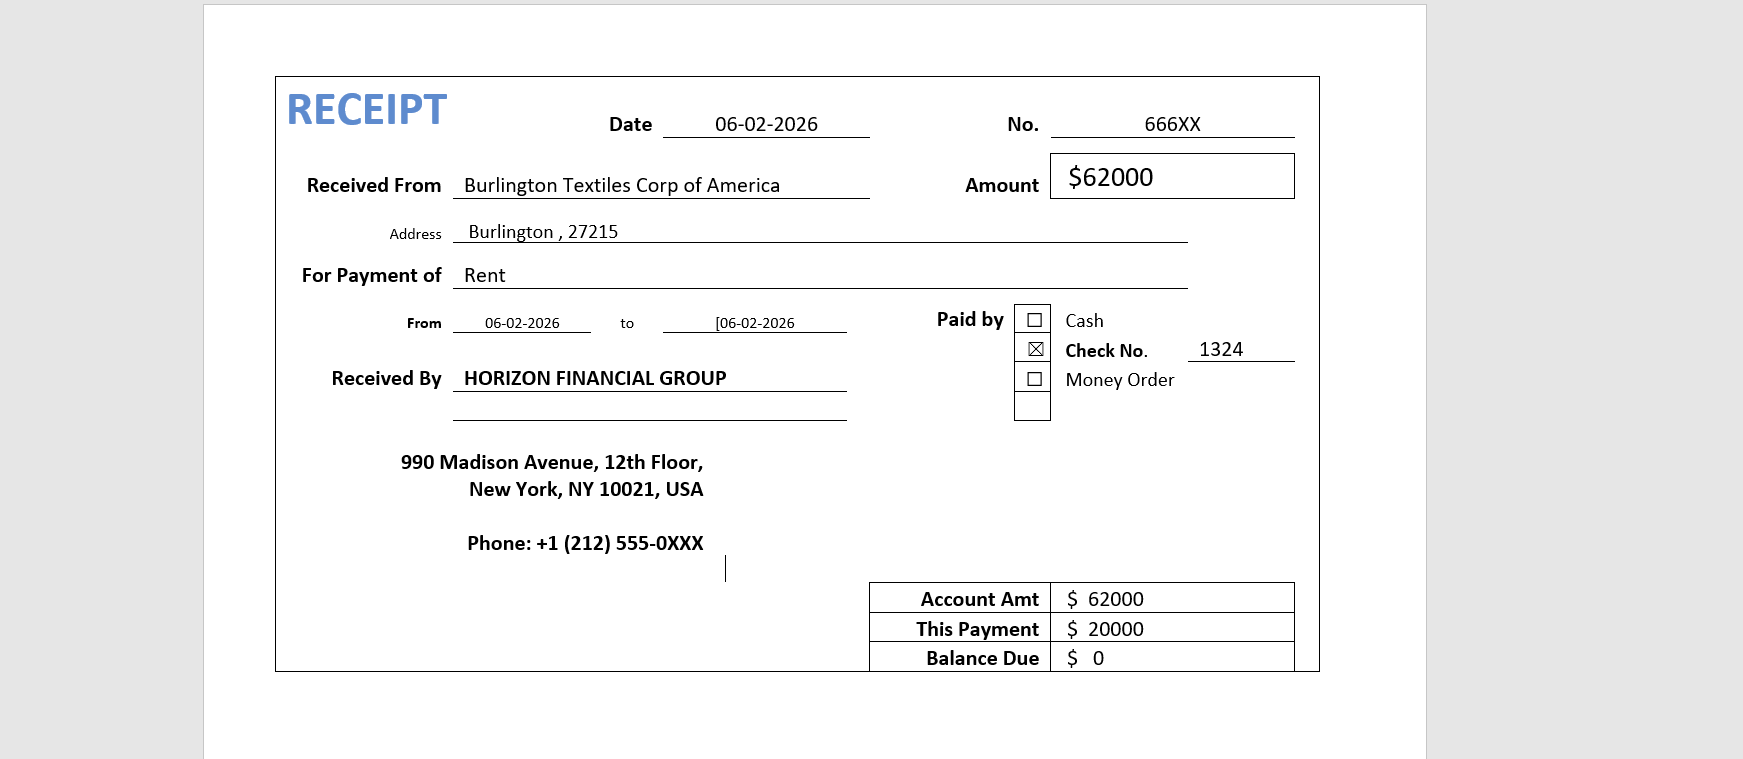
Step 23: Finally, open the Generated Document to review your receipt.
Thank You
Was this article helpful?
That’s Great!
Thank you for your feedback
Sorry! We couldn't be helpful
Thank you for your feedback
Feedback sent
We appreciate your effort and will try to fix the article