Let’s check out the steps:
Step 1: Login to Salesforce.
Step 2: Open Docs Made Easy from the App launcher.
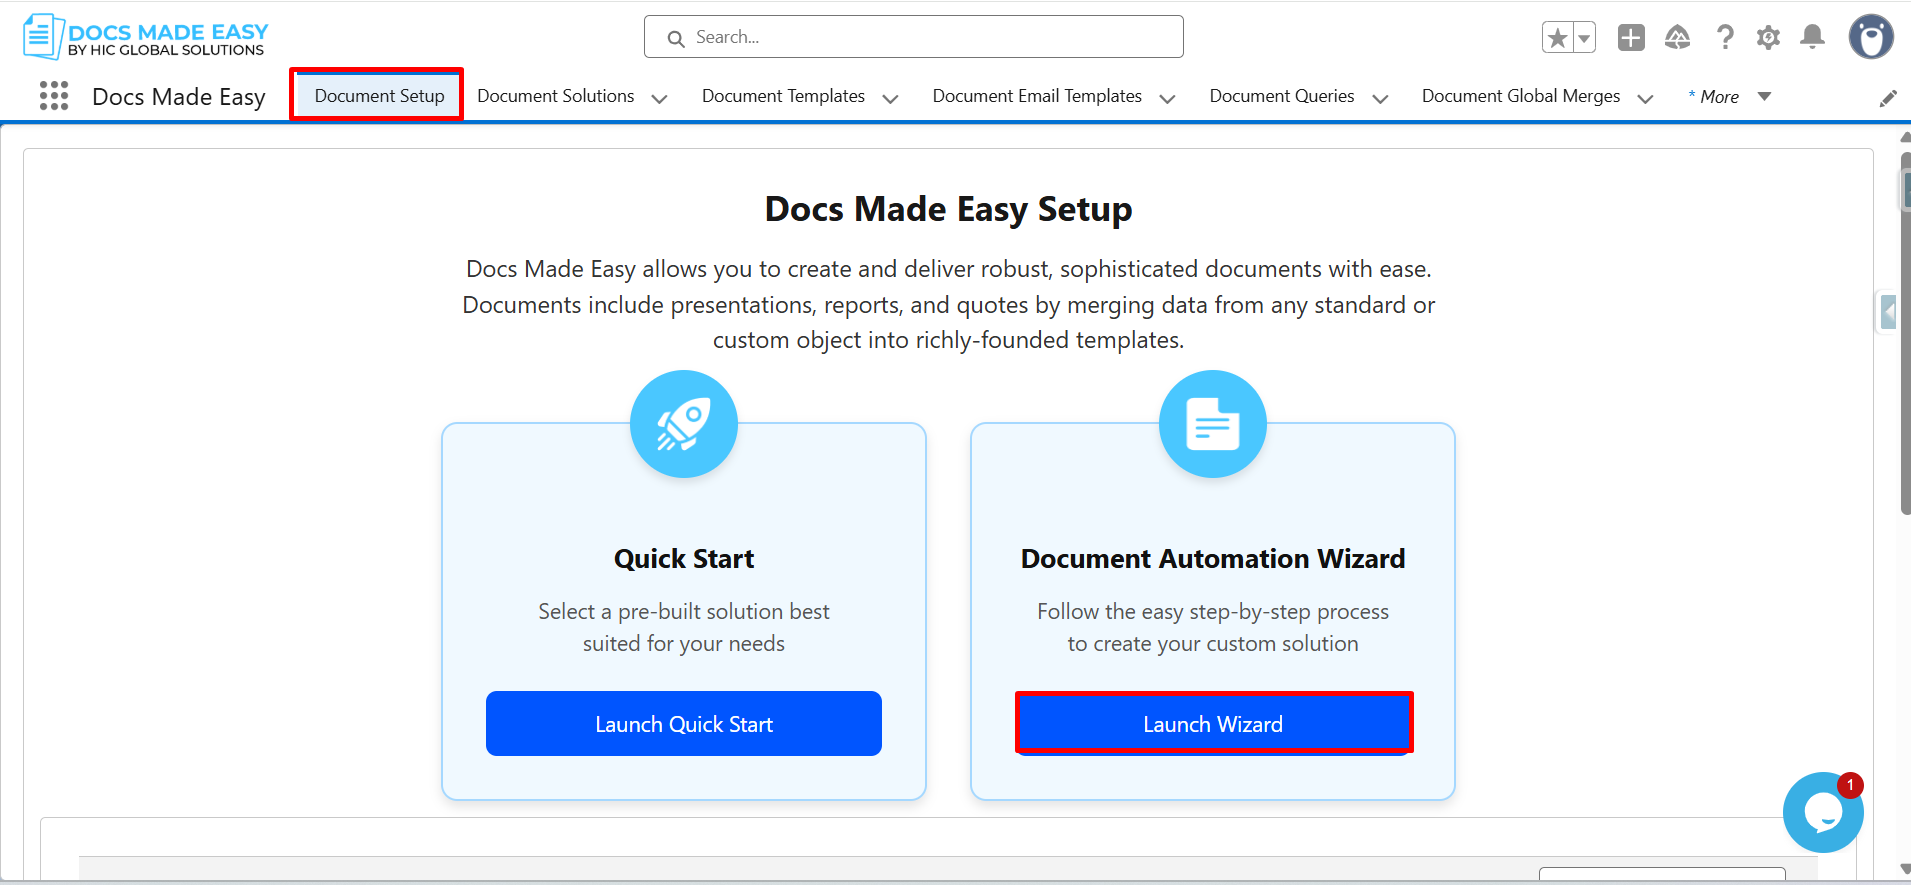
Step 3: Click on Document setup. Then click Launch wizard.
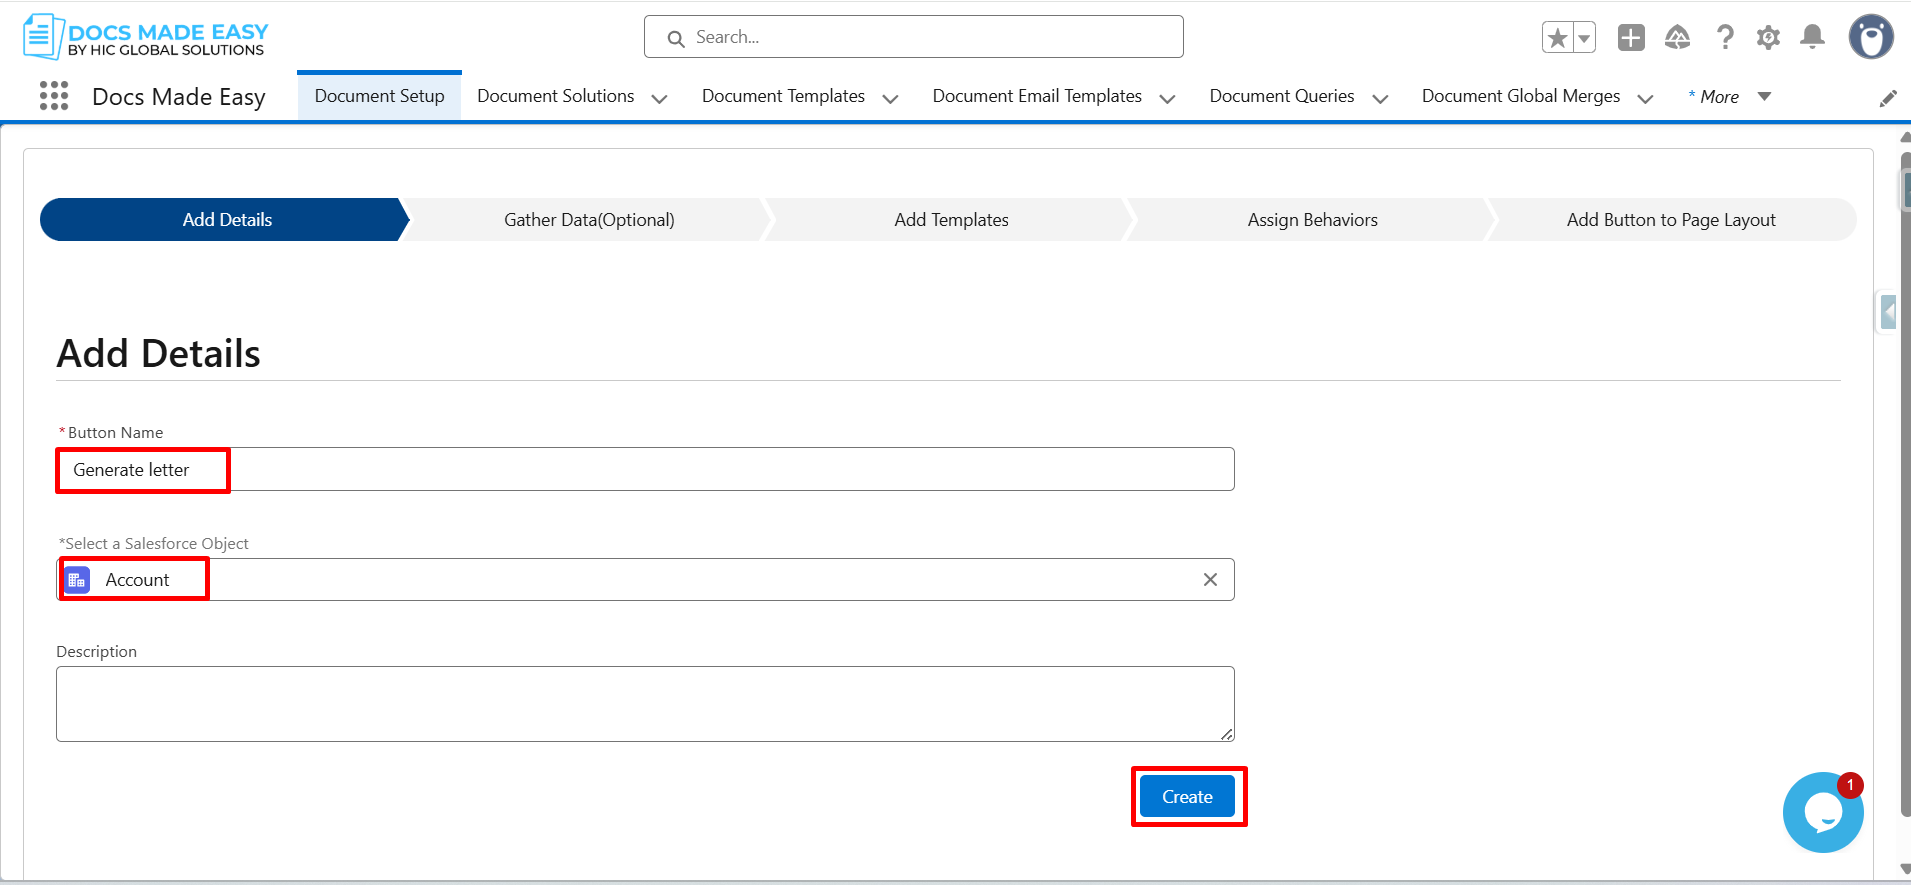
Step 4: Enter Button Name, select a Salesforce object and click on Create.
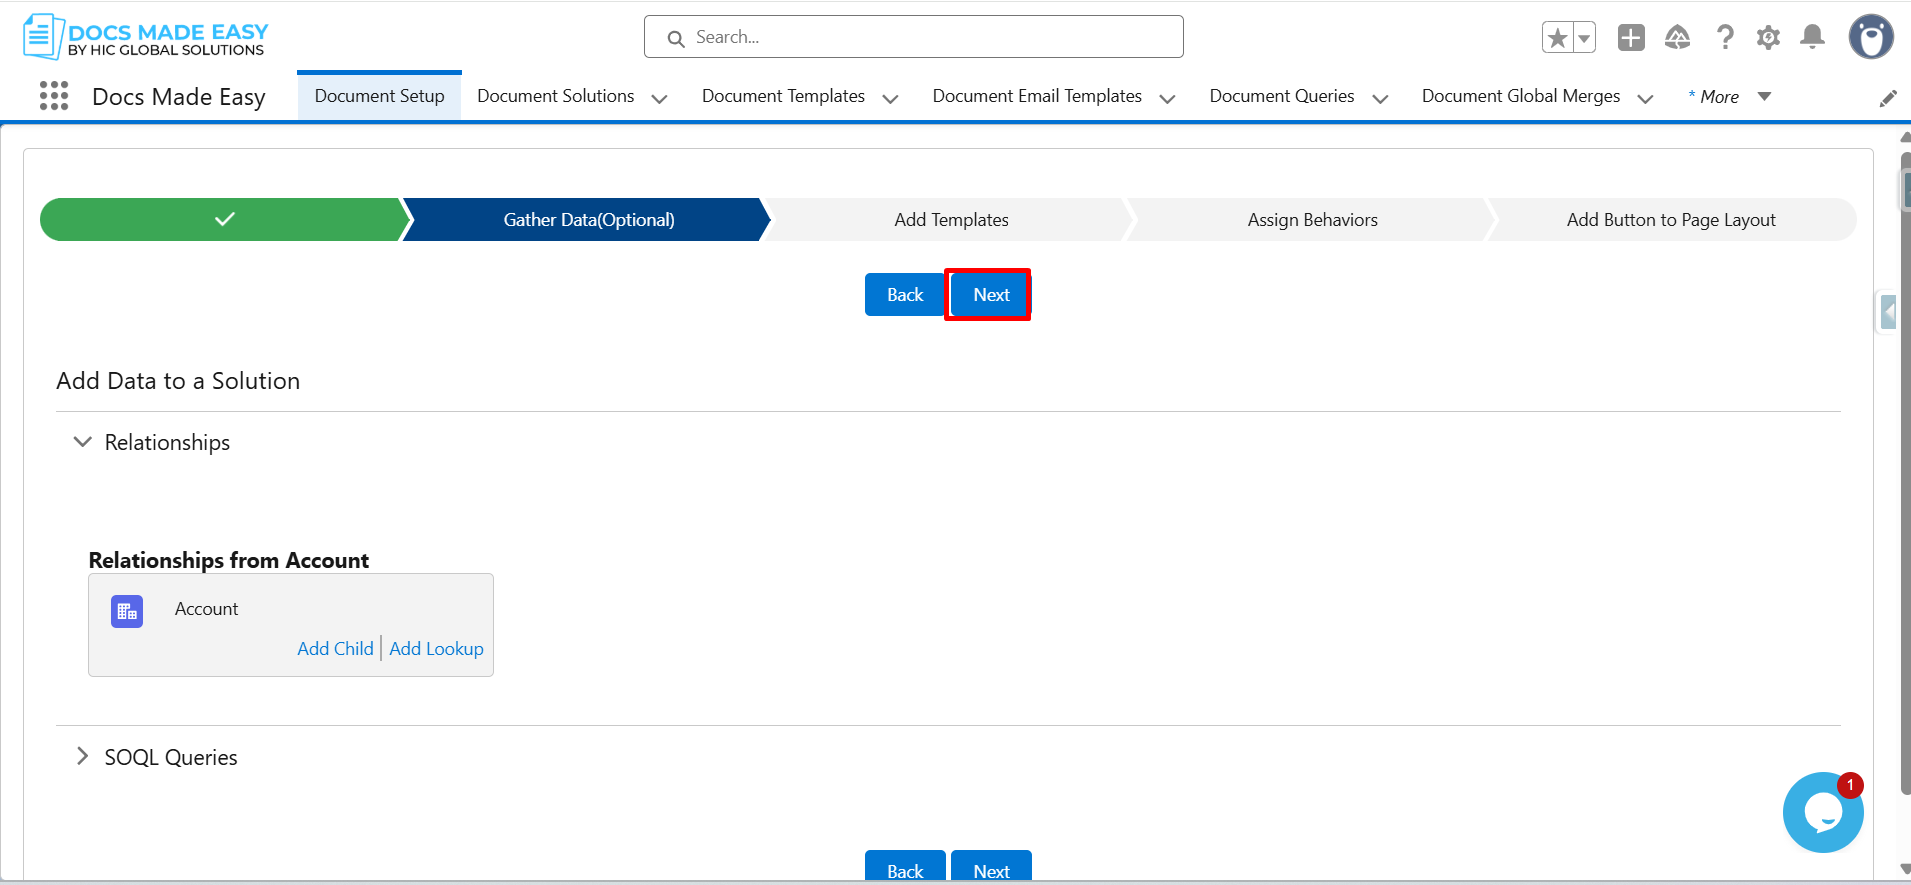
Step 5: Click on Next.
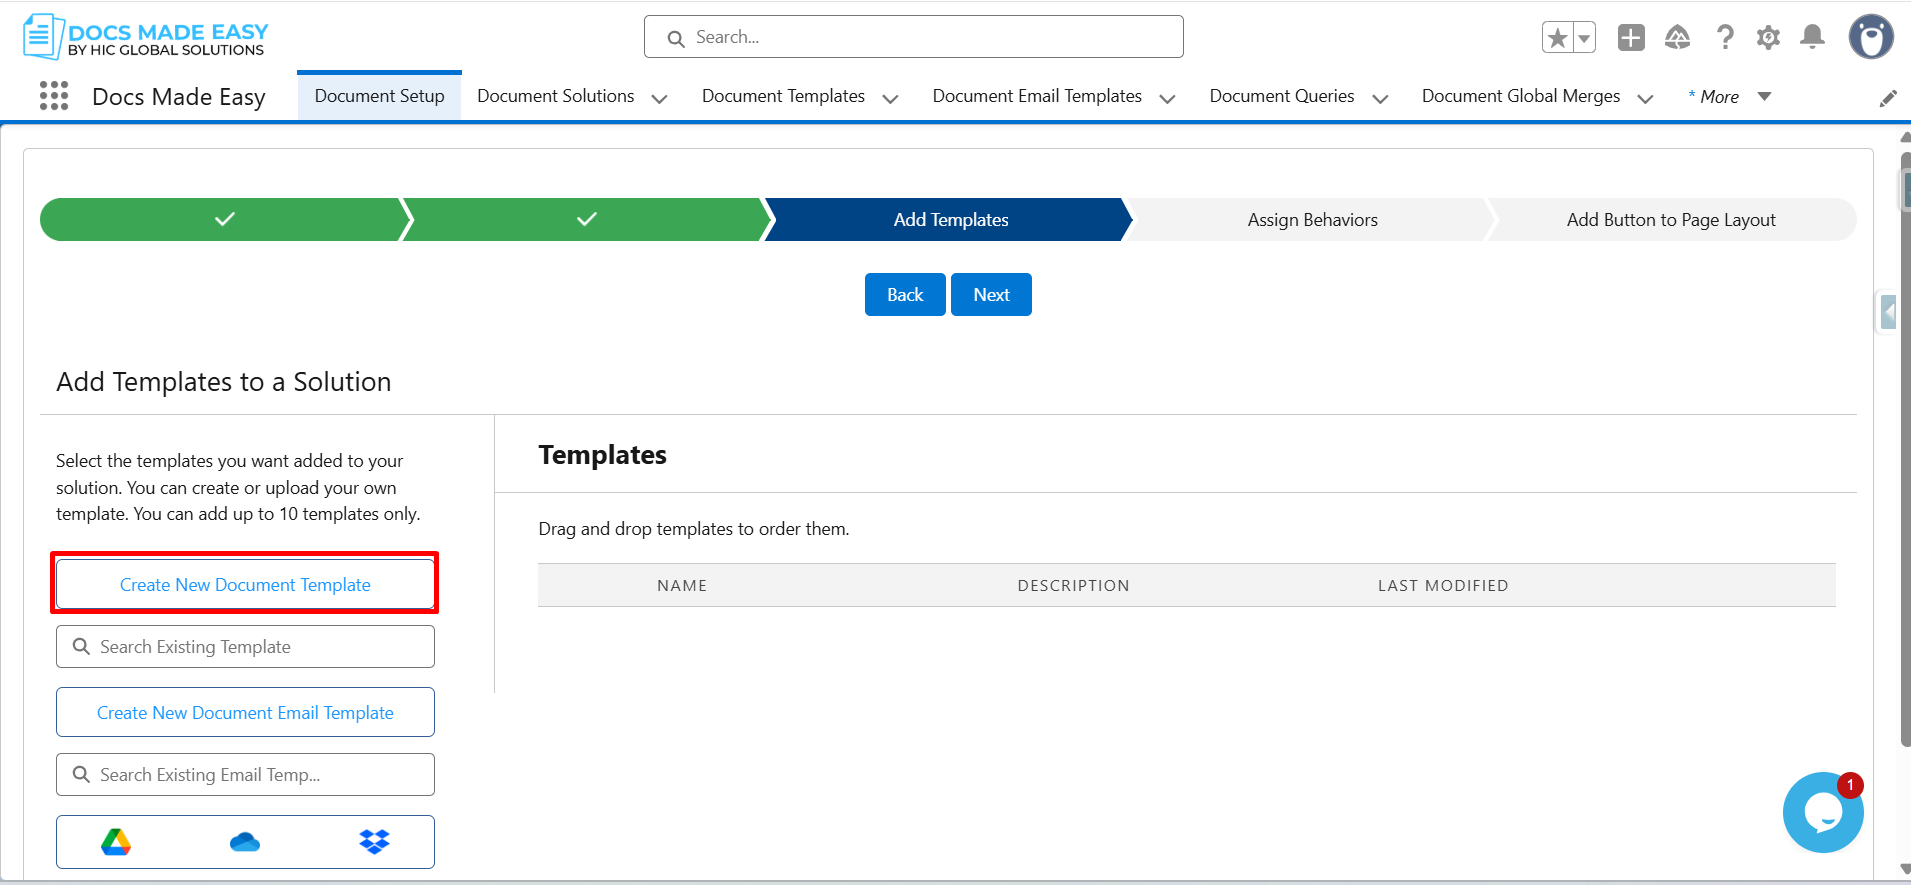
Step 6: Click on Create New Document Template.
Step 7: Click on Merge Field Helper.
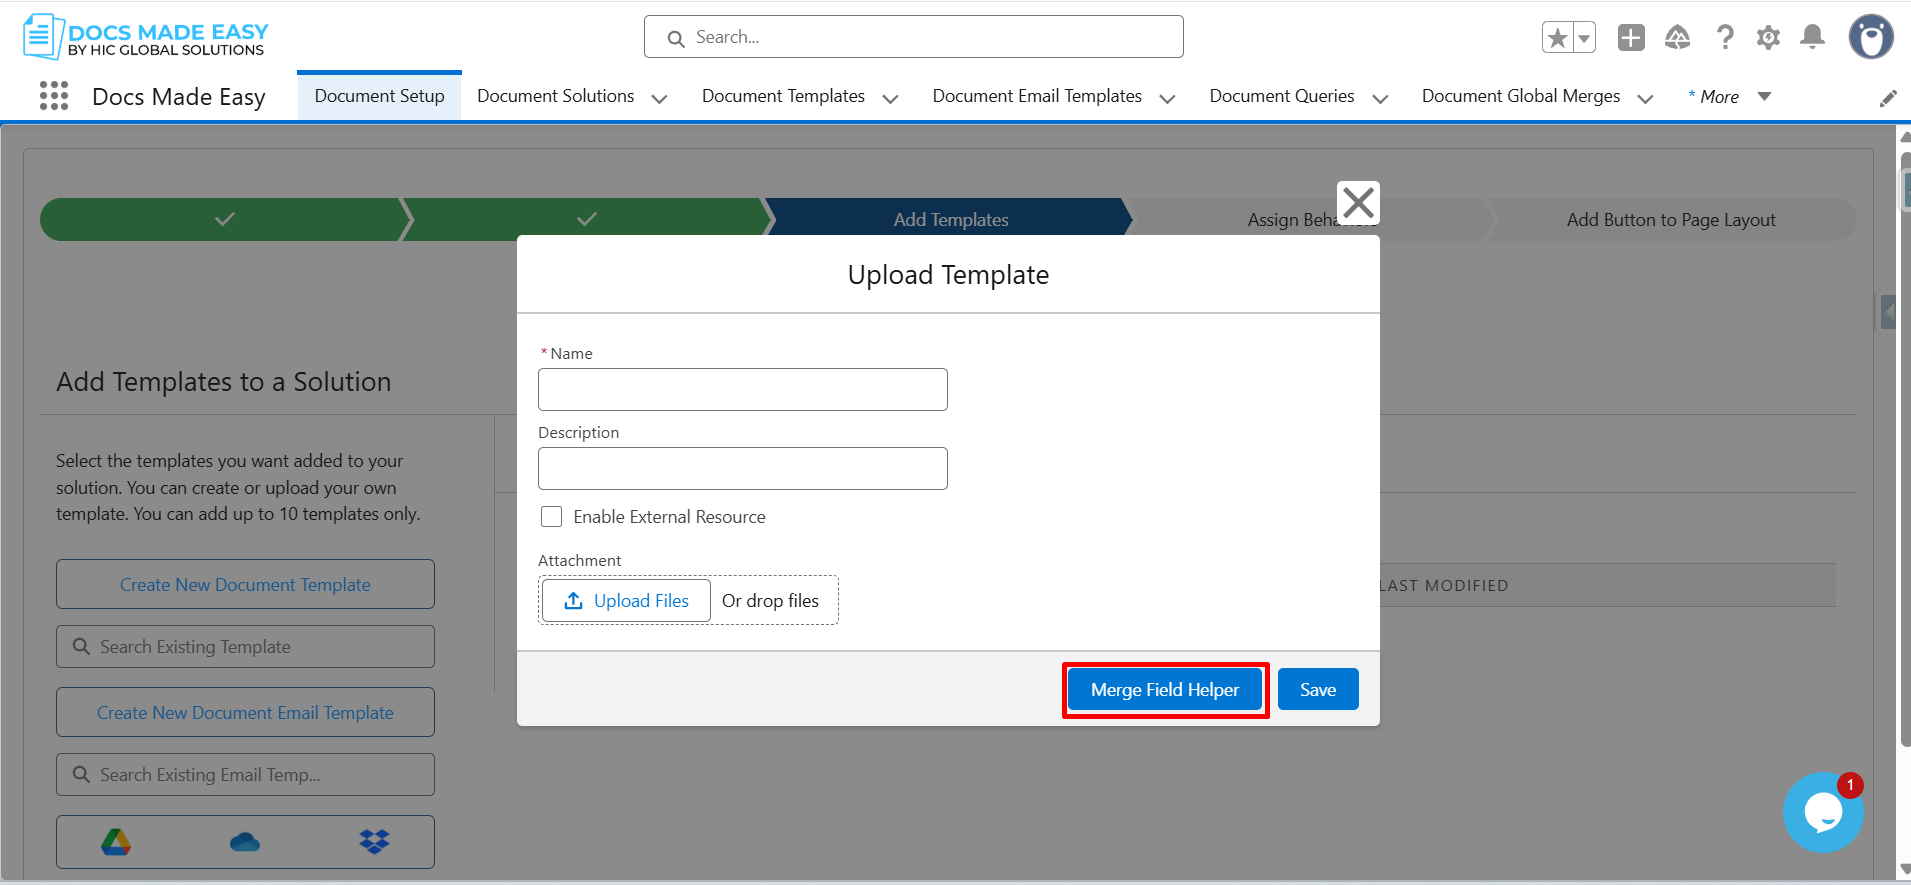
Step 8: From the Insert field list, click on Account Name.
The system will auto-generate the merge field syntax: {{Account.Name}}. Then, click Copy to Clipboard.
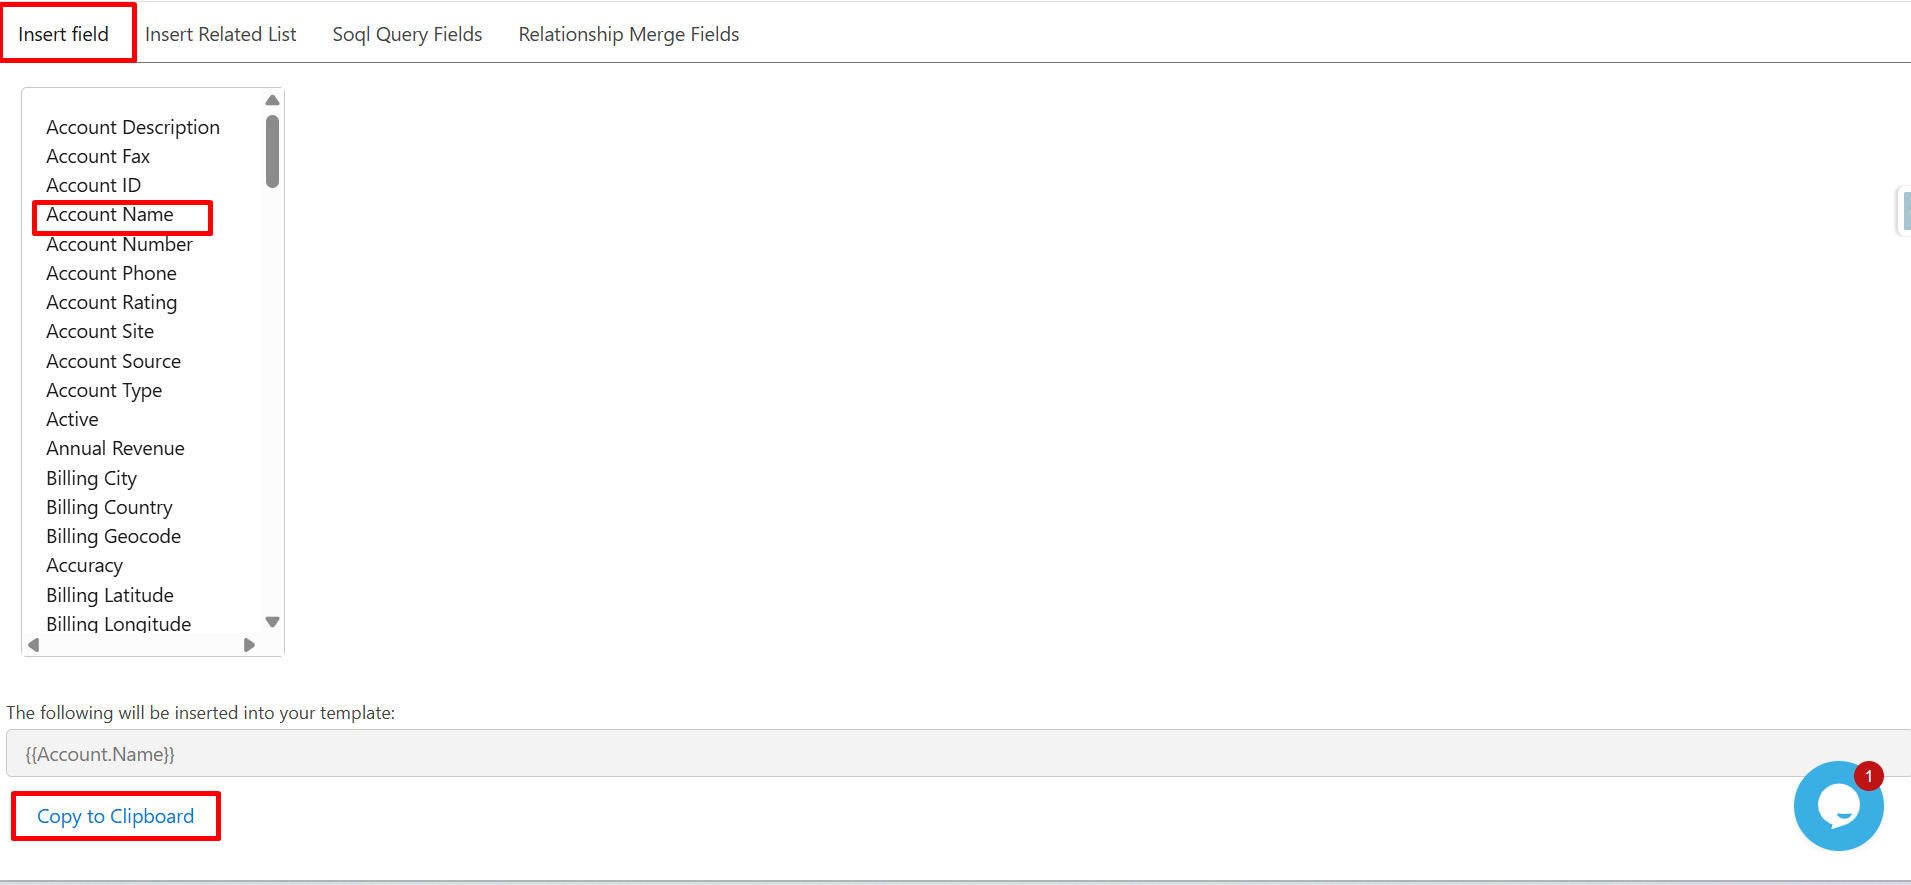
Step 9: Click on Account Phone. Click on Copy to Clipboard.
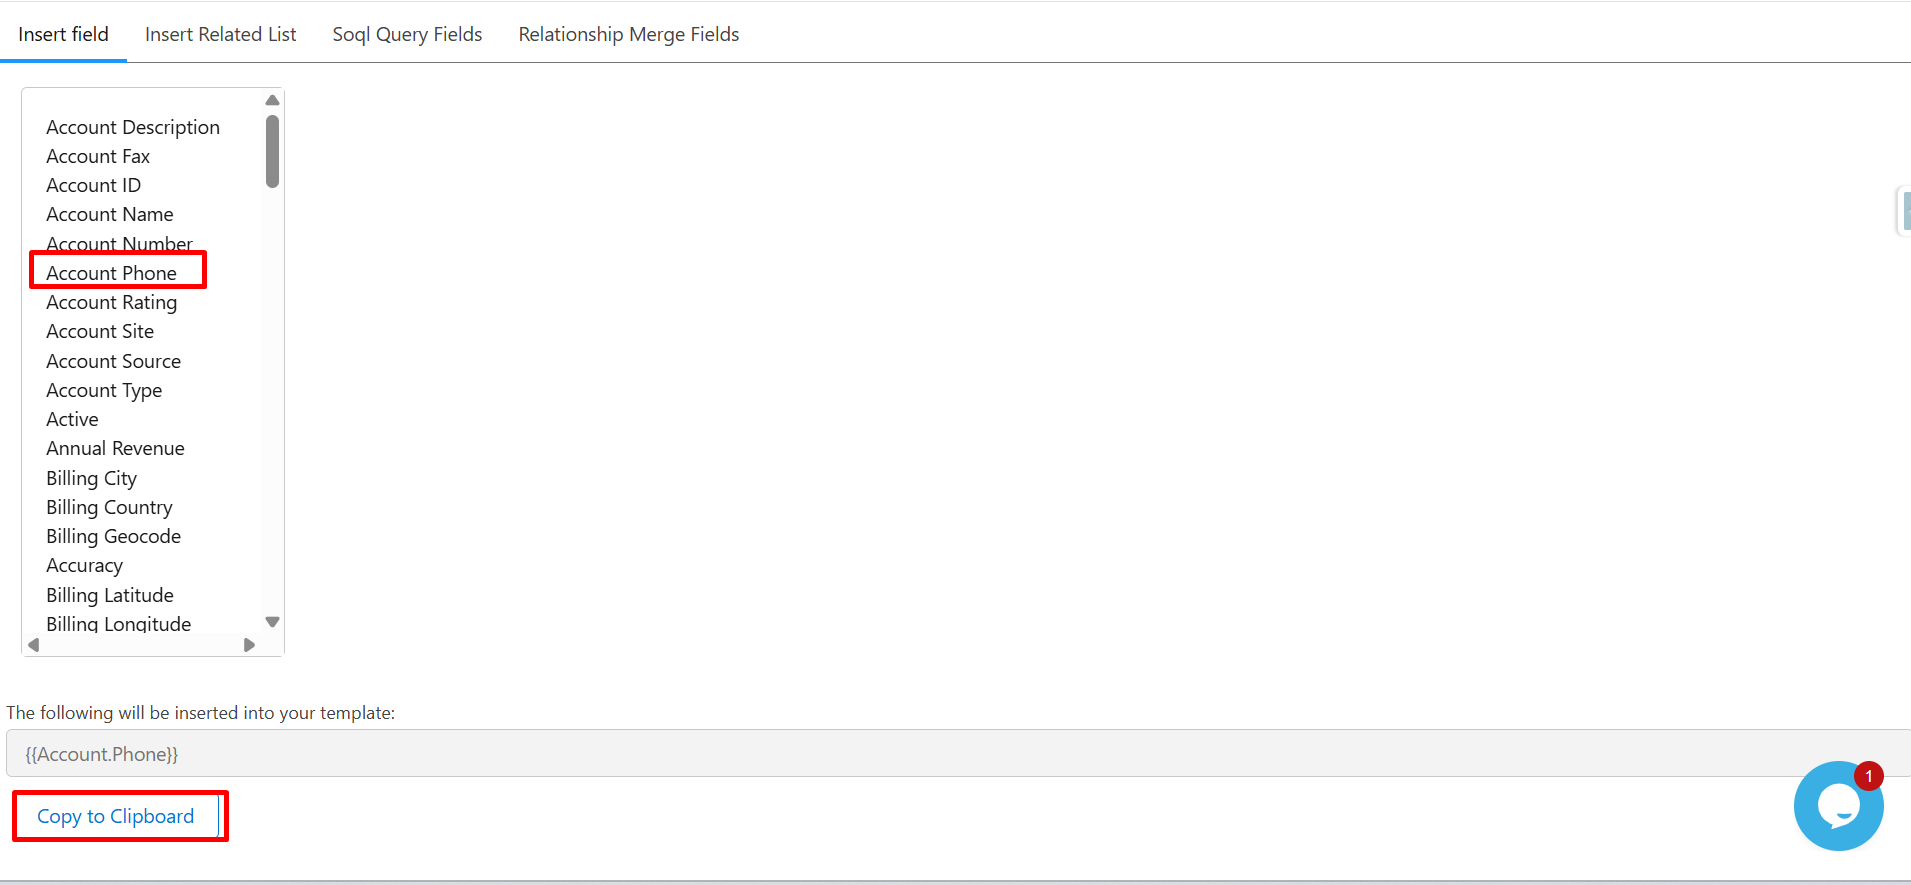
Step 10: Click on Billing Zip/Postal Code then click on Copy to Clipboard.
Step 11: Click on the Insert Related List. From the Available Related List, Contacts
Under Child Object Field, choose the required fields such as:
- Name
The system automatically generates the table merge syntax.
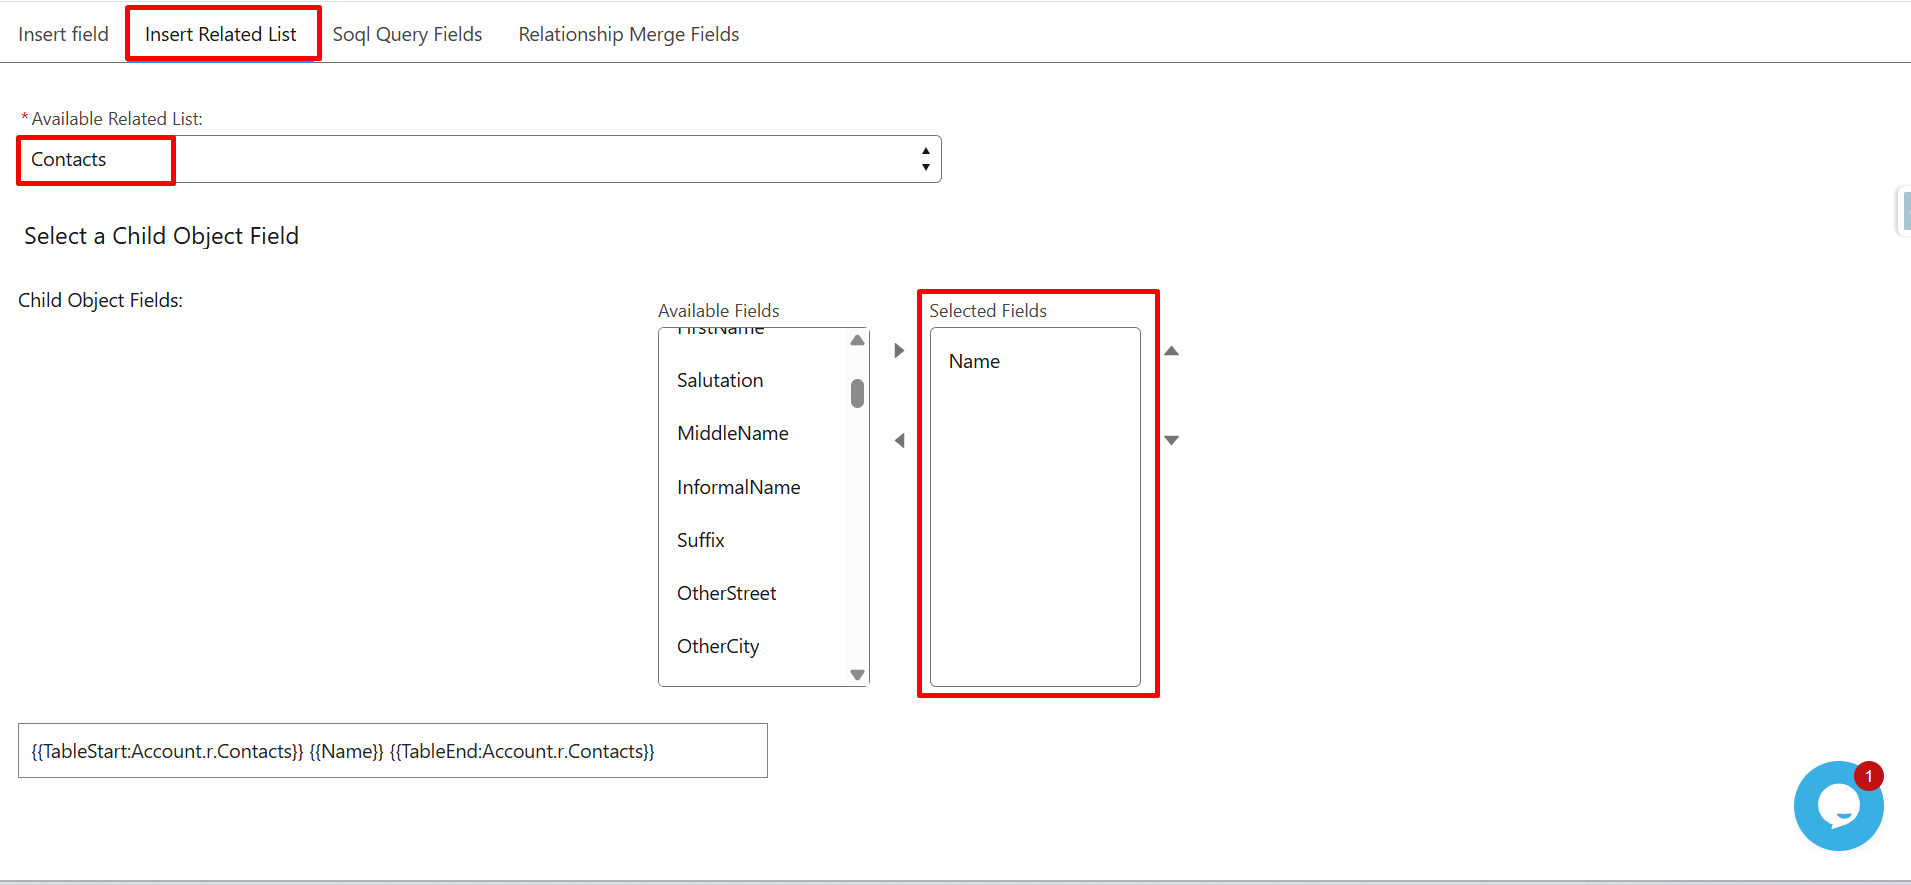
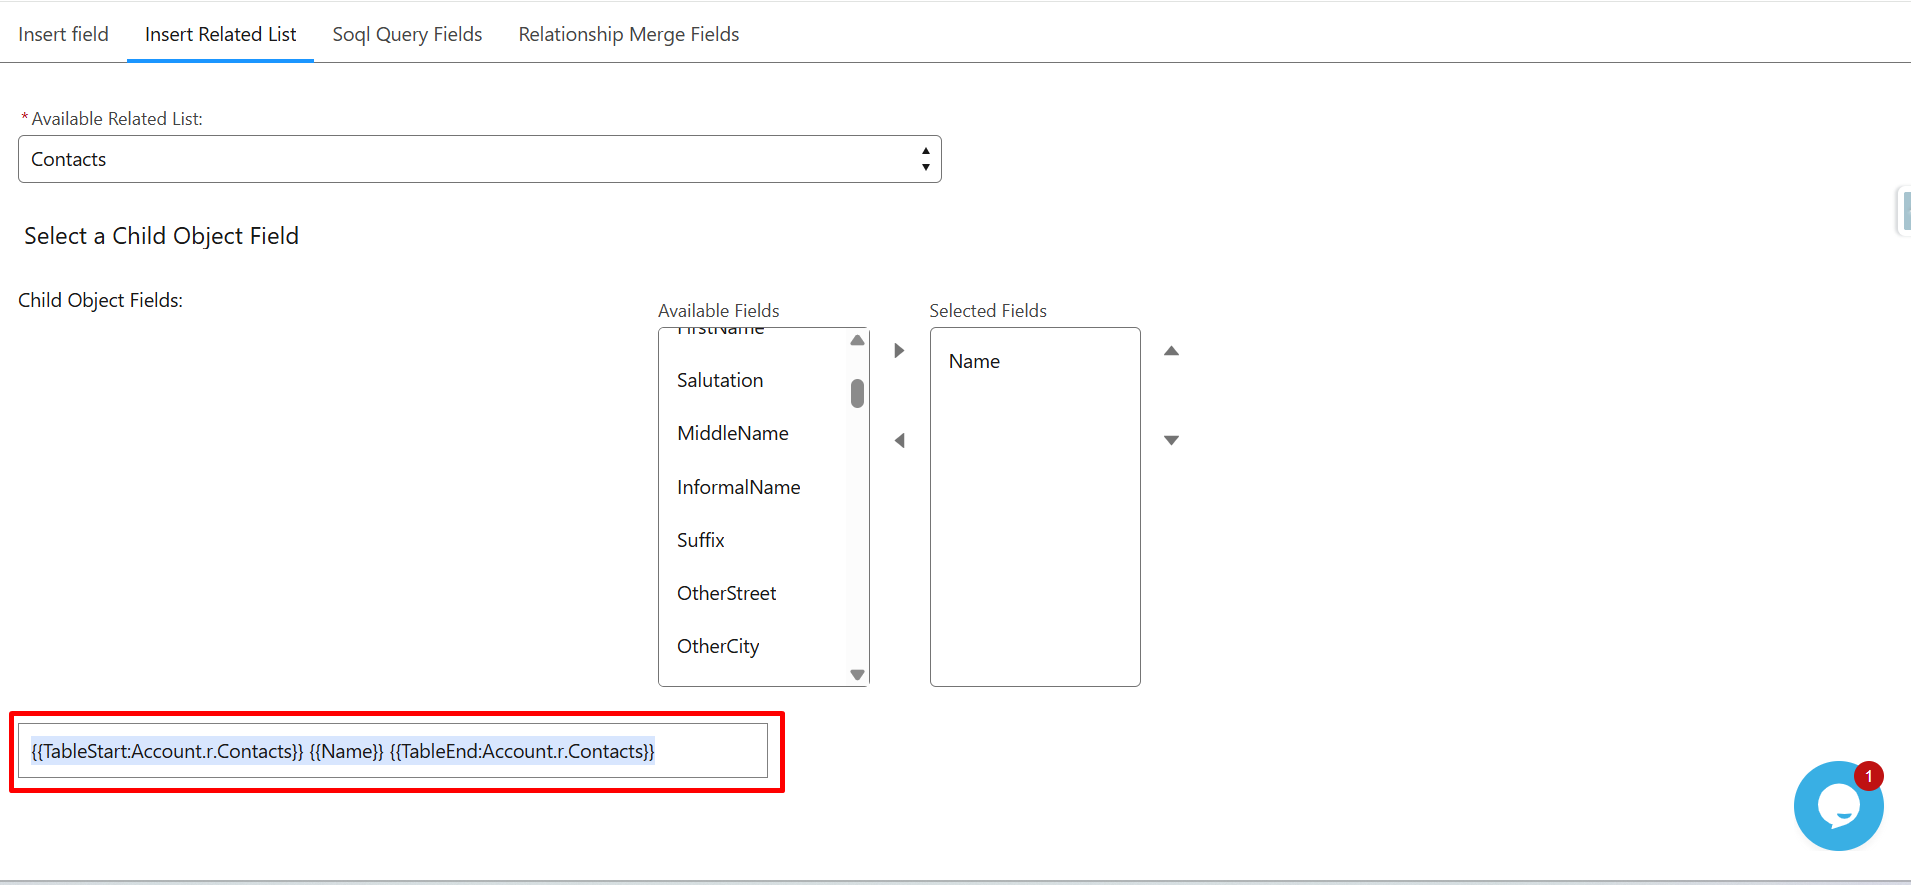
Step 12: Copy the generated table merge syntax.
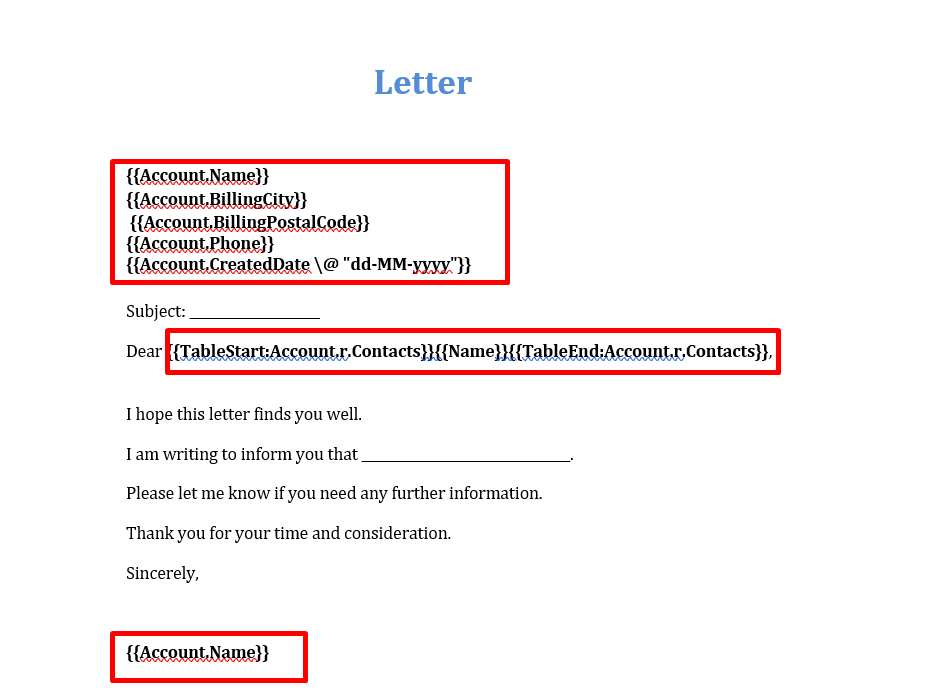
Step 13: Paste all the syntax into the template editor.
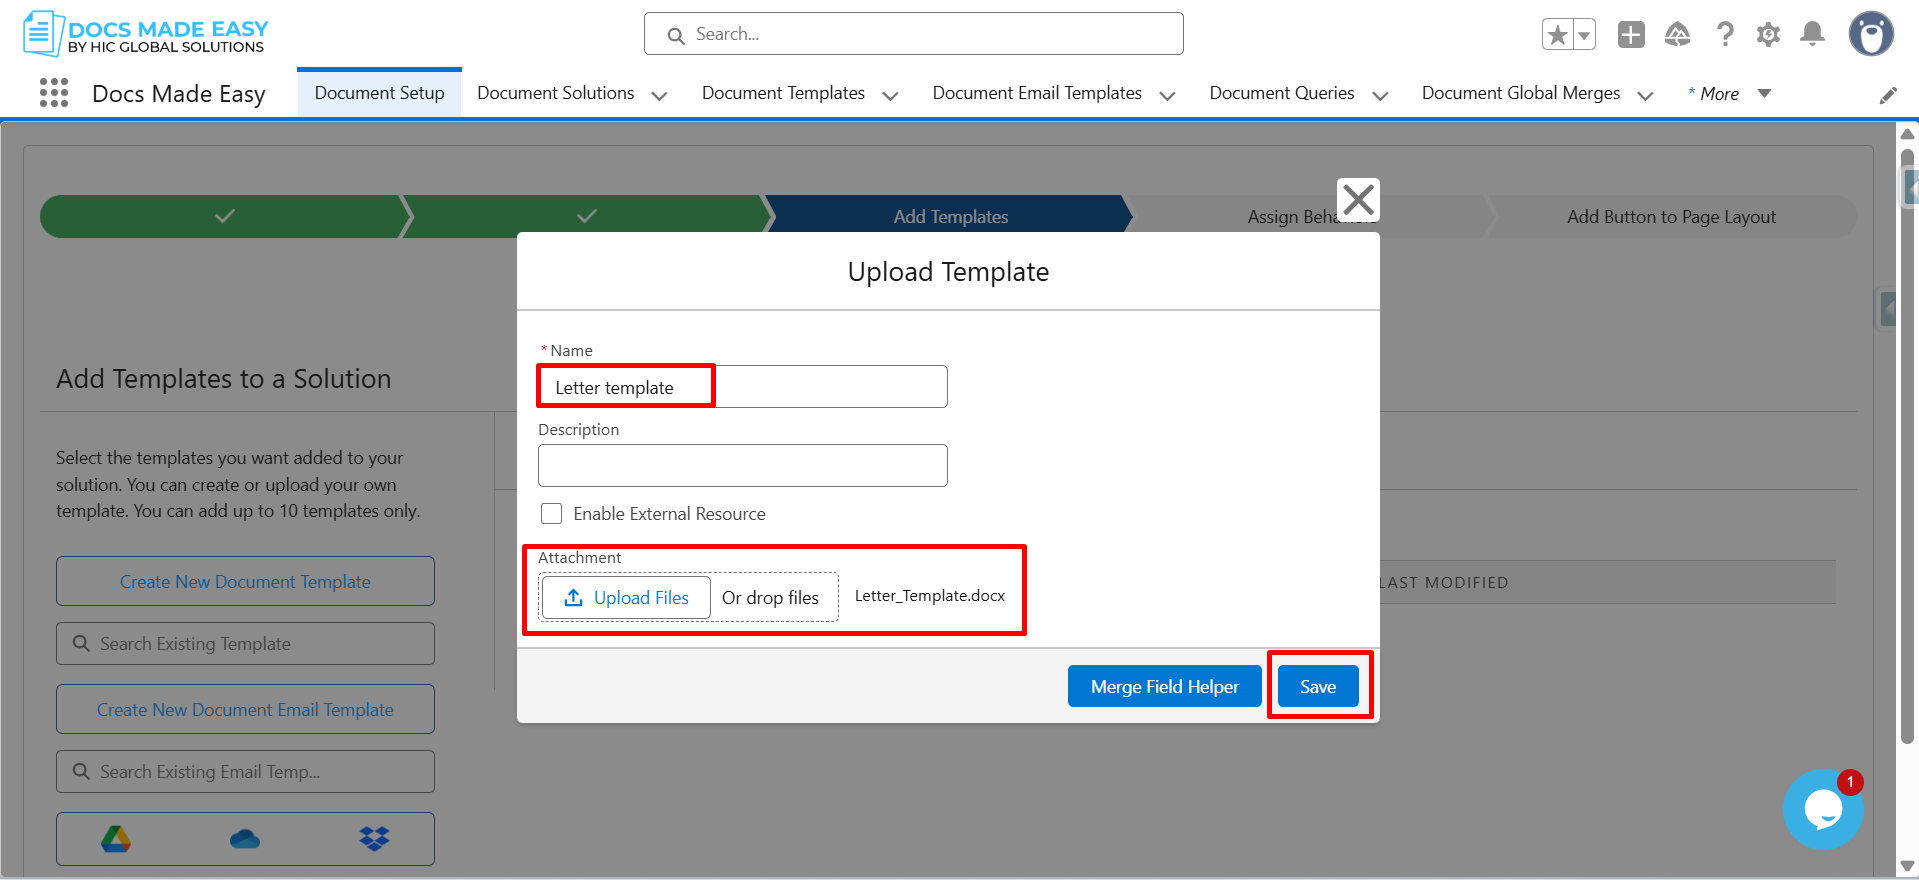
Step 14: Reopen the Upload Template window, enter the template Name, upload the Template file in the Attachment, and click Save.
Step 15: In the Document Setup, click on Next.
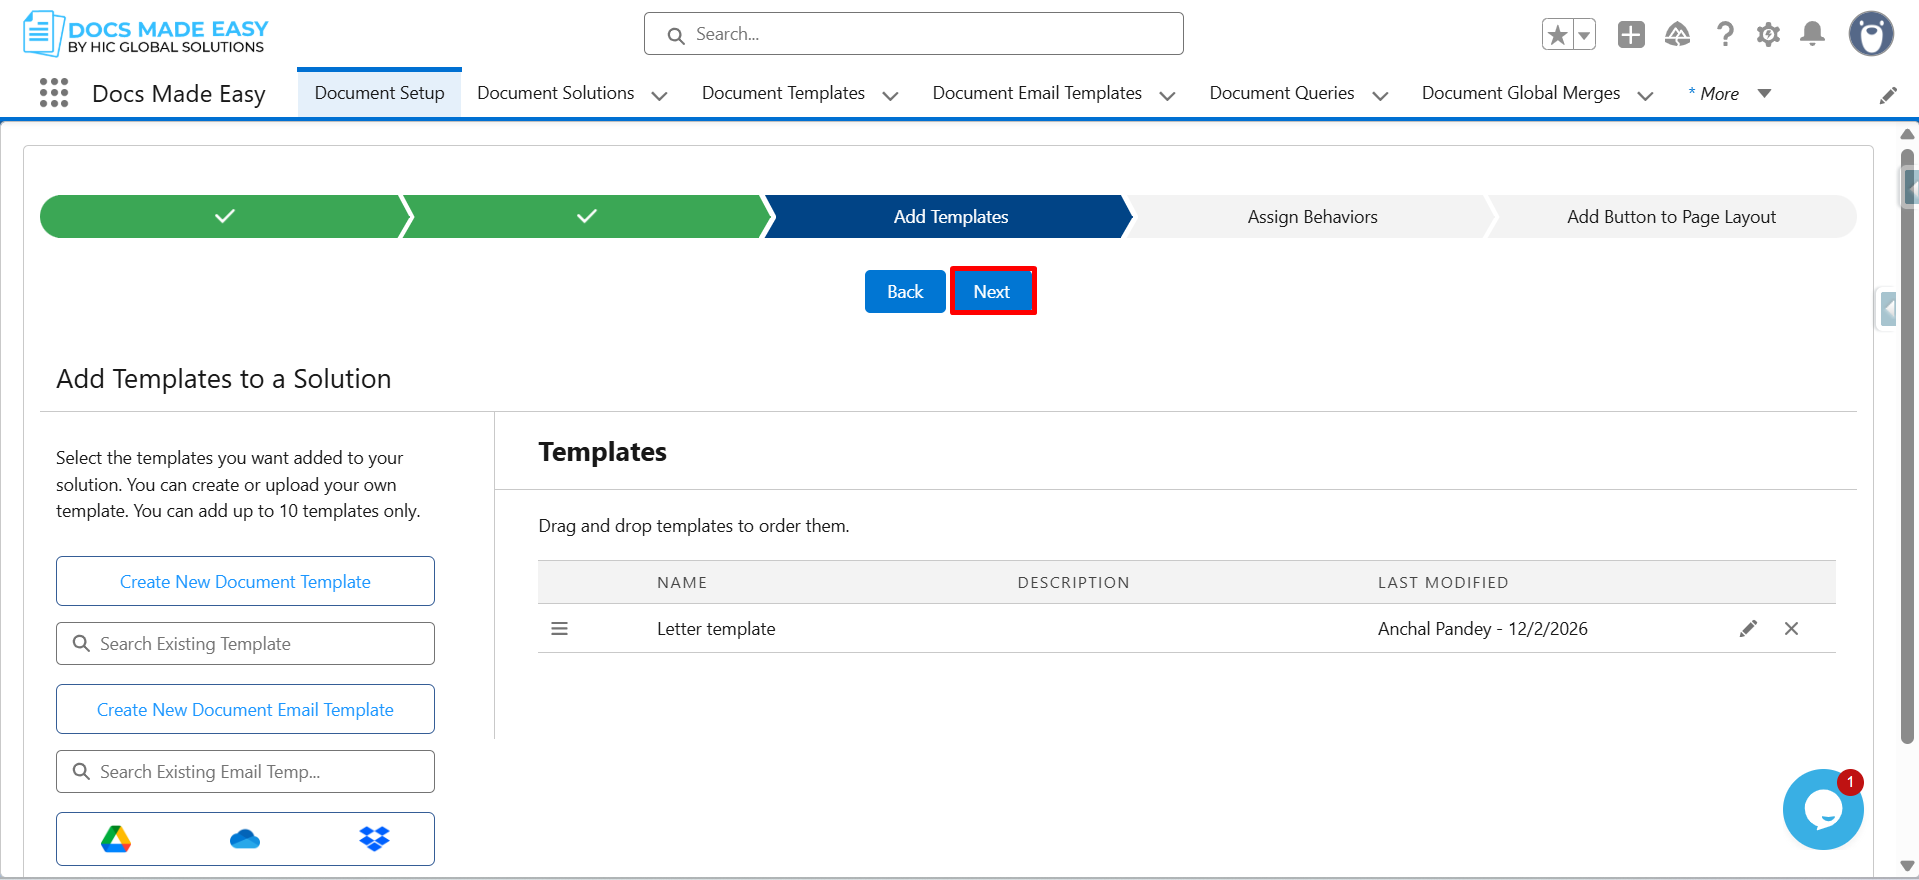
Step 16: Click on Next again.
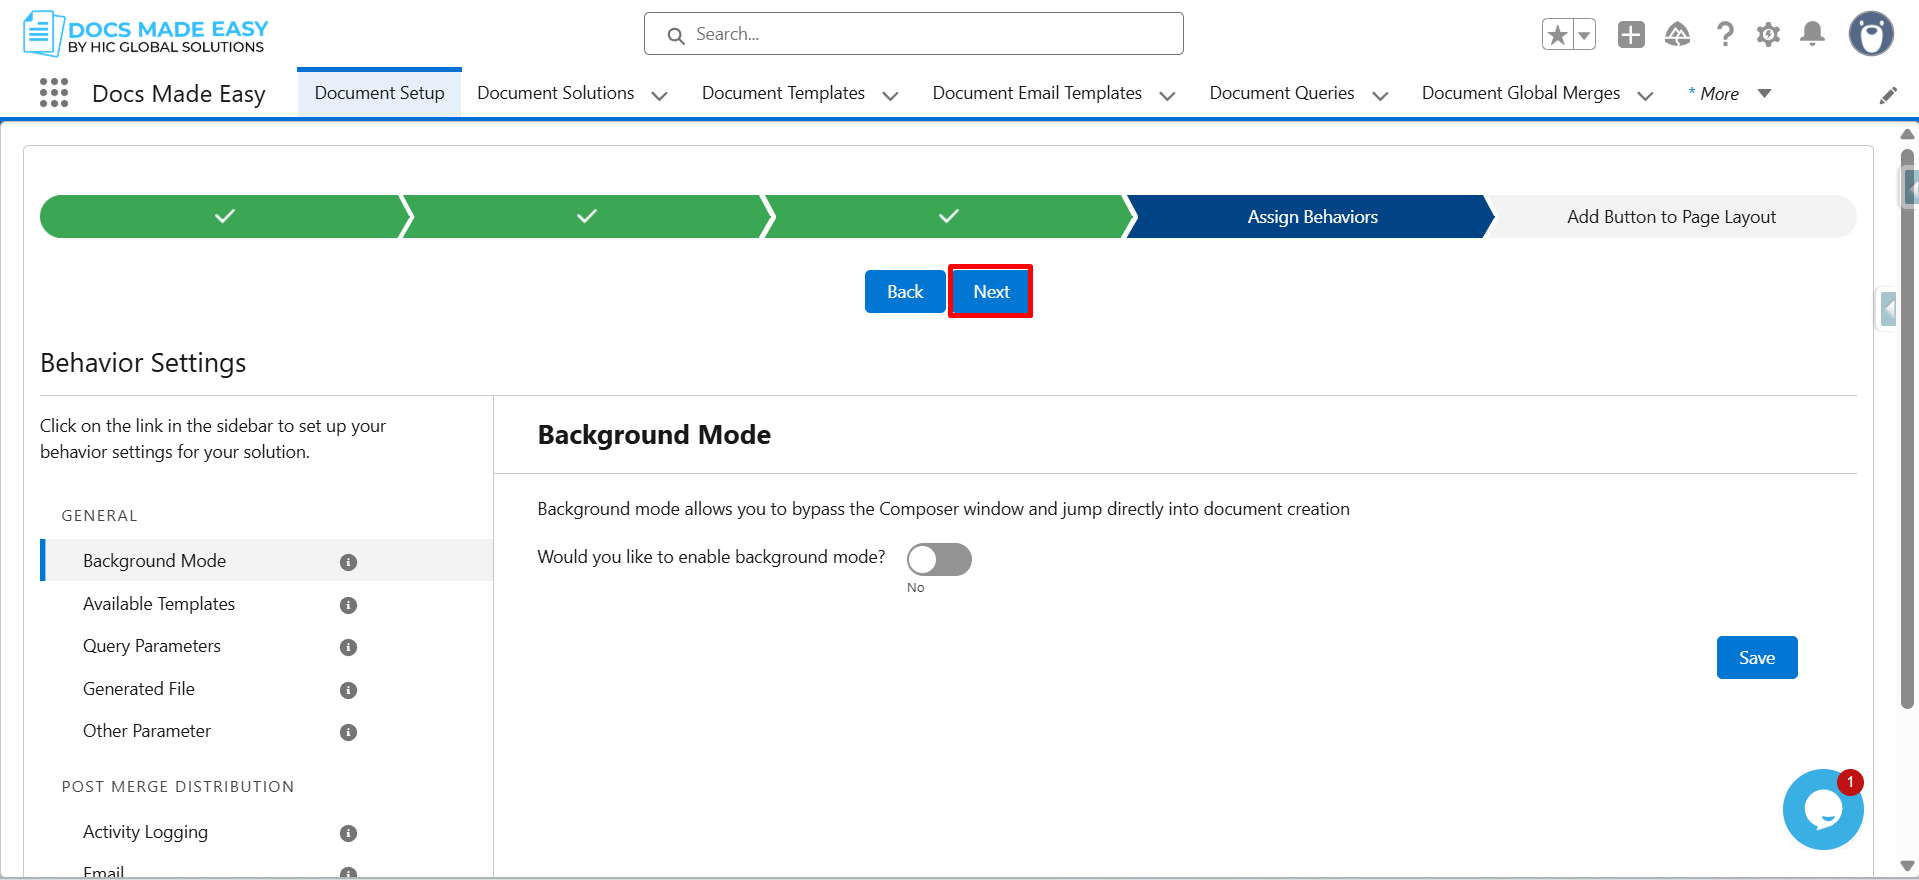
Step 17: Click on Go to Page Layouts.
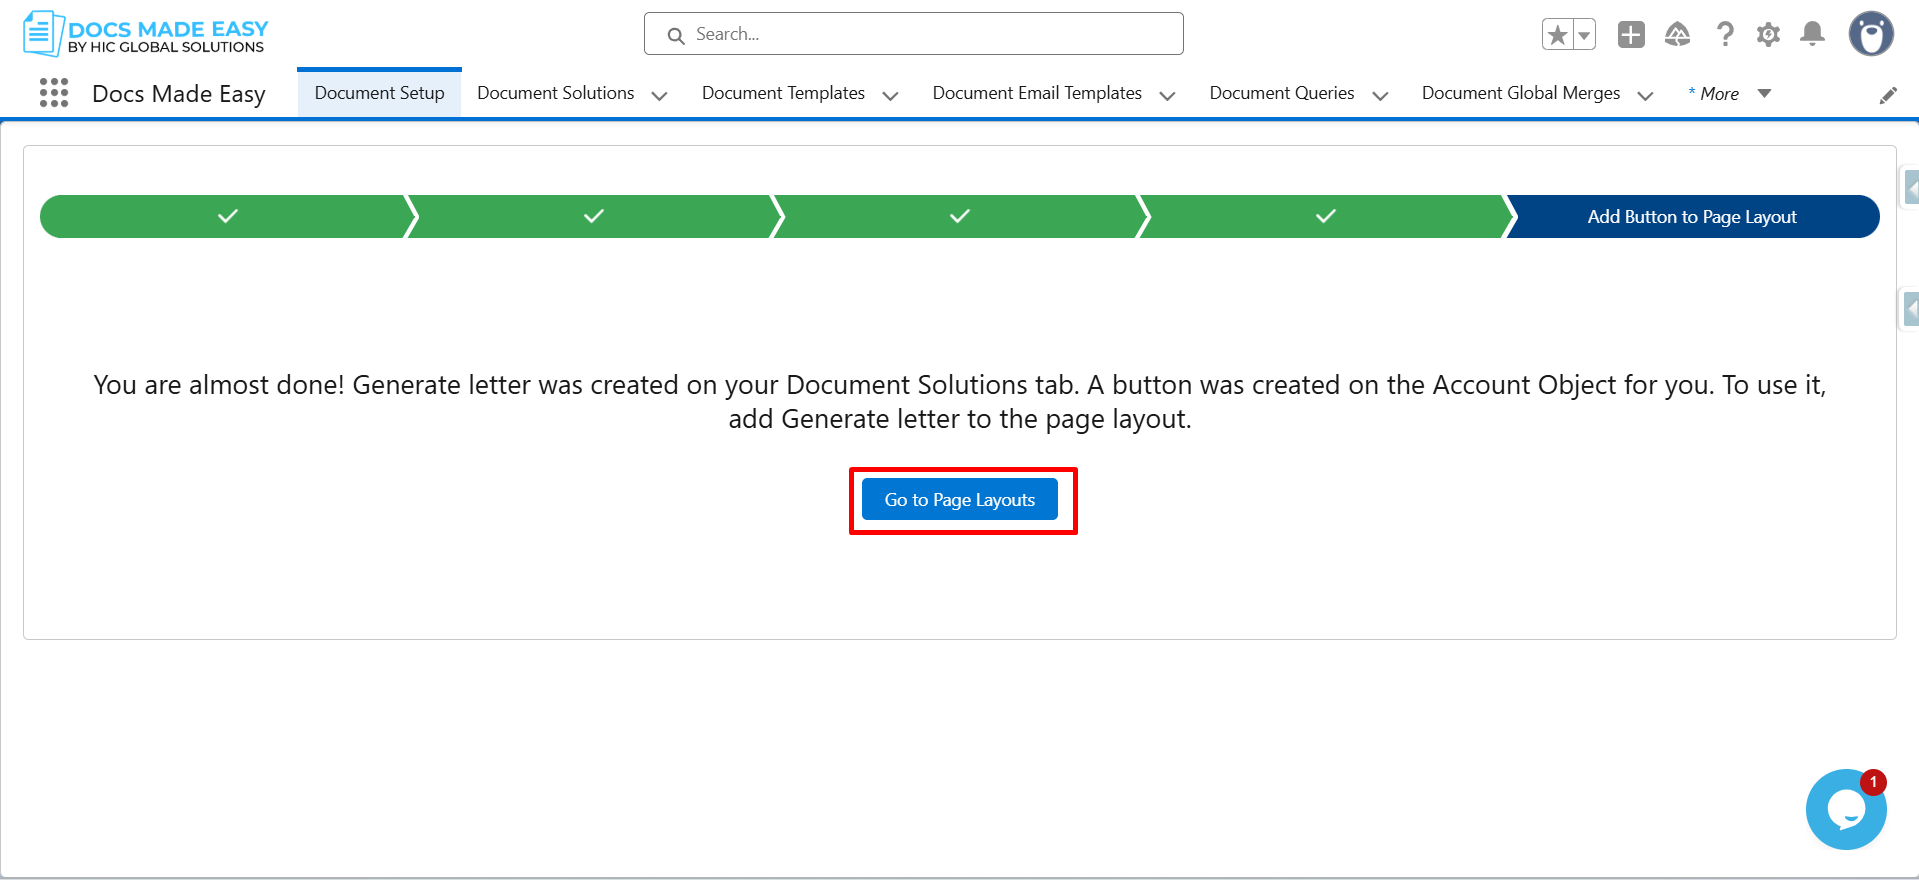
Step 18: Click on Account Layout.
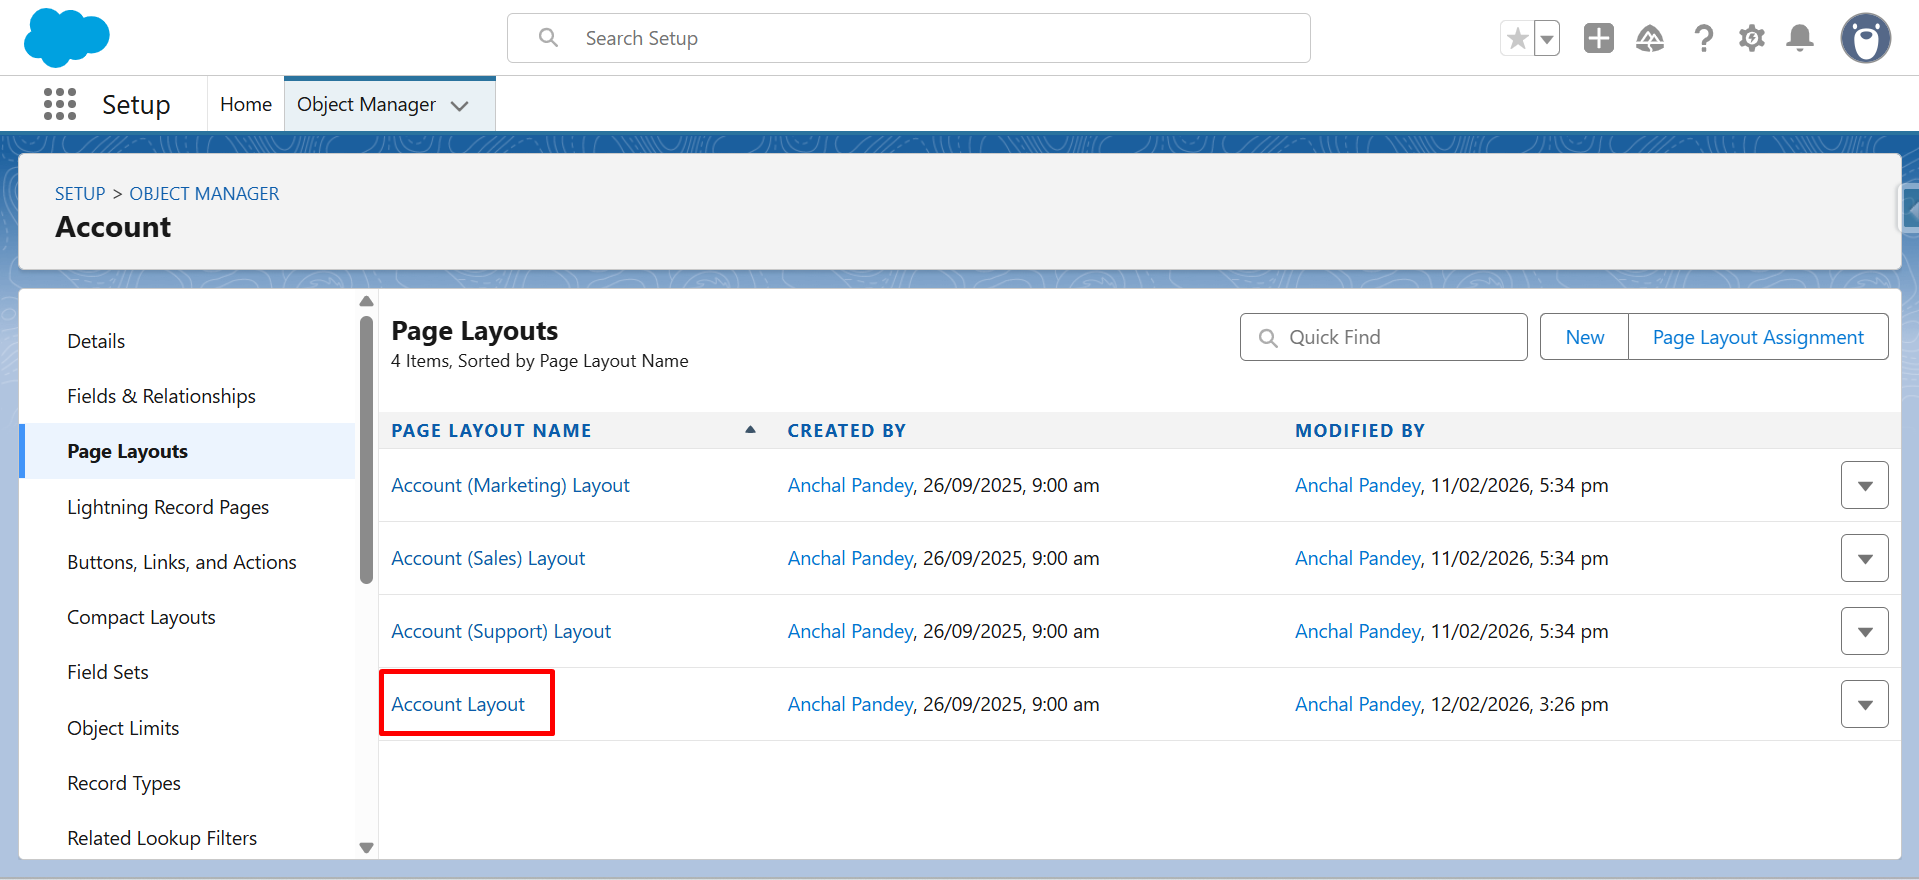
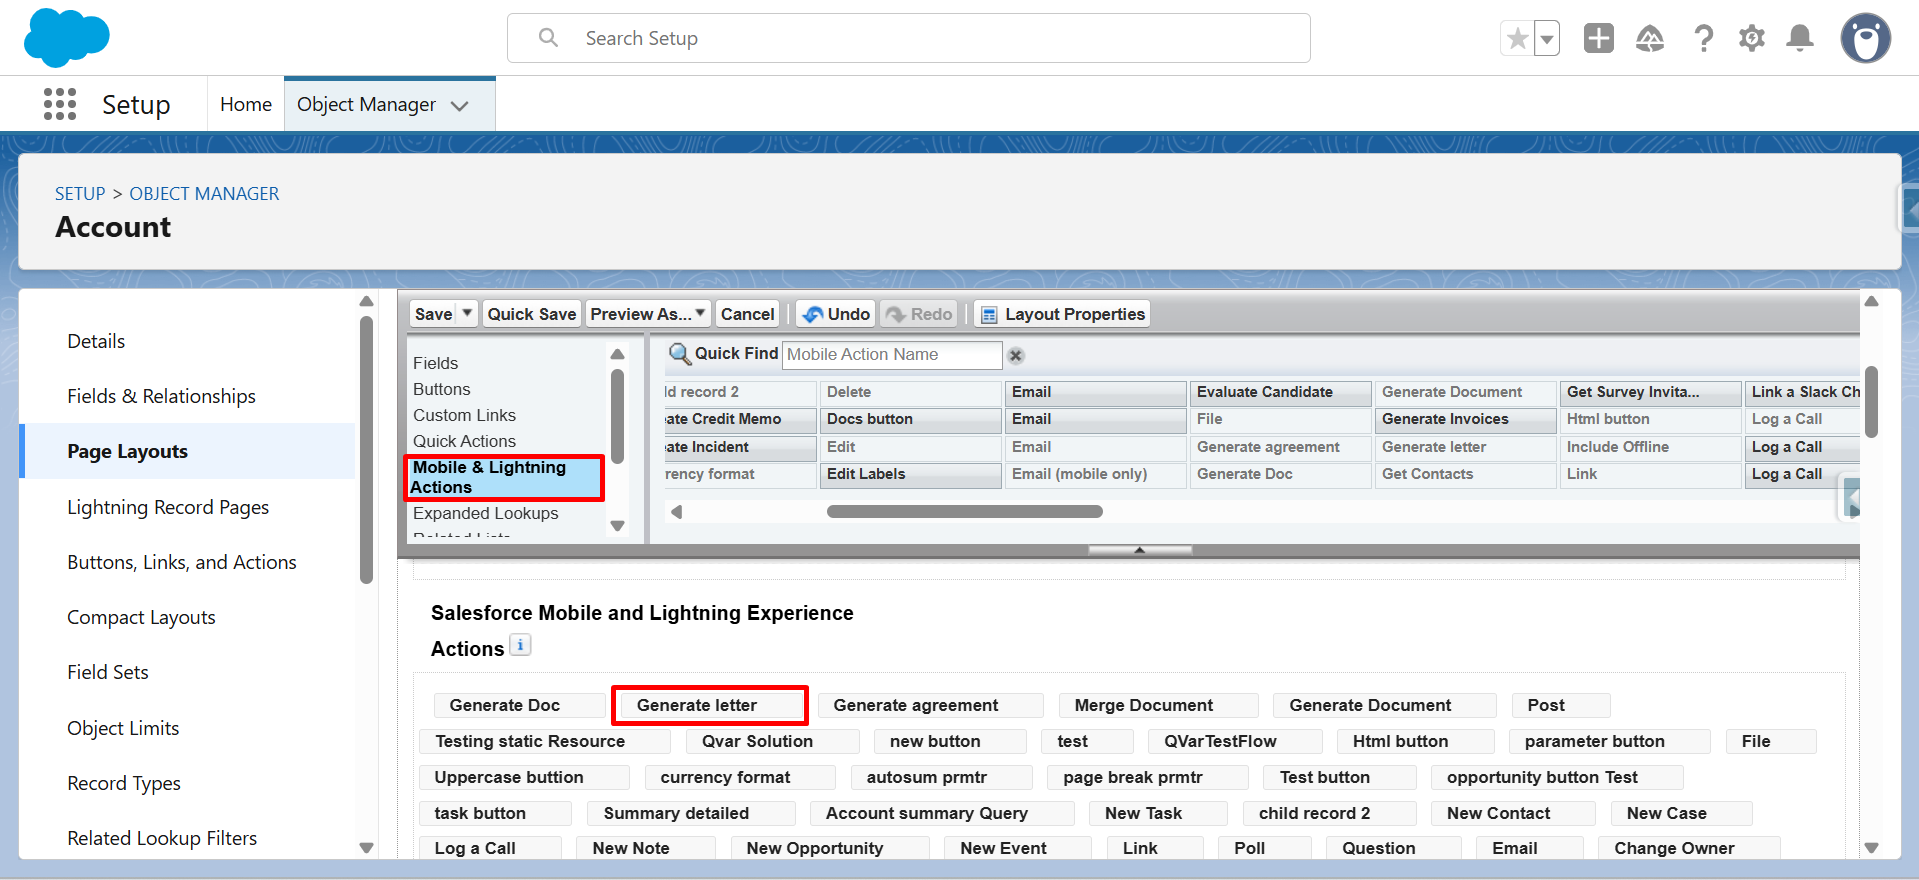
Step 19: From Mobile & Lightning Actions, drag and drop the Generate Letter button below in Salesforce Mobile and Lightning Experience Actions.
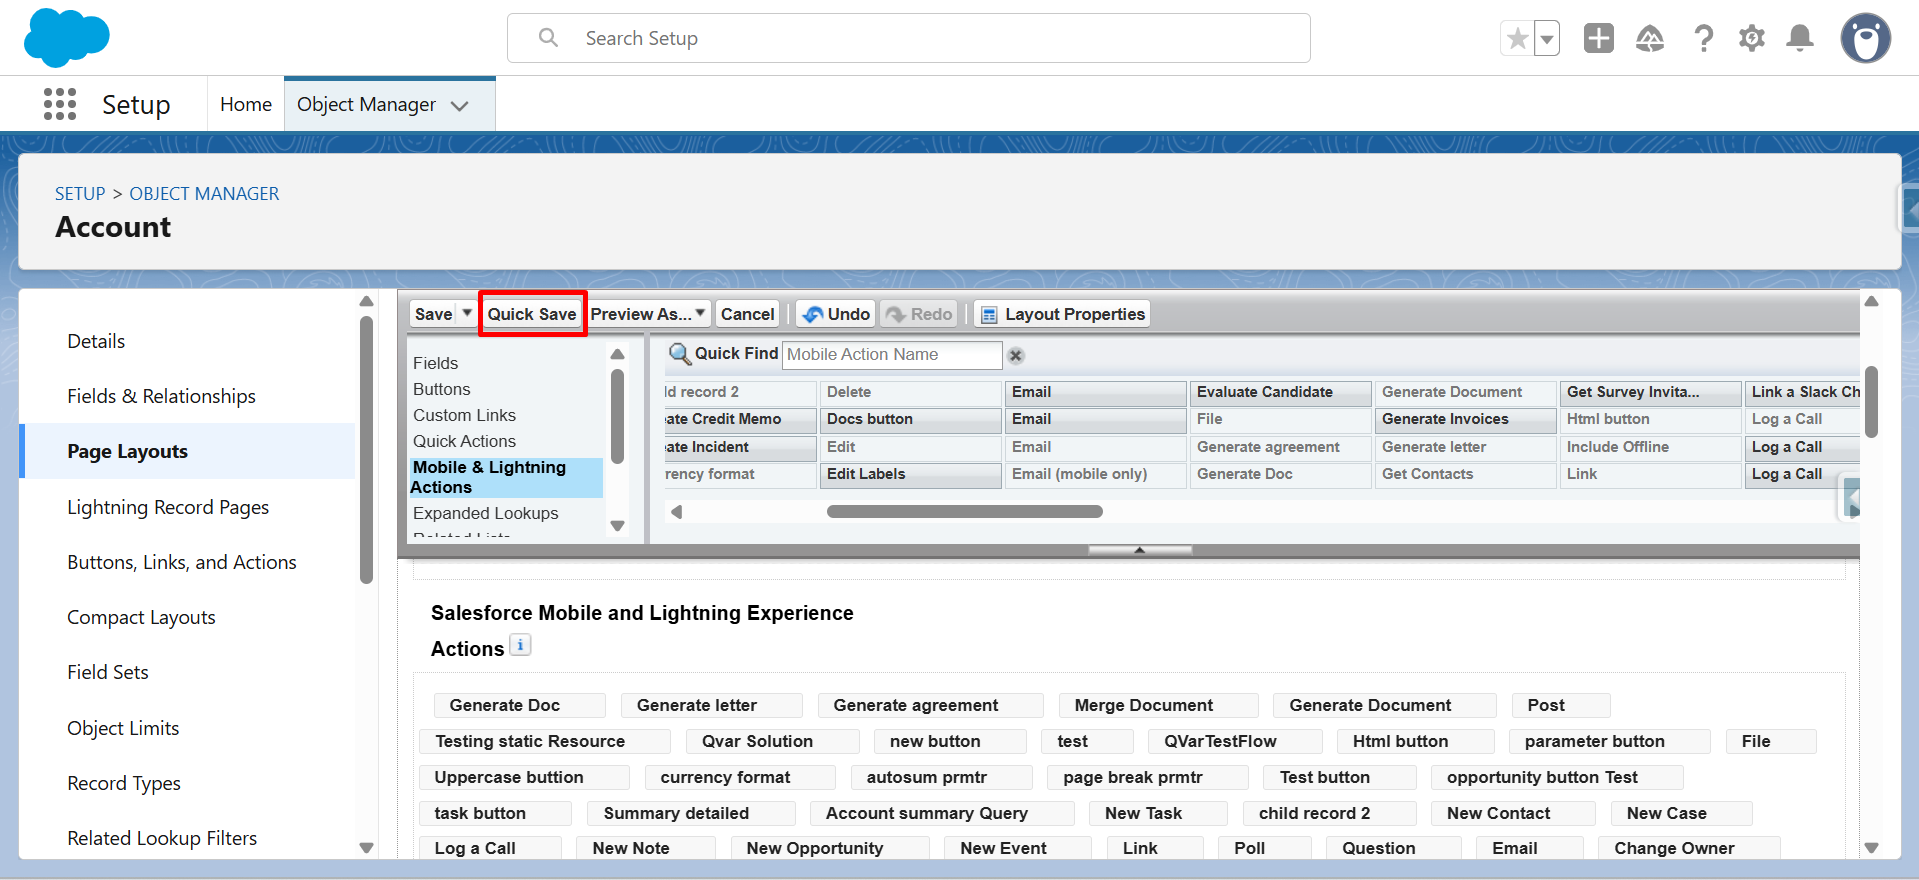
Step 20: Click on Quick Save.
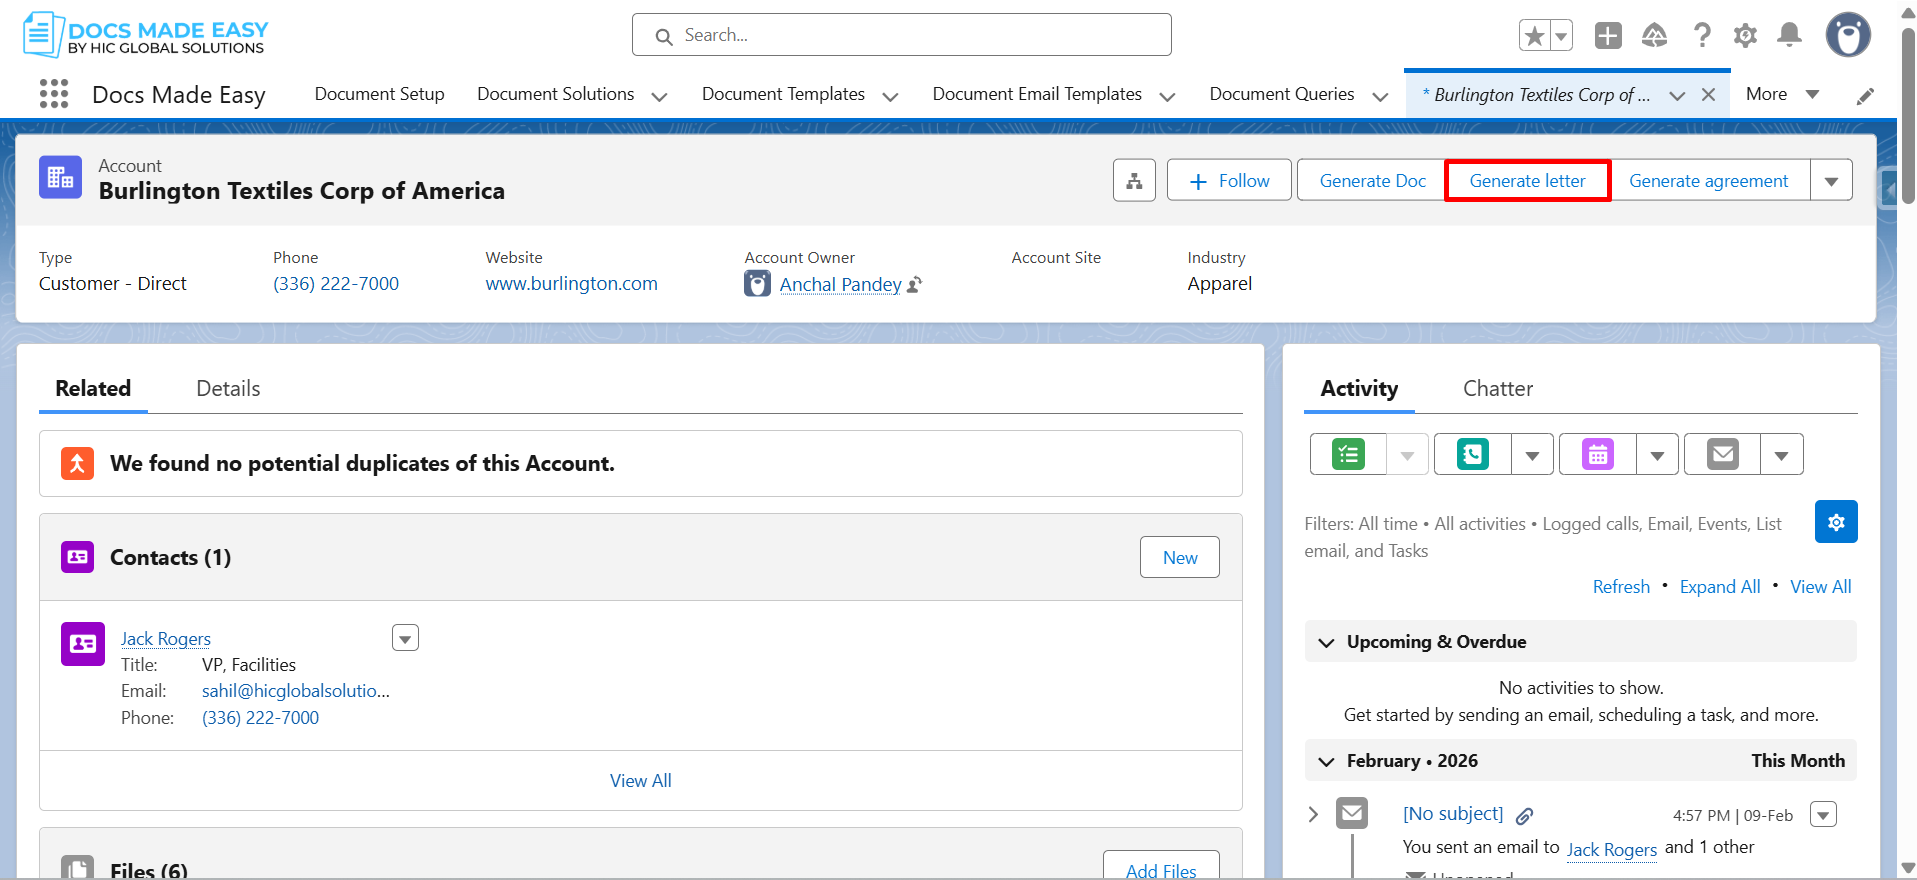
Step 21: Go to Account Record and click on the Generate Letter button.
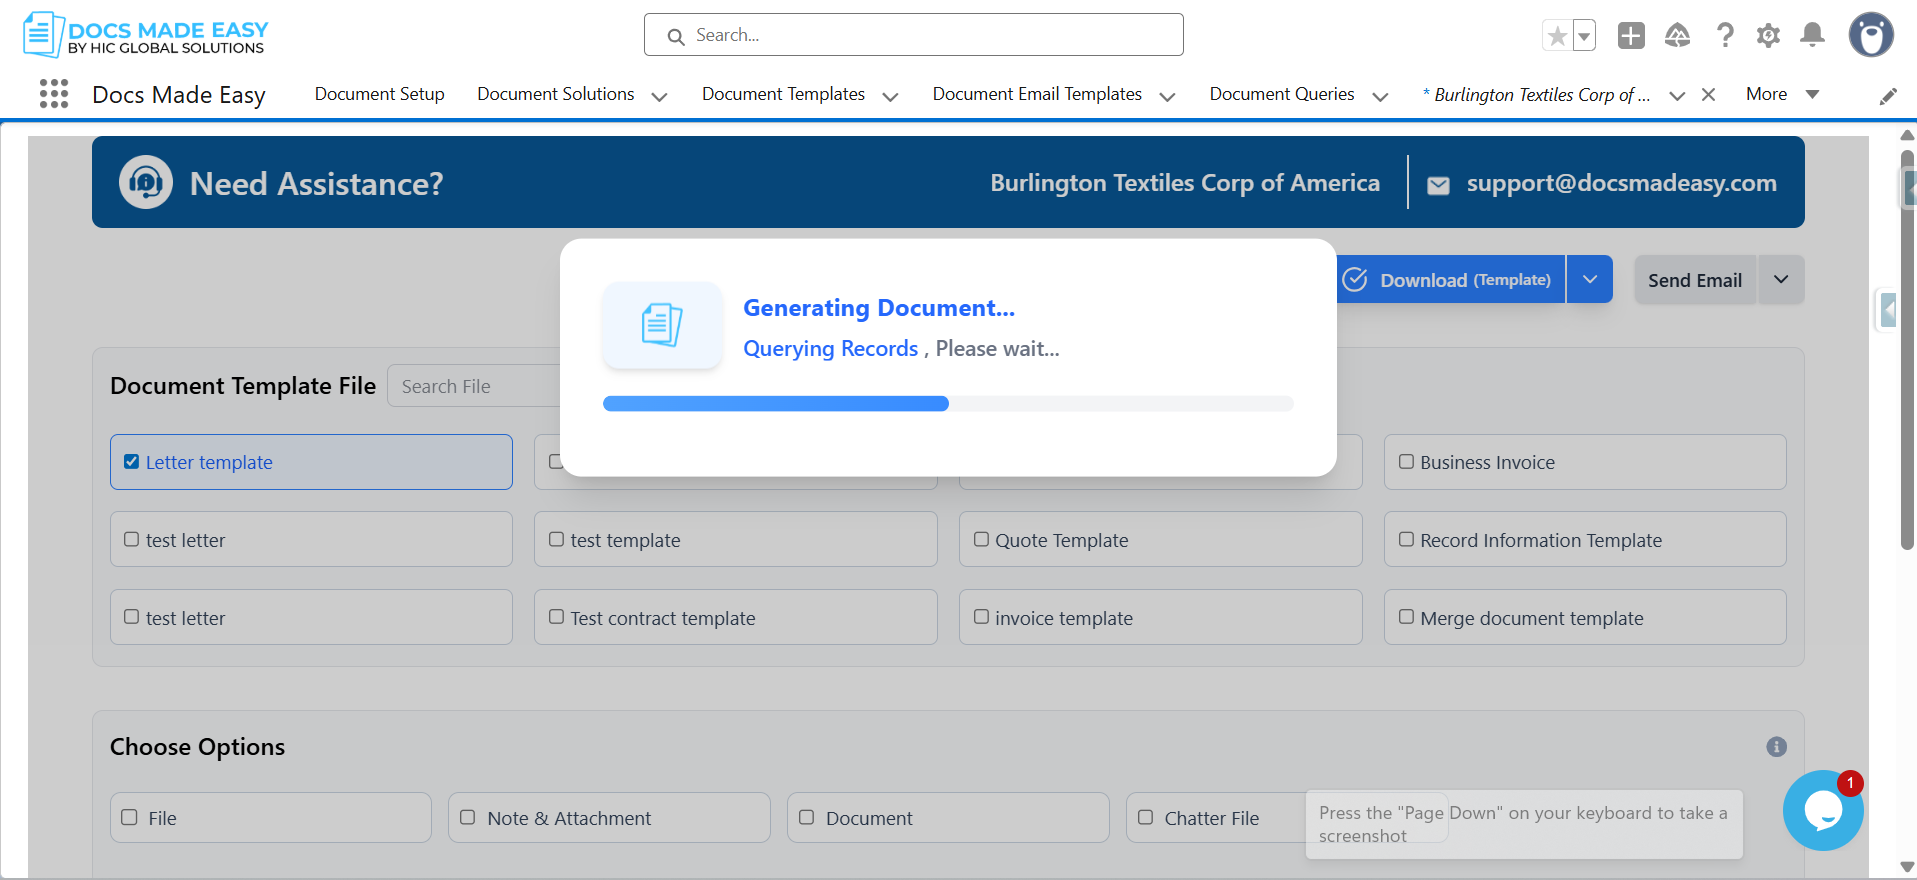
Step 22: Click on Download (Template).
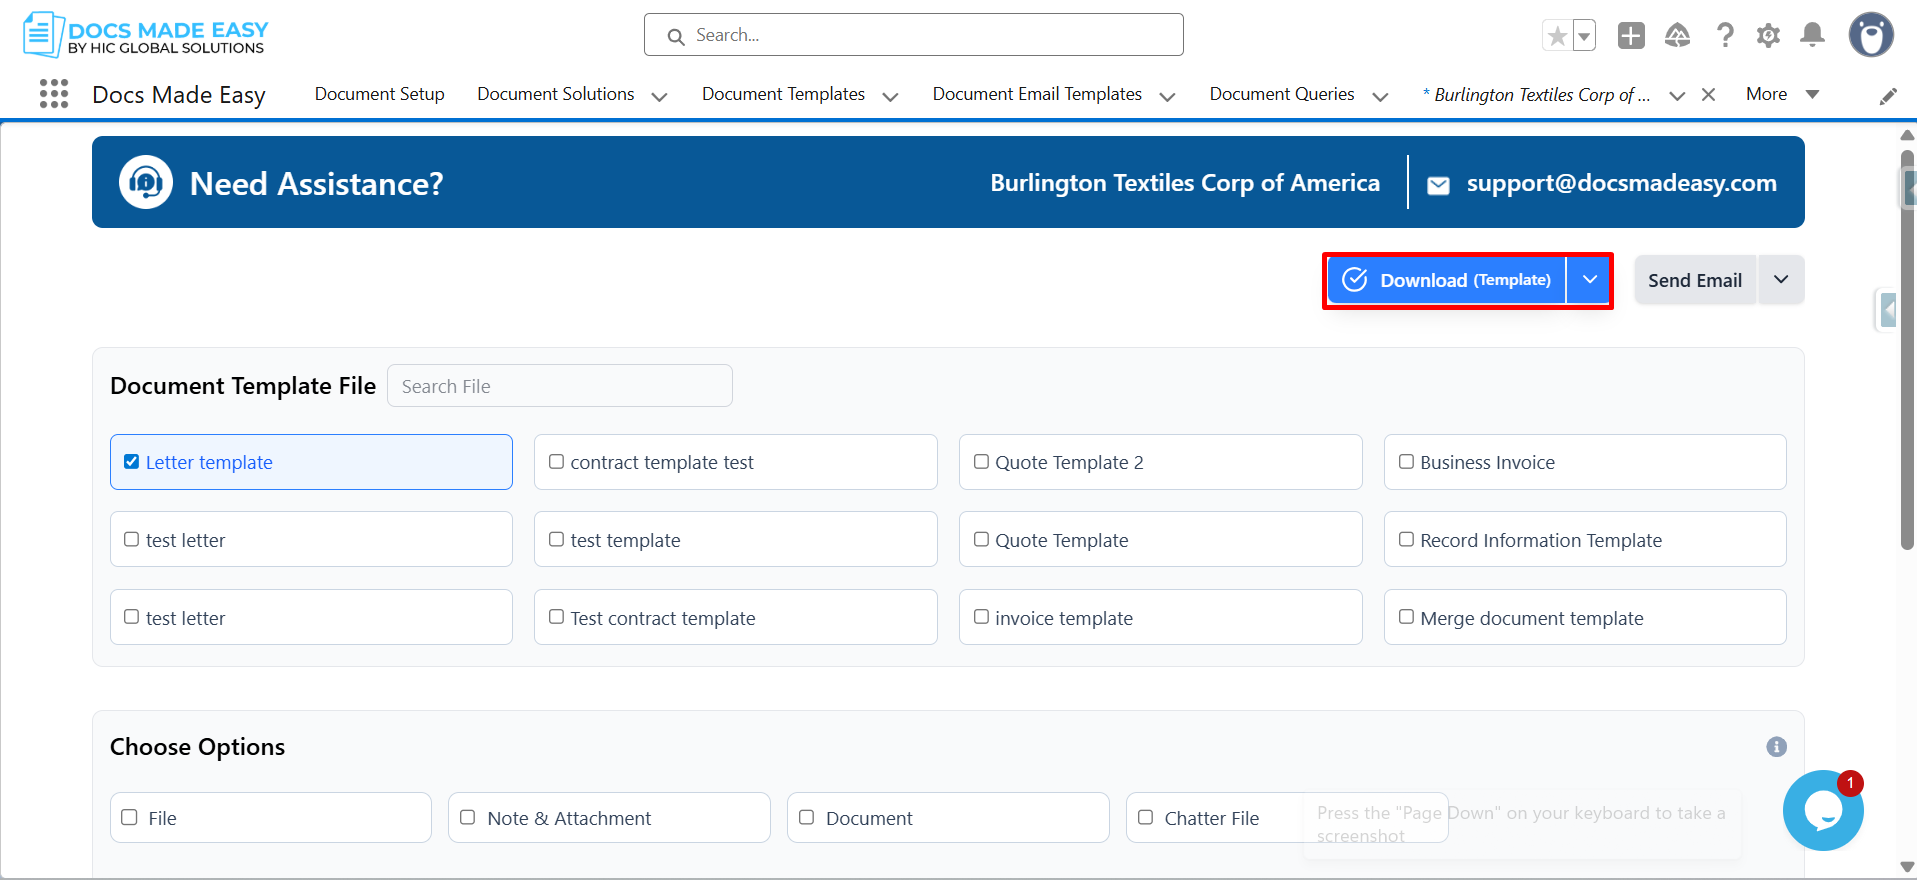
Step 23: The system will start generating the document.
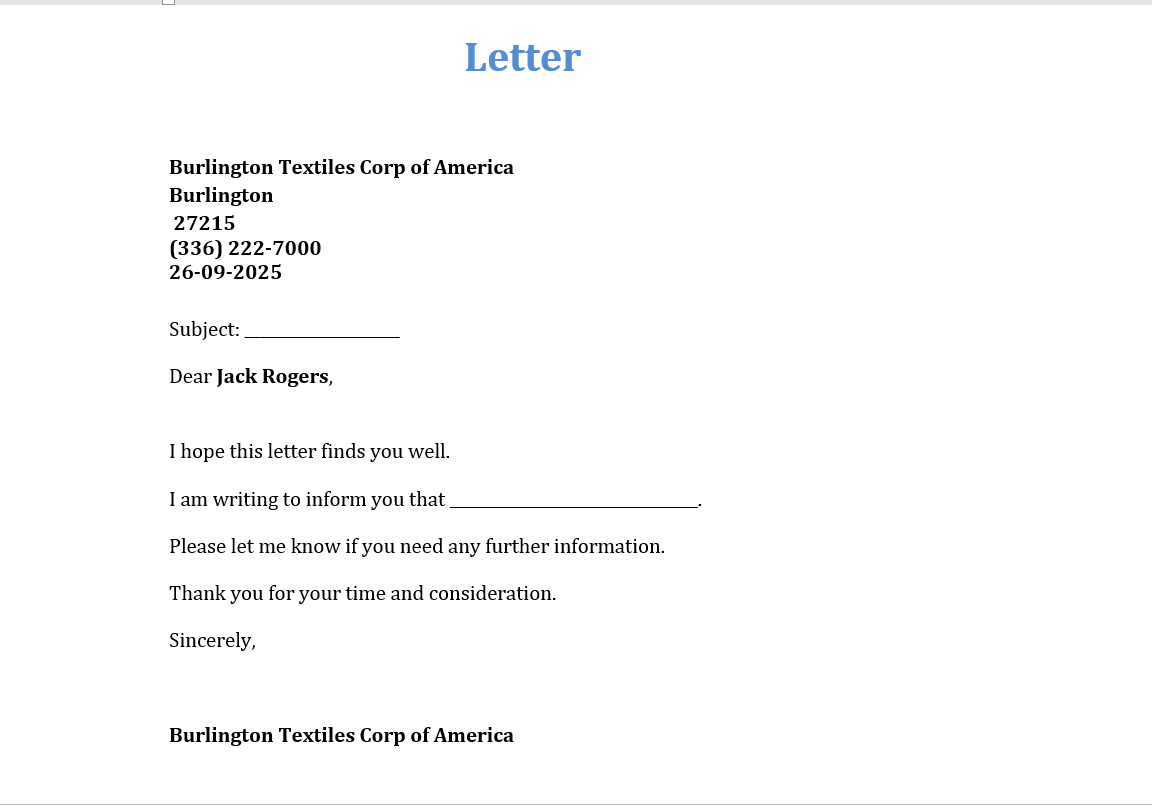
Step 24: Open the generated document and you are done.
Thank You
Was this article helpful?
That’s Great!
Thank you for your feedback
Sorry! We couldn't be helpful
Thank you for your feedback
Feedback sent
We appreciate your effort and will try to fix the article